|
找了很多博客,发现基本都是Ubuntu或者Fedora上安装Gitlab的,基于CentOS的基本都有错误,这篇文章是我二周加班不断测试的成果,按照这篇文章安装,包你成功。 系统环境:CentOS 5.8 x86_64
共分几个步骤 1、安装依赖包 2、安装Ruby、bundle、Python 3、建立git用户 4、安装Gitlab-Shell 5、安装数据库 6、安装Gitlab 7、安装Nginx
一、安装依赖包 1.1、导入yum源 yum –y update yum –y install perl* 导入epel源
rpm -ivh http://dl.fedoraproject.org/pub/epel/5/x86_64/epel-release-5-4.noarch.rpm
1.2安装依赖包
yum groupinstall "Development Tools" -y
yum install kernel-devel \
  kernel-headers \
  zlib-devel \
  libyaml-devel \
  openssl-devel \
  gdbm-devel \
  readline-devel \
  ncurses-devel \
  libffi-devel \
  git \
  curl \
  openssh-server \
  redis \
  postfix \
  libxml2-devel \
  libxslt-devel \
  perl-Time-HiRes \
  curl-devel \
  libicu-devel \
  mysql-devel -y
如果导入epel源后出现信息的话,那么修改/etc/yum.repos.d/epel.repo 文件 将base前的#去掉,同时将mirror前加入#,完整的如下图所示: 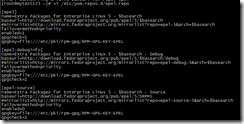
二、安装Ruby、Bundle和Python 2.1、安装ruby
mkdir /tmp/ruby && cd /tmp/ruby
curl --progress http://ftp.ruby-lang.org/pub/ruby/1.9/ruby-1.9.3-p392.tar.gz | tar xz
cd ruby-1.9.3-p392
./configure
make
make install
2.2、安装Bundler Gem gem install bundler 特别注意!!! 安装好Ruby和bundle后,做如下操作,否则后面会被一堆的: sudo: gem: command not found和 /usr/bin/env: ruby: No such file or directory, Could not locate Gemfile 给累死,切记!!! 需要做的操作:
ln -s /usr/local/bin/ruby /usr/bin/ruby ln -s /usr/local/bin/gem /usr/bin/gem ln -s /usr/local/bin/bundle /usr/bin/bundle
2.3、安装Python2.7.2 按照http://tz100.me/135.html即可
三、建立Git用户 useradd -c 'GitLab' git visudo 加入一行 git ALL=(ALL) NOPASSWD: ALL 四、安装Gitlab-Shell 下载gitlab-shell
cd /home/git
sudo -u git -H git clone https://github.com/gitlabhq/gitlab-shell.git
切换到适合gitlab5.1的gitlab-shell的稳定版本
复制配置文件
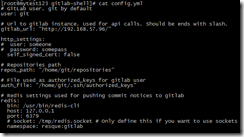
编辑配置文件,将里面的“gitlab_url: http://localhost/”这行修改成你的域名或者IP 注:测试时我使用的是IP sudo -u git -H vi config.yml 我的如下图所示:
此处需要注意的是:URL最后面的/不要去掉! 安装gitlab-shell sudo -u git -H ./bin/install 安装成果的界面如下:
五、建立数据库(基于mysql) yum install mysql mysql-devel mysql-server -y 启动mysql并设置密码 service mysqld start mysqladmin -u root password '你自己的密码' 连接到mysql进行数据库设置 mysql -u root -p == mysql> CREATE USER 'gitlab'@'localhost' IDENTIFIED BY 'gitlab'; mysql> CREATE DATABASE IF NOT EXISTS `gitlabhq_production` DEFAULT CHARACTER SET `utf8` COLLATE `utf8_unicode_ci`; mysql> GRANT SELECT, INSERT, UPDATE, DELETE, CREATE, DROP, INDEX, ALTER ON `gitlabhq_production`.* TO 'gitlab'@'localhost'; mysql> \q 测试连接 [root@mytest123 gitlab-shell]# sudo -u git -H mysql -u gitlab -p -D gitlabhq_production Enter password: Welcome to the MySQL monitor. Commands end with ; or \g. Your MySQL connection id is 5 Server version: 5.0.95 Source distribution Copyright (c) 2000, 2011, Oracle and/or its affiliates. All rights reserved. Oracle is a registered trademark of Oracle Corporation and/or its affiliates. Other names may be trademarks of their respective owners. Type 'help;' or '\h' for help. Type '\c' to clear the current input statement. mysql> \q
六、安装Gitlab 下载源码并切换到5.1的稳定版本
cd /home/git
sudo -u git -H git clone https://github.com/gitlabhq/gitlabhq.git gitlab
cd /home/git/gitlab
sudo -u git -H git checkout 5-1-stable
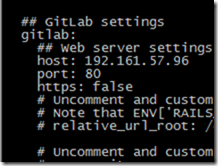
进行配置 cd /home/git/gitlab sudo -u git -H cp config/gitlab.yml.example config/gitlab.yml 编辑gitlab.yml文件,将里面的 host: localhost修改成你的域名或者IP(我使用的是IP),如图 sudo -u git -H vi config/gitlab.yml
赋予GIT用户所需的GITLAB的目录和权限 [root@mytest123 gitlab]# sudo chown -R git -R log [root@mytest123 gitlab]# sudo chown -R git -R tmp [root@mytest123 gitlab]# sudo chmod -R u+rwX log/ [root@mytest123 gitlab]# sudo chmod -R u+rwX tmp/ 建立satellites目录 # sudo -u git -H mkdir /home/git/gitlab-satellites
建立PID目录等并赋权 sudo -u git -H mkdir tmp/pids/ sudo -u git -H mkdir tmp/sockets/ sudo chmod -R u+rwX tmp/pids/ sudo chmod -R u+rwX tmp/sockets/
建立upload目录,不建立的话backup功能会失败 sudo -u git -H mkdir public/uploads sudo chmod -R u+rwX public/uploads
复制PUma配置文件 sudo -u git -H cp config/puma.rb.example config/puma.rb
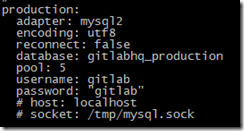
复制数据库配置文件并编辑修改此文件中的用户名和密码为刚才建立的数据库用户和密码 sudo -u git cp config/database.yml.mysql config/database.yml sudo -u git -H vi config/database.yml
如图所示:
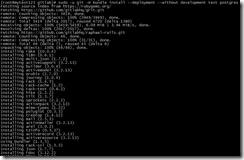
安装所需的Gems cd /home/git/gitlab sudo gem install charlock_holmes --version '0.6.9' sudo -u git -H bundle install --deployment --without development test postgres
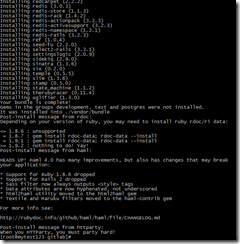
bundle install会安装很多依赖包,耐心等待就是了,给出二张截图
配置GIT用户的全局变量 sudo -u git -H git config --global user.name "GitLab" sudo -u git -H git config --global user.email "gitlab@YOUR_DOMAIN_NAME"
启动redis 注:没明白为什么需要redis,据说高级特性需要 service redis start
初始化数据库 sudo -u git -H bundle exec rake gitlab:setup RAILS_ENV=production
如果无错的话,则会出现gitlab的默认用户和密码,记录一下密码以便等会登录
安装启动脚本
chmod +x /etc/init.d/gitlab
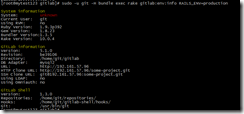
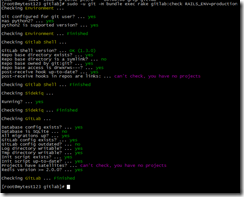
执行检查 sudo -u git -H bundle exec rake gitlab:env:info RAILS_ENV=production sudo -u git -H bundle exec rake gitlab:check RAILS_ENV=production
如果检查没有通过的话,不要启动,先根据检查的结果来修复,操作系统的那个红色没关系 如果报
是因为redis没启动的原因,
启动 sudo service mysqld start sudo service redis start sudo service gitlab start
附:出现前面的用户和密码的话,这一步的Gitlab安装就成功了,但是只是能用3000端口,还不能通过nginx,也就是是说不能使用gitlab-shell调用,所以还未完全调通; 如果急性子的人可以先启动调试了,但我建议你先不要启动直到nginx调试完毕
代码: [root@mytest123 ~]# su -git su: invalid option -- g Try `su --help' for more information. [root@mytest123 ~]# su - git [git@mytest123 ~]$ cd gitlab [git@mytest123 gitlab]$ bundle exec rails s -e production -d /usr/local/lib/ruby/gems/1.9.1/gems/bundler-1.3.5/lib/bundler/runtime.rb:216: warning: Insecure world writable dir /home/git/gitlab/vendor/bundle/ruby/1.9.1/bin in PATH, mode 040777 /usr/local/lib/ruby/gems/1.9.1/gems/bundler-1.3.5/lib/bundler/runtime.rb:216: warning: Insecure world writable dir /home/git/gitlab/vendor/bundle/ruby/1.9.1/bin in PATH, mode 040777 => Booting WEBrick => Rails 3.2.13 application starting in production on http://0.0.0.0:3000 [git@mytest123 gitlab]$
七、安装nginx yum install nginx -y
下载gitlab的nginx配置文件
curl --output /etc/nginx/conf.d/gitlab.conf https://raw.github.com/gitlabhq/gitlab-recipes/5-1-stable/nginx/gitlab
然后编辑这个文件,将这两行
listen YOUR_SERVER_IP:80 default_server; # e.g., listen 192.168.1.1:80; 修改成你的域名或者IP,我的如下:
启动nginx,然后用域名或者IP访问,第一次报了个“502 Bad Gateway”的错误,查gitlab_err.log如下
[root@mytest123 gitlab]# tail -f /var/log/nginx/gitlab_error.log
主要有2处需要修改,/home/git/gitlab/目录要给权限,然后:/home/git/gitlab/tmp/sockets/gitlab.socket 这个文件也要给权限,我直接给gitlab目录777的权限 [root@mytest123 gitlab]# chmod -R 777 /home/git/gitlab/ 重新启动gitlab和nginx,再次进行访问
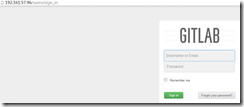
成功,界面出来了~
通过gitlab-shell的命令行检查也成功,耶!
[root@mytest123 git]# su – git
参考文档:https://gist.github.com/wakefield/5304650 (责任编辑:IT) |

