|
在今天的业务中,越来越需要共享工作区,实验室,工具和任何其他类型的资源。 充分利用可用资源已成为现代企业的竞争优势。
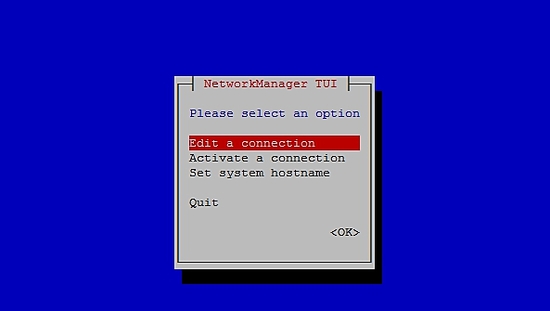
每个公司资源有限,所有成员对这些资源的使用存在争议,这就是说,这些资源的争议可能会导致员工之间的问题,组织中的关系和不生产力的磨损。 软件概述预订的是使用PHP和MySQL编写的开源软件,可帮助组织和组织有效地管理,记录和跟踪任何类型的资源。 它允许您创建计划,以便用户可以找到可用于资源使用的计划。 预订允许通过使用配额公平分配资源。 它还允许您通过预留批准来控制资源的使用。 也可以配置资源预约之间的自动范围。 预订包括伟大的企业功能,如支持大量语言,基于Web,移动优先,报告系统,提醒,LDAP,Active Directory,与电子邮件客户端集成的文件等。 环境本文介绍了Booked的安装和基本配置。 本文是基于以下环境编写的:具有CENTOS 7最小,2GB RAM,8GB高清和2个网络接口(仅主机和NAT)的虚拟盒VM。 安全本文不完全覆盖这个复杂和广泛的主题。 它把重点放在简单的SO配置和Booked系统配置上。 制备假设您使用全新安装的Centos 7 Minimal,在安装Booked之前,请运行以下命令来更新系统并安装其他软件包: yum update Transaction Summary ================================================================================ Install 1 Package Upgrade 39 Packages Total download size: 91 M Is this ok [y/d/N]: y 安装您最喜欢的文本编辑器或使用VI。 在本文中,我使用VIM来安装它,运行以下命令: yum install vim 安装WGET包,运行以下命令: yum install wget 安装UNZIP包,运行以下命令: yum install unzip 要配置网络,请运行以下命令打开NMTUI(网络管理器文本用户界面)工具,并编辑您希望的网络接口和主机名称: nmtui
在CentOS 7上设置网络设置和主机名后,运行以下命令应用更改: service networks restart 要验证网络信息,请运行以下命令: ip addr 输出如下所示:
1: lo: <LOOPBACK,UP,LOWER_UP> mtu 65536 qdisc noqueue state UNKNOWN qlen 1 在Centos 7上禁用SELINUX(安全增强型Linux),编辑以下配置文件: vim /etc/selinux/config "/etc/selinux/config" 14L, 547C# This file controls the state of SELinux on the system. # SELINUX= can take one of these three values: # enforcing - SELinux security policy is enforced. # permissive - SELinux prints warnings instead of enforcing. # disabled - No SELinux policy is loaded. SELINUX=enforcing # SELINUXTYPE= can take one of three two values: # targeted - Targeted processes are protected, # minimum - Modification of targeted policy. Only selected processes are prootected. # mls - Multi Level Security protection. SELINUXTYPE=targeted 将指令SELINUX的值更改为 禁用 ,保存文件并重新启动服务器。 要在Centos 7上检查SELinux的状态,请运行以下命令: getenforce 输出必须是: Disabled 要在Centos 7上禁用FirewallD,请运行以下命令: systemctl disable firewalld systemctl stop firewalld 要检查Centos 7上的防火墙状态, 请运行以下命令: systemctl status firewalld 在Centos 7上安装MariaDB,Apache和PHP要在Centos 7上安装MariaDB,请运行以下命令:
yum -y install mariadb-server 要启动MariaDB,请运行以下命令: systemctl start mariadb 要增加MariaDB的安全性,请运行以下命令: /usr/bin/mysql_secure_installation 根据以下输出设置选项或使用您自己的偏好设置:
NOTE: RUNNING ALL PARTS OF THIS SCRIPT IS RECOMMENDED FOR ALL MariaDB
      SERVERS IN PRODUCTION USE!  PLEASE READ EACH STEP CAREFULLY!

In order to log into MariaDB to secure it, we'll need the current
password for the root user.  If you've just installed MariaDB, and
you haven't set the root password yet, the password will be blank,
so you should just press enter here.

Enter current password for root (enter for none):<Press Enter>

OK, successfully used password, moving on...

Setting the root password ensures that nobody can log into the MariaDB
root user without the proper authorisation.

Set root password? [Y/n] <Press Y>
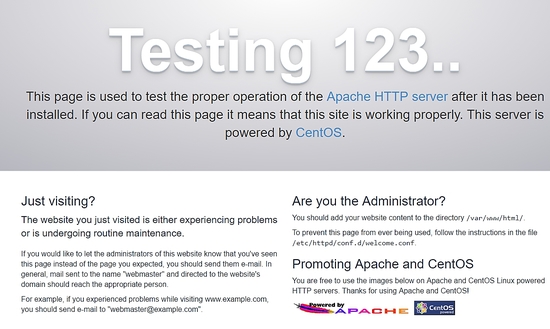
设置root密码: New password: ******* Re-enter new password: ******* Password updated successfully! Reloading privilege tables.. ... Success! By default, a MariaDB installation has an anonymous user, allowing anyone to log into MariaDB without having to have a user account created for them. This is intended only for testing, and to make the installation go a bit smoother. You should remove them before moving into a production environment. Remove anonymous users? [Y/n] <Press Y> ... Success! Normally, root should only be allowed to connect from 'localhost'. This ensures that someone cannot guess at the root password from the network. Disallow root login remotely? [Y/n] <Choose acording your needs> ... Success! By default, MariaDB comes with a database named 'test' that anyone can access. This is also intended only for testing, and should be removed before moving into a production environment. Remove test database and access to it? [Y/n] <Press Y> - Dropping test database... ... Success! - Removing privileges on test database... ... Success! Reloading the privilege tables will ensure that all changes made so far will take effect immediately. Reload privilege tables now? [Y/n] <Press Y> ... Success! Cleaning up... All done! If you've completed all of the above steps, your MariaDB installation should now be secure. Thanks for using MariaDB! 将MariaDB设置为使用Centos 7自动启动: systemctl enable mariadb.service 要安装Apache,请运行以下命令: yum install httpd 要启动Apache,请运行以下命令: systemctl start httpd.service 安装Apache 使用Centos 7 自动启动 : systemctl enable httpd.service 要测试Apache,请在Web浏览器中键入服务器的IP地址。 如果每件事情都是艰难的,你可以看到一个测试页面:
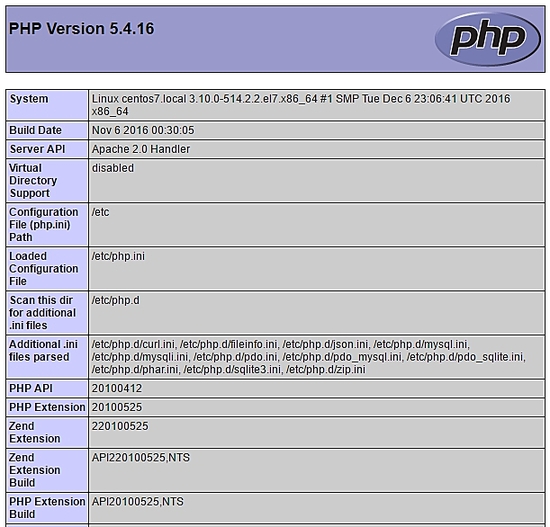
要安装PHP,请运行以下命令: yum install php php-mysql 重新启动Apache,运行以下命令: systemctl restart httpd.service 要测试PHP在/ var / www / html目录中创建一个文件phpinfo.php,具有以下内容: <?php phpinfo(); ?> 现在,您可以通过浏览器访问phpinfo.php,并使用以下URL:http:// [your-ip-addres] /phpinfo.php。 如果一切正常,您可以看到以下页面:
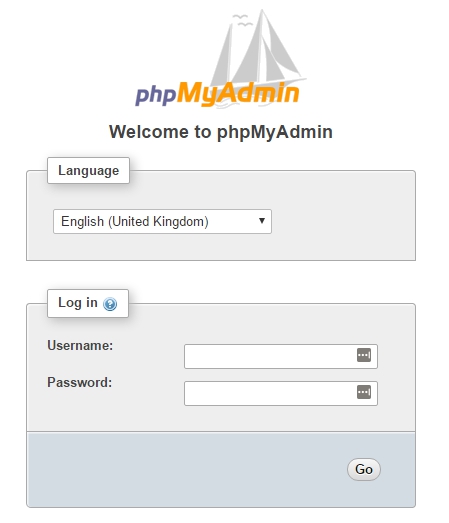
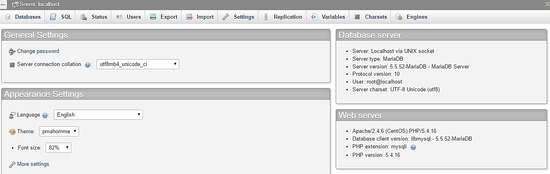
通过终端安装数据库通过终端访问MariaDB,并创建数据库bookedscheduler和用户booked_user ,具有足够的权限来管理此数据库。 通过终端执行以下命令: mysql -u root -p 创建bookedscheduler数据库: MariaDB [(none)]> create database bookedscheduler; 在MariaDb上创建booked_user: CREATE USER ‘booked_user‘@’localhost’ IDENTIFIED BY ‘your_password’; 授予用户booked_user以预订计划员数据库的权限: GRANT ALL PRIVILEGES ON database.bookedscheduler TO ‘booked_user’@’localhost’; 导入预订的数据库模式和数据,从/ var / www / html / booked / database_schema /目录中,必须导入以下sql文件, create_schema.sql和create-data.sql : mysql -u root -p bookedscheduler < create-schema.sql mysql -u root -p bookedscheduler < create-data.sql 通过PHPMyAdmin安装数据库在Centos 7上安装PHPMyAdmin(opitional)PHPMyAdmin是一种通过浏览器以友好的方式管理mysql(mariaDB)数据库的工具。 要自动安装phpmyadmin,您需要安装Epel存储库,运行以下命令: yum install epel-release 现在可以运行以下命令: yum install phpmyadmin PHPMyAdmin安装完成后,我们需要配置它。 首先,复制配置文件,并在/etc/httpd/conf.d/中编辑phpMyAdmin.conf文件: cp /etc/httpd/conf.d/phpMyAdmin.conf /etc/httpd/conf.d/phpMyAdmin.conf.old vim /etc/httpd/conf.d/phpMyAdmin.conf 根据您的网络环境更改值,在我的情况下,我更改了以下行(17,25,34,42)。 我的配置文件如下所示: # phpMyAdmin - Web based MySQL browser written in php # # Allows only localhost by default # # But allowing phpMyAdmin to anyone other than localhost should be considered # dangerous unless properly secured by SSL Alias /phpMyAdmin /usr/share/phpMyAdmin Alias /phpmyadmin /usr/share/phpMyAdmin <IfModule mod_authz_core.c> # Apache 2.4 <RequireAny> Require ip 127.0.0.1 Require ip 192.168.56.1 Require ip ::1 </RequireAny> </IfModule> <IfModule !mod_authz_core.c> # Apache 2.2 Order Deny,Allow Deny from All Allow from 192.168.56.1 Allow from ::1 </IfModule> <Directory /usr/share/phpMyAdmin/setup/> <IfModule mod_authz_core.c> # Apache 2.4 <RequireAny> Require ip 127.0.0.1 Require ip ::1 </RequireAny> </IfModule> <IfModule !mod_authz_core.c> # Apache 2.2 Order Deny,Allow Deny from All Allow from 192.168.56.1 Allow from ::1 </IfModule> </Directory> # These directories do not require access over HTTP - taken from the original # phpMyAdmin upstream tarball # <Directory /usr/share/phpMyAdmin/libraries/> Order Deny,Allow Deny from All Allow from None </Directory> <Directory /usr/share/phpMyAdmin/setup/lib/> Order Deny,Allow Deny from All Allow from None </Directory> <Directory /usr/share/phpMyAdmin/setup/frames/> Order Deny,Allow Deny from All Allow from None </Directory> # This configuration prevents mod_security at phpMyAdmin directories from # filtering SQL etc. This may break your mod_security implementation. # #<IfModule mod_security.c> # <Directory /usr/share/phpMyAdmin/> # SecRuleInheritance Off # </Directory> #</IfModule> 重新启动Apache,运行以下命令: systemctl restart httpd.service 现在您可以通过浏览器访问PHPMyAdmin,并具有以下URL:http:// [your-ip-addres] / phpMyAdmin /
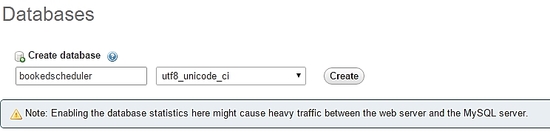
使用您的root帐户和先前在MariaDB安装上定义的密码创建数据库和用户。 在仪表板上,选择“ 数据库”选项以创建新的数据库:
填写表单与数据库名称,然后选择创建 。
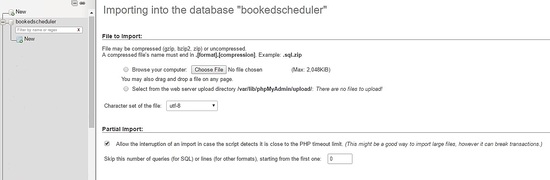
要导入数据库数据,请在左侧菜单中选择bookedscheduler数据库,然后从“ PHPMyAdmin 导入” 仪表板 导入,从安装文件中选择以下文件,create-schema.sql(1)和create-data.sql(2)导入它
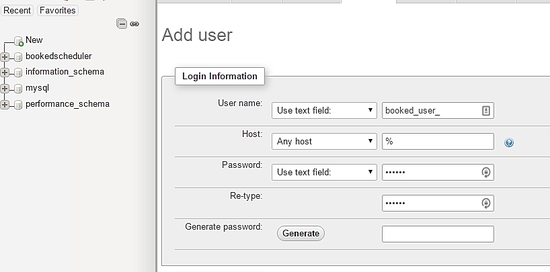
创建具有管理bookedscheduler数据库权限的用户booked_user 。 在PHPMyAdmin仪表板上,选择用户和添加 :
在用户创建屏幕上,填写用户数据库( booked_user )的字段,设置密码并在页面末尾选择GO :
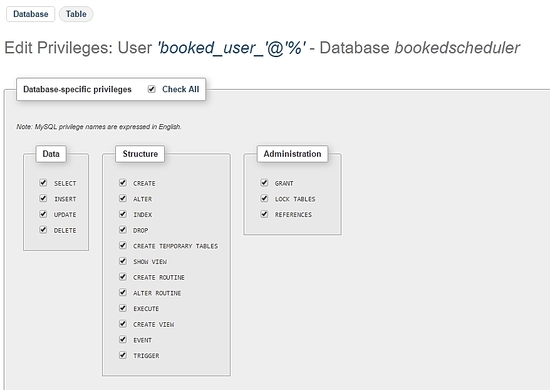
要在bookedscheduler 数据库上设置booked_user的 权限,请从数据库列表中选择bookedscheduler ,然后选择Go:
在“权限”屏幕上,选择“ 全部检查”和“
安装Booked Scheduler Centos 7我们有两种方式来安装Booked Scheduler,手动或自动。 本文仅涵盖手动安装。 要在Centos 7上安装Booked Scheduler,请转到/ tmp目录并下载源代码: wget https://ufpr.dl.sourceforge.net/project/phpscheduleit/Booked/2.6/booked-2.6.5.zip 将文件解压缩到/ var / www / html目录下,运行以下命令: unzip booked-2.6.5.zip -d /var/www/html/ 更改解压缩文件的权限。 cd /var/www/html/ chown -R apache:apache /booked 在/ var / www / html / booked / config中设置配置文件。 将config.dist.php文件的副本复制到config.php并编辑配置文件的块(这是我的配置文件): cp config.dist.php config.php 根据我们的环境更改值,这里我将介绍主要的设置进行更改,并被通知,电子邮件地址将在系统管理员首次注册后:
<?php
/**
Copyright 2011-2016 Nick Korbel

This file is part of Booked Scheduler.

Booked Scheduler is free software: you can redistribute it and/or modify
it under the terms of the GNU General Public License as published by
the Free Software Foundation, either version 3 of the License, or
(at your option) any later version.

Booked Scheduler is distributed in the hope that it will be useful,
but WITHOUT ANY WARRANTY; without even the implied warranty of
MERCHANTABILITY or FITNESS FOR A PARTICULAR PURPOSE. See the
GNU General Public License for more details.

You should have received a copy of the GNU General Public License
along with Booked Scheduler. If not, see <http://www.gnu.org/licenses/>.
*/

error_reporting(E_ALL & ~E_NOTICE & ~E_STRICT);
//ini_set('display_errors', 1);
//ini_set('display_startup_errors', 1);

/**
 * Application configuration
 */
$conf['settings']['app.title'] = 'Booked Scheduler'; // application title
$conf['settings']['default.timezone'] = 'America/Chicago'; // Change your time zone - look up here http://php.net/manual/en/timezones.php
$conf['settings']['allow.self.registration'] = 'true'; // if users can register themselves
$conf['settings']['admin.email'] = 'alexandrecostacps@gmail.com'; // fill with the email address of admin user
$conf['settings']['admin.email.name'] = 'Booked Administrator'; // name to be used in From: field when sending automatic emails
$conf['settings']['default.page.size'] = '50'; // number of records per page
$conf['settings']['enable.email'] = 'true'; // global configuration to enable if any emails will be sent
$conf['settings']['default.language'] = 'en_us';  Change acording to your language // find your language in the lang directory
$conf['settings']['script.url'] = 'http://[your-ip-address]/Web'; // public URL to the Web directory of this instance. this is the URL that appears when you are logging in. leave http: or https: off to auto-detect
$conf['settings']['image.upload.directory'] = 'Web/uploads/images'; // full or relative path to where images will be stored
$conf['settings']['image.upload.url'] = 'uploads/images'; // full or relative path to show uploaded images from
$conf['settings']['cache.templates'] = 'true'; // true recommended, caching template files helps web pages render faster
$conf['settings']['use.local.jquery'] = 'false'; // false recommended, delivers jQuery from Google CDN, uses less bandwidth
$conf['settings']['registration.captcha.enabled'] = 'true'; // recommended. unless using recaptcha this requires php_gd2 enabled in php.ini
$conf['settings']['registration.require.email.activation'] = 'true'; // requires enable.email = true
$conf['settings']['registration.auto.subscribe.email'] = 'false'; // requires enable.email = true
$conf['settings']['registration.notify.admin'] = 'true'; // whether the registration of a new user sends an email to the admin (ala phpScheduleIt 1.2)
$conf['settings']['inactivity.timeout'] = '30'; // minutes before the user is automatically logged out
$conf['settings']['name.format'] = '{first} {last}'; // display format when showing user names
$conf['settings']['css.extension.file'] = ''; // full or relative url to an additional css file to include. this can be used to override the default style
$conf['settings']['disable.password.reset'] = 'false'; // if the password reset functionality should be disabled
$conf['settings']['home.url'] = 'your-intranet-portal-url'; // the url to open when the logo is clicked
$conf['settings']['logout.url'] = 'your-intranet-portal-url'; // the url to be directed to after logging out
$conf['settings']['default.homepage'] = '1'; // the default homepage to use when new users register (1 = Dashboard, 2 = Schedule, 3 = My Calendar, 4 = Resource Calendar)

$conf['settings']['schedule']['use.per.user.colors'] = 'false'; // color reservations by user
$conf['settings']['schedule']['show.inaccessible.resources'] = 'true'; // whether or not resources that are inaccessible to the user are visible
$conf['settings']['schedule']['reservation.label'] = '{name}'; // format for what to display on the reservation slot label. Available properties are: {name}, {title}, {description}, {email}, {phone}, {organization}, {position}, {startdate}, {enddate} {resourcename} {participants} {invitees} {reservationAttributes}. Custom attributes can be added using att with the attribute id. For example {att1}
$conf['settings']['schedule']['hide.blocked.periods'] = 'false'; // if blocked periods should be hidden or shown

/**
 * ical integration configuration
 */
$conf['settings']['ics']['require.login'] = 'true'; // recommended, if the user must be logged in to access ics files
$conf['settings']['ics']['subscription.key'] = ''; // must be set to allow webcal subscriptions
$conf['settings']['ics']['import'] = 'false'; // enable iCal import
$conf['settings']['ics']['import.key'] = ''; // it's recommended to set this key when iCal import is enabled
/**
 * Privacy configuration - Set up here your business rules
 */
$conf['settings']['privacy']['view.schedules'] = 'true'; // if unauthenticated users can view schedules
$conf['settings']['privacy']['view.reservations'] = 'false'; // if unauthenticated users can view reservations
$conf['settings']['privacy']['hide.user.details'] = 'false'; // if personal user details should be displayed to non-administrators
$conf['settings']['privacy']['hide.reservation.details'] = 'false'; // if reservation details should be displayed to non-administrators
$conf['settings']['privacy']['allow.guest.reservations'] = 'false'; // if reservations can be made by users without a Booked account, if true this overrides schedule and resource visibility
/**
 * Reservation specific configuration
 */
$conf['settings']['reservation']['start.time.constraint'] = 'future'; // when reservations can be created or edited. options are future, current, none
$conf['settings']['reservation']['updates.require.approval'] = 'false'; // if updates to previously approved reservations require approval again
$conf['settings']['reservation']['prevent.participation'] = 'false'; // if participation and invitation options should be removed
$conf['settings']['reservation']['prevent.recurrence'] = 'false'; // if recurring reservations are disabled for non-administrators
$conf['settings']['reservation']['enable.reminders'] = 'false'; // if reminders are enabled. this requires email to be enabled and the reminder job to be configured
$conf['settings']['reservation']['allow.guest.participation'] = 'false';
$conf['settings']['reservation']['allow.wait.list'] = 'false';
$conf['settings']['reservation']['checkin.minutes.prior'] = '5';
/**
 * Email notification configuration
 */
$conf['settings']['reservation.notify']['resource.admin.add'] = 'false';
$conf['settings']['reservation.notify']['resource.admin.update'] = 'false';
$conf['settings']['reservation.notify']['resource.admin.delete'] = 'false';
$conf['settings']['reservation.notify']['resource.admin.approval'] = 'false';
$conf['settings']['reservation.notify']['application.admin.add'] = 'false';
$conf['settings']['reservation.notify']['application.admin.update'] = 'false';
$conf['settings']['reservation.notify']['application.admin.delete'] = 'false';
$conf['settings']['reservation.notify']['application.admin.approval'] = 'false';
$conf['settings']['reservation.notify']['group.admin.add'] = 'false';
$conf['settings']['reservation.notify']['group.admin.update'] = 'false';
$conf['settings']['reservation.notify']['group.admin.delete'] = 'false';
$conf['settings']['reservation.notify']['group.admin.approval'] = 'false';
/**end business rules
 * File upload configuration
 */
$conf['settings']['uploads']['enable.reservation.attachments'] = 'false'; // if reservation attachments can be uploaded
$conf['settings']['uploads']['reservation.attachment.path'] = 'uploads/reservation'; // full or relative (to the root of your installation) filesystem path to store reservation attachments
$conf['settings']['uploads']['reservation.attachment.extensions'] = 'txt,jpg,gif,png,doc,docx,pdf,xls,xlsx,ppt,pptx,csv'; // comma separated list of file extensions that users are allowed to attach. leave empty to allow all extensions
/**
 * Database configuration
 */
$conf['settings']['database']['type'] = 'mysql';
$conf['settings']['database']['user'] = 'booked_user'; // database user with permission to the booked database
$conf['settings']['database']['password'] = 'your_password'; fill with the booked_user password
$conf['settings']['database']['hostspec'] = '127.0.0.1'; // ip, dns or named pipe
$conf['settings']['database']['name'] = 'bookedscheduler';
/**TIP: if you have problems to conect to database, please, try with the user and passord of root, if it works, go back to user database permitions.
 * Mail server configuration
 */To e-mail configurarion I need to use a relay to my e-mail server and in my server I instaled postfix and configurate it to send e-mails
$conf['settings']['phpmailer']['mailer'] = 'mail'; // options are 'mail', 'smtp' or 'sendmail'
$conf['settings']['phpmailer']['smtp.host'] = 'your-mx'; // 'smtp.company.com'
$conf['settings']['phpmailer']['smtp.port'] = '25';
$conf['settings']['phpmailer']['smtp.secure'] = ''; // options are '', 'ssl' or 'tls'
$conf['settings']['phpmailer']['smtp.auth'] = 'true'; // options are 'true' or 'false'
$conf['settings']['phpmailer']['smtp.username'] = 'user@yourdomain.com';
$conf['settings']['phpmailer']['smtp.password'] = 'your-password';
$conf['settings']['phpmailer']['sendmail.path'] = '/usr/sbin/sendmail';
$conf['settings']['phpmailer']['smtp.debug'] = 'false';
/**
 * Plugin configuration. For more on plugins, see readme_installation.html
 */
$conf['settings']['plugins']['Authentication'] = '';
$conf['settings']['plugins']['Authorization'] = '';
$conf['settings']['plugins']['Permission'] = '';
$conf['settings']['plugins']['PostRegistration'] = '';
$conf['settings']['plugins']['PreReservation'] = '';
$conf['settings']['plugins']['PostReservation'] = '';
/**
 * Installation settings
 */
$conf['settings']['install.password'] = ''; //just to automated instalation
/**
 * Pages
 */
$conf['settings']['pages']['enable.configuration'] = 'true';
/**
 * API
 */
$conf['settings']['api']['enabled'] = 'false';
/**
 * ReCaptcha
 */
$conf['settings']['recaptcha']['enabled'] = 'false';
$conf['settings']['recaptcha']['public.key'] = '';
$conf['settings']['recaptcha']['private.key'] = '';
/**
 * Email
 */
$conf['settings']['email']['default.from.address'] = 'your-email-address';
$conf['settings']['email']['default.from.name'] = 'your-system-name';
/**
 * Reports
 */
$conf['settings']['reports']['allow.all.users'] = 'false';
/**
 * Account Password Rules
 */
$conf['settings']['password']['minimum.letters'] = '6';
$conf['settings']['password']['minimum.numbers'] = '0';
$conf['settings']['password']['upper.and.lower'] = 'false';
/**
 * Label display settings
 */
$conf['settings']['reservation.labels']['ics.summary'] = '{title}';
$conf['settings']['reservation.labels']['ics.my.summary'] = '{title}';
$conf['settings']['reservation.labels']['rss.description'] = '<div><span>Start</span> {startdate}</div><div><span>End</span> {enddate}</div><div><span>Organizer</span> {name}</div><div><span>Description</span> {description}</div>';
$conf['settings']['reservation.labels']['my.calendar'] = '{resourcename} {title}';
$conf['settings']['reservation.labels']['resource.calendar'] = '{name}';
$conf['settings']['reservation.labels']['reservation.popup'] = ''; // Format for what to display in reservation popups. Possible values: {name} {dates} {title} {resources} {participants} {accessories} {description} {attributes}. Custom attributes can be added using att with the attribute id. For example {att1}
/**
 * Security header settings
 */
$conf['settings']['security']['security.headers'] = 'false'; // Enable the following options
$conf['settings']['security']['security.strict-transport'] = 'true';
$conf['settings']['security']['security.x-frame'] = 'deny';
$conf['settings']['security']['security.x-xss'] = '1; mode=block';
$conf['settings']['security']['security.x-content-type'] = 'nosniff';
$conf['settings']['security']['security.content-security-policy'] = "default-src 'self'"; // Requires careful tuning (know what your doing)
/**
 * Google Analytics settings
 */
$conf['settings']['google.analytics']['tracking.id'] = ''; // if set, Google Analytics tracking code will be added to every page in Booked

$conf['settings']['authentication']['allow.facebook.login'] = 'true';
$conf['settings']['authentication']['allow.google.login'] = 'true';
$conf['settings']['authentication']['required.email.domains'] = '';
/**
 * Credits functionality
 */
$conf['settings']['credits']['enabled'] = 'false';
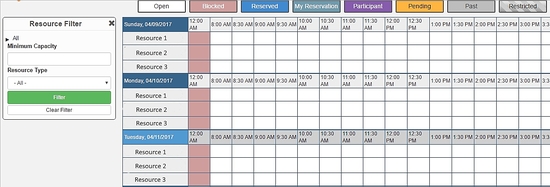
配置预定的计划程序WebInterface访问以下地址http://your-ipaddress/Web/index.php,如果一切正常,您将看到以下屏幕:
选择注册以创建管理员帐户,请记住,使用以前在文件config.php配置的电子邮件地址。
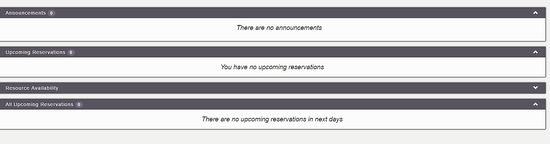
创建帐户后,转到登录屏幕并进行身份验证。 仪表板将加载,如下图所示:
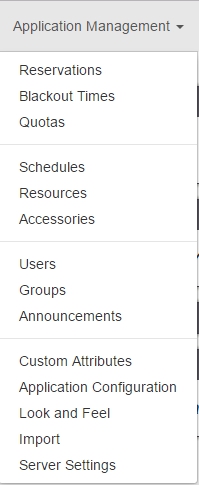
在主菜单上,您可以配置所有系统,选择应用程序管理 :
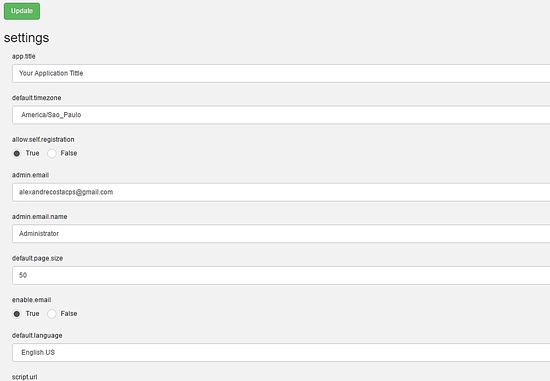
通过此菜单,您可以配置Booked Scheduler的所有资源,更改config.php,选择应用程序配置 :
这篇文章是关于Booked Scheduler的一个小概述,这个软件有很多惊人的功能,可以帮助任何环境提供资源的合理使用。
我希望本文可以向您介绍软件,以防安装有任何问题,随时提出问题。 如果您想获得有关Booked Scheduler访问http://www.bookedscheduler.com/的更多信息。 (责任编辑:IT) |