|
首先,请确定你是位“拥有 Broadcom BCM43xx 无线网络卡的幸运儿”:
安装需要的组件:
接着到这里下载驱动安装包. 然后用root账户解开安装包,并修改所有者为普通用户:
然后make,但是我报错了:
其实把更新装完重启以下电脑就解决了,如果问题没解决的话:
再make看看
理想的输出应该是这样: KBUILD_NOPEDANTIC=1 make -C /lib/modules/`uname -r`/build M=`pwd` make[1]: 进入目录“/usr/src/kernels/3.10.0-123.4.2.el7.x86_64” CFG80211 API is prefered for this kernel version Using CFG80211 API CC [M] /usr/local/src/hybrid-wl/src/shared/linux_osl.o CC [M] /usr/local/src/hybrid-wl/src/wl/sys/wl_linux.o CC [M] /usr/local/src/hybrid-wl/src/wl/sys/wl_iw.o CC [M] /usr/local/src/hybrid-wl/src/wl/sys/wl_cfg80211_hybrid.o LD [M] /usr/local/src/hybrid-wl/wl.o WARNING: modpost: missing MODULE_LICENSE() in /usr/local/src/hybrid-wl/wl.o see include/linux/module.h for more information WARNING: /usr/local/src/hybrid-wl/wl.o(.data+0x150f40): Section mismatch in reference from the variable wl_pci_driver to the function .init.text:wl_pci_probe() The variable wl_pci_driver references the function __init wl_pci_probe() If the reference is valid then annotate the variable with __init* or __refdata (see linux/init.h) or name the variable: *_template, *_timer, *_sht, *_ops, *_probe, *_probe_one, *_console Building modules, stage 2. CFG80211 API is prefered for this kernel version Using CFG80211 API MODPOST 1 modules WARNING: modpost: missing MODULE_LICENSE() in /usr/local/src/hybrid-wl/wl.o see include/linux/module.h for more information WARNING: /usr/local/src/hybrid-wl/wl.o(.data+0x150f40): Section mismatch in reference from the variable wl_pci_driver to the function .init.text:wl_pci_probe() The variable wl_pci_driver references the function __init wl_pci_probe() If the reference is valid then annotate the variable with __init* or __refdata (see linux/init.h) or name the variable: *_template, *_timer, *_sht, *_ops, *_probe, *_probe_one, *_console CC /usr/local/src/hybrid-wl/wl.mod.o LD [M] /usr/local/src/hybrid-wl/wl.ko make[1]: 离开目录“/usr/src/kernels/3.10.0-123.4.2.el7.x86_64” 装入驱动程序当你成功地编译了驱动模块后,你便可以将它装入内核中,并设置在开机时自动装入这个驱动程序(要这样做,你必须利用 root 的权限)。当然,做这一切之先,你必须从内核删除现在的无线驱动模块(假如有的话):
然后装入驱动:
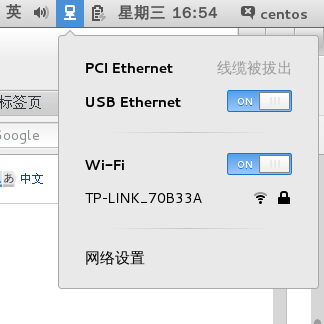
OK!最后贴张图: |

