把之前一直惦记的民间传说性能超Apache N倍的NGINX玩了下。研究+测试前后就是一个下午时间,在此把自己的心得整理了下。
(最后的备注为介绍NGINX加载PHP原理)
Linux操作系统:CentOS 6.3 64bit
NGINX:nginx-1.4.0
MYSQL:mysql-5.6.10
PHP:php-5.4.13
一.安装开发包(使用默认CENTOS更新源):
# yum -y install wget gcc-c++ ncurses-devel cmake make perl
二.关闭iptables和SELINUX
# service iptables stop
# setenforce 0
# vi /etc/sysconfig/selinux
---------------
SELINUX=disabled
---------------
三.安装mysql数据库
# wget http://dev.mysql.com/get/Downloads/MySQL-5.6/mysql-5.6.10.tar.gz/from/http://cdn.mysql.com/
# useradd -d /usr/local/mysql/ mysql 创建一个Mysql用户,指定家目录到/use/local目录下。
# mkdir /usr/local/mysql/data
# mkdir /usr/local/mysql/log 新建一个目录
# chown -R mysql:mysql /usr/local/mysql/data/
# chown -R mysql:mysql /usr/local/mysql/log/
# chmod 750 /usr/local/mysql/data
# chmod 750 /usr/local/mysql/log 修改目录的所属者以及所属组
# tar -zxv -f mysql-5.6.10.tar.gz 解包
# cd mysql-5.6.10
# cmake -DCMAKE_INSTALL_PREFIX=/usr/local/mysql \
-DMYSQL_UNIX_ADDR=/var/lib/mysql/mysql.sock \
-DDEFAULT_CHARSET=gbk \
-DDEFAULT_COLLATION=gbk_chinese_ci \
-DEXTRA_CHARSETS=all \
-DWITH_MYISAM_STORAGE_ENGINE=1 \
-DWITH_INNOBASE_STORAGE_ENGINE=1 \
-DWITH_ARCHIVE_STORAGE_ENGINE=1 \
-DWITH_BLACKHOLE_STORAGE_ENGINE=1 \
-DWITH_MEMORY_STORAGE_ENGINE=1 \
-DWITH_READLINE=1 \
-DENABLED_LOCAL_INFILE=1 \
-DMYSQL_DATADIR=/usr/local/mysql/data \
-DMYSQL_USER=mysql \
-DMYSQL_TCP_PORT=3306
# make
# make install
# 复制配置文件
cp /usr/local/mysql/support-files/my-default.cnf /etc/my.cnf
# vi /etc/my.cnf
--------------------------------------
[mysql]
# CLIENT #
port = 3306
socket = /var/lib/mysql/mysql.sock
[mysqld]
# GENERAL #
user = mysql
default_storage_engine = InnoDB
socket = /var/lib/mysql/mysql.sock
pid_file = /var/run/mysqld/mysqld.pid
# MyISAM #
key_buffer_size = 32M
myisam_recover = FORCE,BACKUP
# SAFETY #
max_allowed_packet = 16M
max_connect_errors = 1000000
skip_name_resolve
sql_mode = STRICT_TRANS_TABLES,ERROR_FOR_DIVISION_BY_ZERO,NO_AUTO_CREATE_USER,NO_AUTO_VALUE_ON_ZERO,NO_ENGINE_SUBSTITUTION,NO_ZERO_DATE,NO_ZERO_IN_DATE,ONLY_FULL_GROUP_BY
sysdate_is_now = 1
innodb = FORCE
innodb_strict_mode = 1
# DATA STORAGE #
datadir = /usr/local/mysql/data
# BINARY LOGGING #
log-bin =/usr/local/mysql/log/bin.log
expire_logs_days = 30
sync_binlog = 1
# CACHES AND LIMITS #
key_buffer = 256M
max_allowed_packet = 64M
sort_buffer_size = 256M
read_buffer_size = 256M
read_rnd_buffer_size = 256M
thread_stack = 256M
tmp_table_size = 32M
max_heap_table_size = 32M
query_cache_type = 1
query_cache_size = 256M
query_cache_limit = 256M
max_connections = 2048
thread_cache_size = 512
open_files_limit = 65535
table_definition_cache = 1024
table_open_cache = 2048
# INNODB #
innodb_log_files_in_group = 2
innodb_log_file_size = 64M
innodb_flush_log_at_trx_commit = 1
innodb_file_per_table = 1
innodb_buffer_pool_size = 2G
# LOGGING #
log-error=/usr/local/mysql/log/error.log
general_log=1
general_log_file=/usr/local/mysql/log/mysql.log
slow_query_log=1
slow_query_log_file=/usr/local/mysql/log/slowquery.log
log-output=FILE
# 避免MySQL的外部锁定,减少出错几率增强稳定性 #
skip-external-locking
# 禁止sql读取本地文件 #
local-infile=0
-------------------------------------
# 进入安装路径
cd /usr/local/mysql
# 执行配置脚本
scripts/mysql_install_db --user=mysql --datadir=/usr/local/mysql/data
# 复制服务启动脚本
cp /usr/local/mysql/support-files/mysql.server /etc/init.d/mysqld
# chkconfig --add mysqld #添加开机启动服务
# chkconfig --level 35 mysqld on #设置mysql启动
# service mysqld start #启动数据库
# ln -s /var/lib/mysql/mysql.sock /tmp/mysql.sock 创建一个mysql接口的软链接
# /usr/local/mysql/bin/mysqladmin -u root password 123456 #设置密码
# /usr/local/mysql/bin/mysql -u root -p123456 #连接数据库
mysql> create database phpwind; #---创建数据库
mysql> grant all privileges on *.* to root@'%' identified by '123456' with grant option; #给root用户非本地链接所有权限,并改密码和赋予其给其他人下发权限.
mysql> show variables; #查看mysql设置.
# 这里是把mysql文件链接到默认位置,必须做这步,在编译其他软件的时候自定义mysql的库文件路径。
# ln -s /usr/local/mysql/lib/mysql /usr/lib/mysql
# ln -s /usr/local/mysql/include/mysql /usr/include/mysql
四.编译安装nginx(官方文档http://wiki.nginx.org/Main)
1.模块依赖性:
gzip 模块需要 zlib 库
rewrite 模块需要 pcre 库
ssl 功能需要 openssl 库
# yum install gcc openssl-devel pcre-devel zlib-devel
2.nginx编译
先添加nginx用户和用户组
# groupadd nginx
# useradd -g nginx -s /bin/false -M nginx
解压源码包,这里采用最新的源码包1.4.0
# tar -zxvf nginx-1.4.0.tar.gz
# cd nginx-1.4.0
# ./configure --prefix=/usr/local/nginx --pid-path=/var/run/nginx.pid --lock-path=/var/lock/nginx.lock --user=nginx --group=nginx --with-http_ssl_module --with-http_dav_module --with-http_flv_module --with-http_realip_module --with-http_gzip_static_module --with-http_stub_status_module --with-mail --with-mail_ssl_module --with-debug --http-client-body-temp-path=/var/tmp/nginx/client --http-proxy-temp-path=/var/tmp/nginx/proxy --http-fastcgi-temp-path=/var/tmp/nginx/fastcgi --http-uwsgi-temp-path=/var/tmp/nginx/uwsgi --http-scgi-temp-path=/var/tmp/nginx/scgi
# ln -s /usr/local/nginx/sbin/nginx /usr/sbin/
# make && make install
创建缓存目录:
# mkdir -p /var/tmp/nginx/client
3.创建启动脚本
# vi /etc/init.d/nginx
-------------------------------
#!/bin/sh
#
# nginx - this script starts and stops the nginx daemin
#
# chkconfig: - 85 15
# description: Nginx is an HTTP(S) server, HTTP(S) reverse \
# proxy and IMAP/POP3 proxy server
# processname: nginx
# config: /usr/local/nginx/conf/nginx.conf
# pidfile: /usr/local/nginx/logs/nginx.pid
# Source function library.
. /etc/rc.d/init.d/functions
# Source networking configuration.
. /etc/sysconfig/network
# Check that networking is up.
[ "$NETWORKING" = "no" ] && exit 0
nginx="/usr/local/nginx/sbin/nginx"
prog=$(basename $nginx)
NGINX_CONF_FILE="/usr/local/nginx/conf/nginx.conf"
lockfile=/var/lock/subsys/nginx
start() {
[ -x $nginx ] || exit 5
[ -f $NGINX_CONF_FILE ] || exit 6
echo -n $"Starting $prog: "
daemon $nginx -c $NGINX_CONF_FILE
retval=$?
echo
[ $retval -eq 0 ] && touch $lockfile
return $retval
}
stop() {
echo -n $"Stopping $prog: "
killproc $prog -QUIT
retval=$?
echo
[ $retval -eq 0 ] && rm -f $lockfile
return $retval
}
restart() {
configtest || return $?
stop
start
}
reload() {
configtest || return $?
echo -n $"Reloading $prog: "
killproc $nginx -HUP
RETVAL=$?
echo
}
force_reload() {
restart
}
configtest() {
$nginx -t -c $NGINX_CONF_FILE
}
rh_status() {
status $prog
}
rh_status_q() {
rh_status >/dev/null 2>&1
}
case "$1" in
start)
rh_status_q && exit 0
$1
;;
stop)
rh_status_q || exit 0
$1
;;
restart|configtest)
$1
;;
reload)
rh_status_q || exit 7
$1
;;
force-reload)
force_reload
;;
status)
rh_status
;;
condrestart|try-restart)
rh_status_q || exit 0
;;
*)
echo $"Usage: $0 {start|stop|status|restart|condrestart|try-restart|reload|force-
reload|configtest}"
exit 2
esac
---------------------------
# chmod 755 /etc/init.d/nginx
# chkconfig --add nginx
# service nginx start
# chkconfig nginx on
4.访问测试页面:
http://localhost
五.安装php模块
1.处理依赖包
暂无..
2.安装PHP
# wget http://cn2.php.net/distributions/php-5.4.13.tar.bz2
# tar -jxvf php-5.4.13.tar.bz2
# cd php-5.4.13
此处编译安装了我们项目经常用到的PHP模块,如有其它需要可以自定义添加.
#./configure --prefix=/usr/local/php5 --enable-fastcgi --enable-fpm --with-libxml-dir=/usr/local/lib --with-zlib-dir=/usr/local/lib --with-mysql=/usr/local/mysql --with-mysqli=/usr/local/mysql/bin/mysql_config --with-gd --enable-soap --enable-sockets --enable-xml --enable-mbstring --with-png-dir=/usr/local --with-jpeg-dir=/usr/local --with-curl=/usr/lib --with-freetype-dir=/usr/include/freetype2/freetype/ --enable-bcmath --enable-maintainer-zts
在“./configure”编译选项中,“--enable-fastcgi”是启用对PHP的FastCGI支持,“--enable-fpm”是激活对FastCGI模式的fpm支持。
# make
# make install
安装结束后:
添加php配置文件,需要CP 一个源码里面的php.ini-development或php.ini-production
到/usr/local/php/lib 为 php.ini
# cd ~/php-5.4.13
# cp php.ini-development /usr/local/php5/lib/php.ini
PHP配置: (修改php.ini,默认目录/usr/local/php5/lib/php.ini)
# vi /usr/local/php5/lib/php.ini
-------------------------
expose_php = Off
display_errors = Off
date.timezone =PRC
log_errors = On
error_log = /usr/local/nginx/logs/php_error.log
-------------------------
配置启动FastCGI进程:
# cd /usr/local/php5/etc/
# cp php-fpm.conf.default php-fpm.conf
优化配置:
# vi php-fpm.conf
内存小于4G服务器(值可逐级递减):
修改如下参数:
--------------
pm=dynamic
pm.max_children=40
pm.start_servers=10
pm.min_spare_servers=10
pm.max_spare_servers=40
--------------
内存大于4G服务器(值可逐级递增):
修改如下参数:
--------------
pm=static
pm.max_children=100
--------------
启动服务:
# /usr/local/php5/sbin/php-fpm
# ps -ef|grep php-fpm
----------------------------
root 3829 1 0 01:33 ? 00:00:00 php-fpm: master process
(/usr/local/php5/etc/php-fpm.conf)
nobody 3830 3829 0 01:33 ? 00:00:00 php-fpm: pool www
nobody 3831 3829 0 01:33 ? 00:00:00 php-fpm: pool www
root 3836 1908 0 01:36 pts/0 00:00:00 grep php-fpm
----------------------------
重启fpm:
# pkill php-fpm
# /usr/local/php5/sbin/php-fpm
配置nginx支持php:
由于Nginx本身不会对PHP进行解析,因此要实现Nginx对PHP的支持,其实是将对PHP页面的请求交给fastCGI进程监听的IP地址及端口。如果把php-fpm当做动态应用服务器,那么Nginx其实就是一个反向代理服务器。
Nginx通过反向代理功能实现对PHP的解析,这就是Nginx实现PHP动态解析的原理。
这里假定Nginx的安装目录为/usr/local,则Nginx配置文件的路径为/usr/local/nginx/conf/nginx.conf。下面是在Nginx下支持PHP解析的一个虚拟主机配置实例。
# vi /usr/local/nginx/conf/nginx.conf
添加到http层级:
----------------
server {
server_name www.abc.com;
location / {
index index.html index.php;
root /usr/local/nginx/html/www.abc.com;
}
location ~ \.php$ {
root html;
fastcgi_pass 127.0.0.1:9000;
fastcgi_index index.php;
fastcgi_param SCRIPT_FILENAME /usr/local/nginx/html/www.abc.com$fastcgi_script_name;
include fastcgi_params;
}
}
------------------
通过location指令,将所有以php为后缀的文件都交给127.0.0.1:9000来处理,而这里的IP地址和端口就是FastCGI进程监听的IP地址和端口。
fastcgi_param指令指定放置PHP动态程序的主目录,也就是$fastcgi_script_name前面指定的路径,这里是/usr/local/nginx/html/www.abc.com目录,建议将这个目录与Nginx虚拟主机指定的根目录保持一致.
fastcgi_params文件是FastCGI进程的一个参数配置文件,在安装Nginx后,会默认生成一个这样的文件,这里通过include指令将FastCGI参数配置文件包含了进来。
测试NGINX是否加载PHP
# vi /usr/local/nginx/html/www.abc.com/info.php
---------------
<?php
echo phpinfo();
?>
---------------
重启nginx服务
# service nginx restart
检查80端口是否打开
# lsof -i:80
浏览器输入(注意修改本机HOST文件)
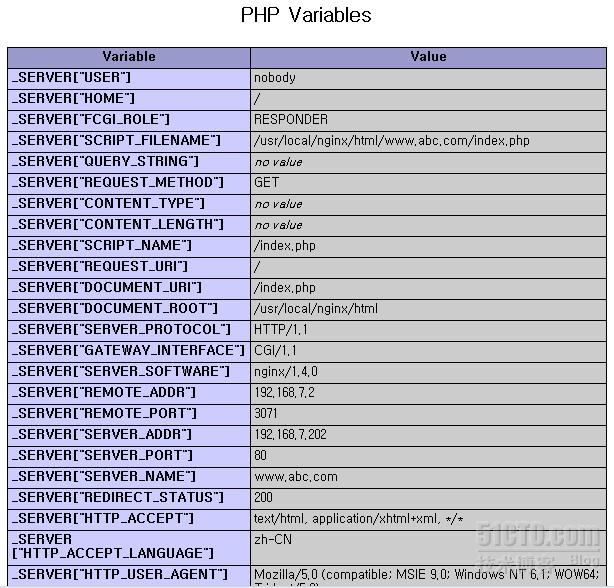
http://www.abc.com/info.php
显示有如下测试页面内容,PHP在GNINX下加载成功
在配置完成Nginx+FastCGI之后,为了保证Nginx下PHP环境的高速稳定运行,需要添加一些FastCGI优化缓存指令。
推荐在项目稳定后可添加如下代码。
项目页面测试阶段或经常改动页面可能造成新添加的功能无法实现,不推荐使用。
下面给出一个优化实例,将下面代码添加到Nginx主配置文件中的HTTP层级。
# vi /usr/local/nginx/conf/nginx.conf
添加到http层级:
--------------------------
fastcgi_cache_path /usr/local/nginx/fastcgi_cache levels=1:2 keys_zone=TEST:10m inactive=5m;
fastcgi_connect_timeout 300;
fastcgi_send_timeout 300;
fastcgi_read_timeout 300;
fastcgi_buffer_size 64k;
fastcgi_buffers 4 64k;
fastcgi_busy_buffers_size 128k;
fastcgi_temp_file_write_size 128k;
fastcgi_cache TEST;
fastcgi_cache_valid 200 302 1h;
fastcgi_cache_valid 301 1d;
fastcgi_cache_valid any 1m;
-----------------------
至此,MYSQL+Nginx+PHP(Fastcgi)大功告成。
---------备 注(大神可无视)-------------
什么是CGI
CGI全称是“公共网关接口”(Common Gateway Interface),HTTP服务器与你的或其它机器上的程序进行“交谈”的一种工具,其程序须运行在网络服务器上。
CGI可以用任何一种语言编写,只要这种语言具有标准输入、输出和环境变量。如php,perl,tcl等
什么是FastCGI
FastCGI像是一个常驻(long-live)型的CGI,它可以一直执行着,只要激活后,不会每次都要花费时间去fork一次(这是CGI最为人诟病的fork-and-execute 模式)。它还支持分布式的运算, 即 FastCGI 程序可以在网站服务器以外的主机上执行并且接受来自其它网站服务器来的请求。
FastCGI是语言无关的、可伸缩架构的CGI开放扩展,其主要行为是将CGI解释器进程保持在内存中并因此获得较高的性能。众所周知,CGI解释器的反复加载是CGI性能低下的主要原因,如果CGI解释器保持在内存中并接受FastCGI进程管理器调度,则可以提供良好的性能、伸缩性、Fail- Over特性等等。
FastCGI与CGI特点
1、如CGI,FastCGI也具有语言无关性.
2、如CGI, FastCGI在进程中的应用程序,独立于核心web服务器运行,提供了一个比API更安全的环境。(APIs把应用程序的代码与核心的web服务器链接在一起,这意味着在一个错误的API的应用程序可能会损坏其他应用程序或核心服务器;恶意的API的应用程序代码甚至可以窃取另一个应用程序或核心服务器的密钥。)
3、FastCGI技术目前支持语言有:C/C++、Java、Perl、Tcl、Python、SmallTalk、Ruby等。相关模块在Apache, ISS, Lighttpd等流行的服务器上也是可用的。
4、如CGI,FastCGI的不依赖于任何Web服务器的内部架构,因此即使服务器技术的变化, FastCGI依然稳定不变。
FastCGI的工作原理
1、Web Server启动时载入FastCGI进程管理器(IIS ISAPI或Apache Module)
2、FastCGI进程管理器自身初始化,启动多个CGI解释器进程(可见多个php-cgi)并等待来自Web Server的连接。
3、当客户端请求到达Web Server时,FastCGI进程管理器选择并连接到一个CGI解释器。Web server将CGI环境变量和标准输入发送到FastCGI子进程php-cgi。
4、FastCGI子进程完成处理后将标准输出和错误信息从同一连接返回WebServer。当FastCGI子进程关闭连接时,请求便告处理完成。FastCGI子进程接着等待并处理来自FastCGI进程管理器(运行在Web Server中)的下一个连接。 在CGI模式中,php-cgi在此便退出了。
在上述情况中,你可以想象CGI通常有多慢。每一个Web请求PHP都必须重新解析php.ini、重新载入全部扩展并重初始化全部数据结构。使用FastCGI,所有这些都只在进程启动时发生一次。一个额外的好处是,持续数据库连接(Persistentdatabase connection)可以工作。
FastCGI的不足
因为是多进程,所以比CGI多线程消耗更多的服务器内存,PHP-CGI解释器每进程消耗7至25兆内存,将这个数字乘以50或100就是很大的内存数。
Nginx 1.4.0+php-5.4.13(FastCGI)服务器在3万并发连接下,开启的10个Nginx进程消耗150M内存(15M*10=150M),开启的64个php-cgi进程消耗1280M内存(20M*64=1280M),加上系统自身消耗的内存,总共消耗不到2GB内存。如果服务器内存较小,完全可以只开启25个php-cgi进程,这样php-cgi消耗的总内存数才500M。
补充:编译详细参数如下:
#Nginx安装路径。如果没有指定,默认为 /usr/local/nginx。
--prefix=PATH
#Nginx可执行文件安装路径。只能安装时指定,如果没有指定,默认为PATH/sbin/nginx。
--sbin-path=PATH
#在没有给定-c选项下默认的nginx.conf的路径。如果没有指定,默认为
PATH/conf/nginx.conf。
--conf-path=PATH
#在nginx.conf中没有指定pid指令的情况下,默认的nginx.pid的路径。如果没有指定,默认为
PATH/logs/nginx.pid。
--pid-path=PATH
#nginx.lock文件的路径。
--lock-path=PATH
#在nginx.conf中没有指定error_log指令的情况下,默认的错误日志的路径。如果没有指定,默认为
PATH/logs/error.log。
--error-log-path=PATH
#在nginx.conf中没有指定access_log指令的情况下,默认的访问日志的路径。如果没有指定,默认为
PATH/logs/access.log。
--http-log-path=PATH
#在nginx.conf中没有指定user指令的情况下,默认的nginx使用的用户。如果没有指定,默认为 nobody。
--user=USER
#在nginx.conf中没有指定user指令的情况下,默认的nginx使用的组。如果没有指定,默
认为 nobody。
--group=GROUP
#指定编译的目录
--builddir=DIR
#启用 rtsig 模块
--with-rtsig_module
#允许或不允许开启SELECT模式,如果configure没有找到合适的模式,比如,kqueue(sun os)、epoll(linux
kenel 2.6+)、rtsig(实时信号)
--with-select_module(--without-select_module)
#允许或不允许开启POLL模式,如果没有合适的,则开启该模式。
--with-poll_module(--without-poll_module)
#开启HTTP SSL模块,使NGINX可以支持HTTPS请求。这个模块需要已经安装了OPENSSL,在
DEBIAN上是libssl-dev
--with-http_ssl_module
--with-http_realip_module #启用 ngx_http_realip_module
--with-http_addition_module #启用 ngx_http_addition_module
--with-http_sub_module #启用 ngx_http_sub_module
--with-http_dav_module #启用 ngx_http_dav_module
--with-http_flv_module #启用 ngx_http_flv_module
--with-http_stub_status_module #启用 "server status" 页
--without-http_charset_module #禁用 ngx_http_charset_module
--without-http_gzip_module #禁用 ngx_http_gzip_module. 如果启用,需要 zlib 。
--without-http_ssi_module #禁用 ngx_http_ssi_module
--without-http_userid_module #禁用 ngx_http_userid_module
--without-http_access_module #禁用 ngx_http_access_module
--without-http_auth_basic_module #禁用 ngx_http_auth_basic_module
--without-http_autoindex_module #禁用 ngx_http_autoindex_module
--without-http_geo_module #禁用 ngx_http_geo_module
--without-http_map_module #禁用 ngx_http_map_module
--without-http_referer_module #禁用 ngx_http_referer_module
--without-http_rewrite_module #禁用 ngx_http_rewrite_module. 如果启用需要 PCRE 。
--without-http_proxy_module #禁用 ngx_http_proxy_module
--without-http_fastcgi_module #禁用 ngx_http_fastcgi_module
--without-http_memcached_module #禁用 ngx_http_memcached_module
--without-http_limit_zone_module #禁用 ngx_http_limit_zone_module
--without-http_empty_gif_module #禁用 ngx_http_empty_gif_module
--without-http_browser_module #禁用 ngx_http_browser_module
--without-http_upstream_ip_hash_module #禁用ngx_http_upstream_ip_hash_module
--with-http_perl_module - #启用 ngx_http_perl_module
--with-perl_modules_path=PATH #指定 perl 模块的路径
--with-perl=PATH #指定 perl 执行文件的路径
--http-log-path=PATH #Set path to the http access log
--http-client-body-temp-path=PATH #Set path to the http client request body
temporary files
--http-proxy-temp-path=PATH #Set path to the http proxy temporary files
--http-fastcgi-temp-path=PATH #Set path to the http fastcgi temporary files
--without-http #禁用 HTTP server
--with-mail #启用 IMAP4/POP3/SMTP 代理模块
--with-mail_ssl_module #启用 ngx_mail_ssl_module
--with-cc=PATH #指定 C 编译器的路径
--with-cpp=PATH #指定 C 预处理器的路径
--with-cc-opt=OPTIONS #
--with-ld-opt=OPTIONS #Additional parameters passed to the linker. With the use
of the system library PCRE in FreeBSD, it is necessary to indicate --with-ld-opt="-L
/usr/local/lib".
--with-cpu-opt=CPU #为特定的 CPU 编译,有效的值包括:pentium, pentiumpro,
pentium3, pentium4, athlon, opteron, amd64, sparc32, sparc64, ppc64
--without-pcre #禁止 PCRE 库的使用。同时也会禁止 HTTP rewrite 模块。在
"location" 配置指令中的正则表达式也需要 PCRE 。
--with-pcre=DIR #指定 PCRE 库的源代码的路径。
--with-pcre-opt=OPTIONS #设置PCRE的额外编译选项。
--with-md5=DIR #使用MD5汇编源码。
--with-md5-opt=OPTIONS #Set additional options for md5 building.
--with-md5-asm #Use md5 assembler sources.
--with-sha1=DIR #Set path to sha1 library sources.
--with-sha1-opt=OPTIONS #Set additional options for sha1 building.
--with-sha1-asm #Use sha1 assembler sources.
--with-zlib=DIR #Set path to zlib library sources.
--with-zlib-opt=OPTIONS #Set additional options for zlib building.
--with-zlib-asm=CPU #Use zlib assembler sources optimized for specified CPU, valid values are:
pentium, pentiumpro
--with-openssl=DIR #Set path to OpenSSL library sources
--with-openssl-opt=OPTIONS #Set additional options for OpenSSL building
--with-debug #启用调试日志
--add-module=PATH #Add in a third-party module found in directory PATH
在不同版本间,选项可能会有些许变化,请总是使用 ./configure --help 命令来检查一下当前的选项列表。
(责任编辑:IT) |