如果你看过译者以前翻译的 snappy 文章,不知有没有感觉相关主题都是浅尝辄止,讲得不够透彻,看得也不太过瘾?如果有的话,相信这篇详细讲解如何从零开始制作一个 snap 包的文章应该不会让你失望。
在这篇文章中,我们将看到如何为名为 timg 的实用程序制作对应的 snap 包。如果这是你第一次听说 snap 安装包,你可以先看看 如何创建你的第一个 snap 包。
今天我们将学习以下有关使用 snapcraft 制作 snap 包的内容:
-
timg 源码中的 Makefile 文件是手工编写,我们需要修改一些 make 插件参数。
-
这个程序是用 C++ 语言写的,依赖几个额外的库文件。我们需要把相关的代码添加到 snap 包中。
-
严格限制还是传统限制?我们将会讨论如何在它们之间进行选择。
首先,我们了解下 timg 有什么用?
背景
Linux 终端模拟器已经变得非常炫酷,并且还能显示颜色!
1.png-19.9kB
除了标准的颜色,大多数终端模拟器(如上图显示的 GNOME 终端)都支持真彩色(1600 万种颜色)。
图片.png-61.9kB
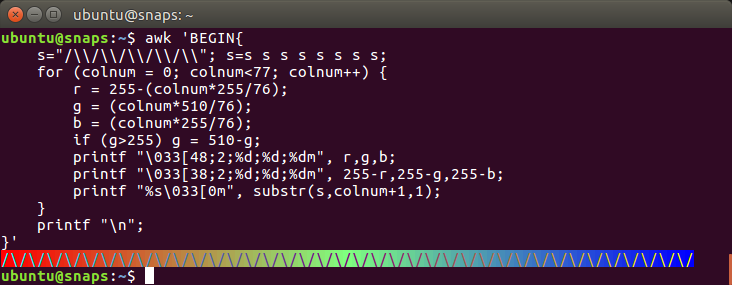
是的!终端模拟器已经支持真彩色了!从这个页面“ 多个终端和终端应用程序已经支持真彩色(1600 万种颜色)” 可以获取 AWK 代码自己进行测试。你可以看到在代码中使用了一些 转义序列 来指定 RGB 的值(256 * 256 * 256 ~= 1600 万种颜色)。
timg 是什么?
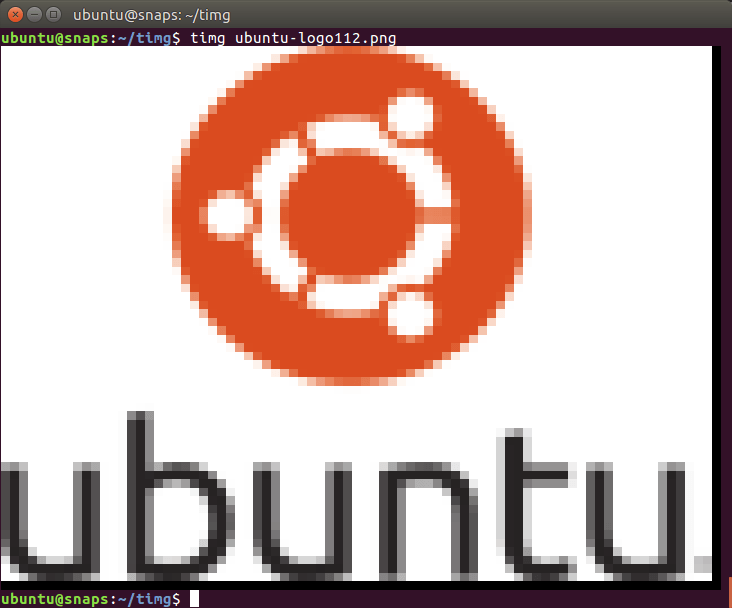
好了,言归正传,timg 有什么用?它能将输入的图片重新调整为终端窗口字符所能显示范围的大小(比如:80 x 25),然后在任何分辨率的终端窗口用彩色字符显示图像。
图片.png-37.3kB
这幅图用彩色块字符显示了 Ubuntu 的 logo,原图是一个 PNG 格式的文件。
图片.png-165kB
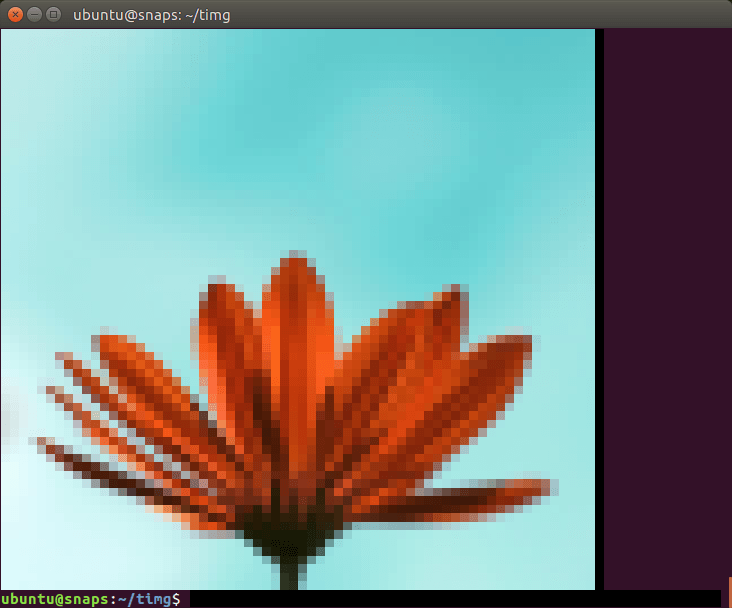
这是 @Doug8888 拍摄的花。
如果你通过远程连接服务器来管理自己的业务,并想要查看图像文件,那么 timg 将会特别有用。
除了静态图片,timg 同样也可以显示 gif 动图。
那么让我们开始 snap 之旅吧!
熟悉 timg 的源码
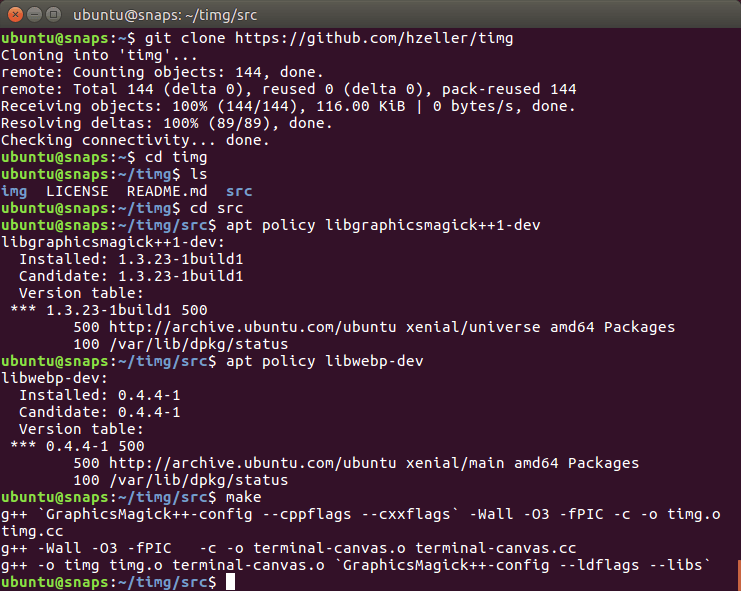
timg 的源码可以在 https://github.com/hzeller/timg 找到。让我们试着手动编译它,以了解它有什么需求。
图片.png-128.4kB
Makefile 在 src/ 子文件夹中而不是项目的根文件夹中。在 github 页面上,他们说需要安装两个开发包(GraphicsMagic++ 和 WebP),然后使用 make 就能生成可执行文件。在截图中可以看到我已经将它们安装好了(在我读完相关的 Readme.md 文件后)。
因此,在编写 snapcraft.yaml 文件时已经有了四条腹稿:
-
Makefile 在 src/ 子文件夹中而不是项目的根文件夹中。
-
这个程序编译时需要两个开发库。
-
为了让 timg 以 snap 包形式运行,我们需要将这两个库捆绑在 snap 包中(或者静态链接它们)。
-
timg 是用 C++ 编写的,所以需要安装 g++。在编译之前,让我们通过 snapcraft.yaml 文件来检查 build-essential 元包是否已经安装。
从 snapcraft 开始
让我们新建一个名为 timg-snap/ 的文件夹,并在其中运行 snapcraft init 这条命令来创建 snapcraft.yaml 工作的框架。
-
ubuntu@snaps:~$ mkdir timg-snap
-
ubuntu@snaps:~$ cd timg-snap/
-
ubuntu@snaps:~/timg-snap$ snapcraft init
-
Created snap/snapcraft.yaml.
-
Edit the file to your liking or run `snapcraft` to get started
-
ubuntu@snaps:~/timg-snap$ cat snap/snapcraft.yaml
-
name: my-snap-name # you probably want to 'snapcraft register <name>'
-
version: '0.1' # just for humans, typically '1.2+git' or '1.3.2'
-
summary: Single-line elevator pitch for your amazing snap # 79 char long summary
-
description: |
-
This is my-snap's description. You have a paragraph or two to tell the most important story about your snap. Keep it under 100 words though, we live in tweetspace and your description wants to look good in the snap store.
-
-
grade: devel # must be 'stable' to release into candidate/stable channels
-
confinement: devmode # use 'strict' once you have the right plugs and slots
-
-
parts:
-
my-part:
-
# See 'snapcraft plugins'
-
plugin: nil
填充元数据
snapcraft.yaml 配置文件的上半部分是元数据。我们需要一个一个把它们填满,这算是比较容易的部分。元数据由以下字段组成:
-
name (名字)—— snap 包的名字,它将公开在 Ubuntu 商店中。
-
version (版本)—— snap 包的版本号。可以是源代码存储库中一个适当的分支或者标记,如果没有分支或标记的话,也可以是当前日期。
-
summary (摘要)—— 不超过 80 个字符的简短描述。
-
description (描述)—— 长一点的描述, 100 个字以下。
-
grade (等级)—— stable (稳定)或者 devel (开发)。因为我们想要在 Ubuntu 商店的稳定通道中发布这个 snap 包,所以在 snap 包能正常工作后,就把它设置成 stable。
-
confinement (限制)—— 我们首先设置为 devmode (开发模式),这样系统将不会以任何方式限制 snap 包。一旦它在 devmode下能正常工作,我们再考虑选择 strict (严格)还是 classic(传统)限制。
我们将使用 timg 这个名字:
-
ubuntu@snaps:~/timg-snap$ snapcraft register timg
-
Registering timg.
-
You already own the name 'timg'.
是的,这个名字我已经注册了 :-)。
接下来,我们应该选择哪个版本的 timg?

图片.png-72.7kB
当在仓库中寻找分支或标记时,我们会发现有一个 v0.9.5 标签,其中有 2016 年 6 月 27 日最新提交的代码。
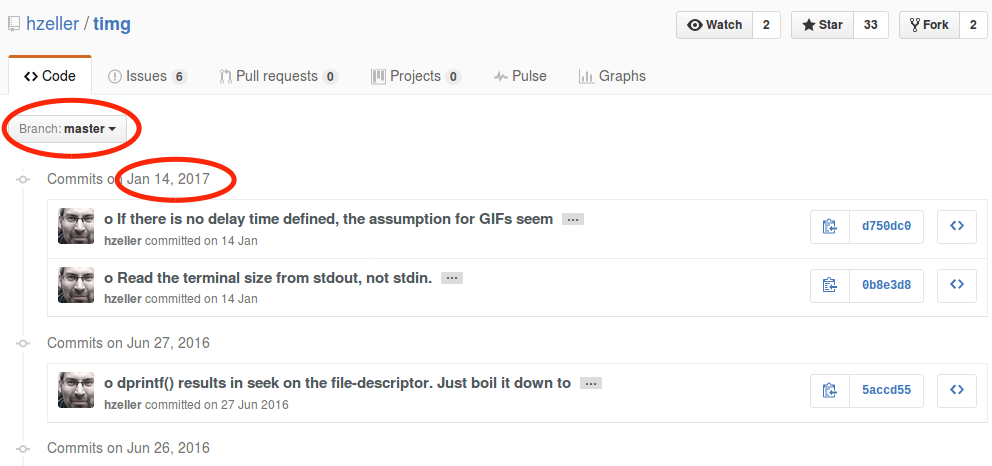
图片.png-71.4kB
然而主分支(master)中有两个看起来很重要的提交。因此我们使用主分支而不用 v0.9.5 标签的那个。我们使用今天的日期—— 20170226 做为版本号。
我们从仓库中搜集了摘要和描述。其中摘要的内容为 A terminal image viewer,描述的内容为 A viewer that uses 24-Bit color capabilities and unicode character blocks to display images in the terminal。
最后,将 grade (等级)设置为 stable (稳定),将 confinement 限制设置为 devmode (开发模式)(一直到 snap 包真正起作用)。
这是更新后的 snapcraft.yaml,带有所有的元数据:
-
ubuntu@snaps:~/timg-snap$ cat snap/snapcraft.yaml
-
name: timg
-
version: '20170226'
-
summary: A terminal image viewer
-
description: |
-
A viewer that uses 24-Bit color capabilities and unicode character blocks to display images in the terminal.
-
-
grade: stable
-
confinement: devmode
-
-
parts:
-
my-part:
-
# See 'snapcraft plugins'
-
plugin: nil
弄清楚 parts: 是什么
现在我们需要将上面已经存在的 parts: 部分替换成真实的 parts:。

Git 仓库的 URL。

存在 Makefile,因此我们需要 make 插件。
我们已经知道 git 仓库的 URL 链接,并且 timg 源码中已有了 Makefile 文件。至于 snapcraft make 插件 的 Makefile 命令,正如文档所言,这个插件总是会运行 make 后再运行 make install。为了确认 make 插件的用法,我查看了 snapcraft 可用插件列表。
因此,我们将最初的配置:
-
parts:
-
my-part:
-
# See 'snapcraft plugins'
-
plugin: nil
修改为:
-
parts:
-
timg:
-
source: https://github.com/hzeller/timg.git
-
plugin: make
这是当前 snapcraft.yaml 文件的内容:
-
name: timg
-
version: '20170226'
-
summary: A terminal image viewer
-
description: |
-
A viewer that uses 24-Bit color capabilities and unicode character blocks
-
to display images in the terminal.
-
-
grade: stable
-
confinement: devmode
-
-
parts:
-
timg:
-
source: https://github.com/hzeller/timg.git
-
plugin: make
让我们运行下 snapcraft prime 命令看看会发生什么:
-
ubuntu@snaps:~/timg-snap$ snapcraft prime
-
Preparing to pull timg
-
Pulling timg
-
Cloning into '/home/ubuntu/timg-snap/parts/timg/src'...
-
remote: Counting objects: 144, done.
-
remote: Total 144 (delta 0), reused 0 (delta 0), pack-reused 144
-
Receiving objects: 100% (144/144), 116.00 KiB | 0 bytes/s, done.
-
Resolving deltas: 100% (89/89), done.
-
Checking connectivity... done.
-
Preparing to build timg
-
Building timg
-
make -j4
-
make: *** No targets specified and no makefile found. Stop.
-
Command '['/bin/sh', '/tmp/tmpem97fh9d', 'make', '-j4']' returned non-zero exit status 2
-
ubuntu@snaps:~/timg-snap$
我们可以看到 snapcraft 无法在源代码中找到 Makefile 文件,正如我们之前所暗示的,Makefile 位于 src/ 子文件夹中。那么,我们可以让 snapcraft 使用 src/ 文件夹中的 Makefile 文件吗?
每个 snapcraft 插件都有自己的选项,并且有一些通用选项是所有插件共享的。在本例中,我们希望研究那些与源代码相关的 snapcraft 选项。我们开始吧:
source-subdir:path
snapcraft 会检出 source 关键字所引用的仓库或者解压归档文件到 parts/<part-name>/src/ 中,但是它只会将特定的子目录复制到 parts/<part-name>/build/ 中。
我们已经有了适当的选项,下面更新下 parts:
-
parts:
-
timg:
-
source: https://github.com/hzeller/timg.git
-
source-subdir: src
-
plugin: make
然后再次运行 snapcraft prime:
-
ubuntu@snaps:~/timg-snap$ snapcraft prime
-
The 'pull' step of 'timg' is out of date:
-
-
The 'source-subdir' part property appears to have changed.
-
-
Please clean that part's 'pull' step in order to continue
-
ubuntu@snaps:~/timg-snap$ snapcraft clean
-
Cleaning up priming area
-
Cleaning up staging area
-
Cleaning up parts directory
-
ubuntu@snaps:~/timg-snap$ snapcraft prime
-
Skipping pull timg (already ran)
-
Preparing to build timg
-
Building timg
-
make -j4
-
g++ `GraphicsMagick++-config --cppflags --cxxflags` -Wall -O3 -fPIC -c -o timg.o timg.cc
-
g++ -Wall -O3 -fPIC -c -o terminal-canvas.o terminal-canvas.cc
-
/bin/sh: 1: GraphicsMagick++-config: not found
-
timg.cc:33:22: fatal error: Magick++.h: No such file or directory
-
compilation terminated.
-
Makefile:10: recipe for target 'timg.o' failed
-
make: *** [timg.o] Error 1
-
make: *** Waiting for unfinished jobs....
-
Command '['/bin/sh', '/tmp/tmpeeyxj5kw', 'make', '-j4']' returned non-zero exit status 2
-
ubuntu@snaps:~/timg-snap$
从错误信息我们可以得知 snapcraft 找不到 GraphicsMagick++ 这个开发库文件。根据 snapcraft 常见关键字可知,我们需要在 snapcraft.yaml 中指定这个库文件,这样 snapcraft 才能安装它。
build-packages:[deb, deb, deb…]
列出构建 part 前需要在主机中安装的 Ubuntu 包。这些包通常不会进入最终的 snap 包中,除非它们含有 snap 包中二进制文件直接依赖的库文件(在这种情况下,可以通过 ldd 发现它们),或者在 stage-package 中显式地指定了它们。
让我们寻找下这个开发包的名字:
-
ubuntu@snaps:~/timg-snap$ apt-cache search graphicsmagick++ | grep dev
-
graphicsmagick-libmagick-dev-compat/xenial 1.3.23-1build1 all
-
libgraphicsmagick++1-dev/xenial 1.3.23-1build1 amd64
-
format-independent image processing - C++ development files
-
libgraphicsmagick1-dev/xenial 1.3.23-1build1 amd64
-
format-independent image processing - C development files
-
ubuntu@snaps:~/timg-snap$
可以看到包名为 libgraphicsmagick++1-dev,下面是更新后的 parts:
-
parts:
-
timg:
-
source: https://github.com/hzeller/timg.git
-
source-subdir: src
-
plugin: make
-
build-packages:
-
- libgraphicsmagick++1-dev
再次运行 snapcraft:
-
ubuntu@snaps:~/timg-snap$ snapcraft
-
Installing build dependencies: libgraphicsmagick++1-dev
-
[...]
-
The following NEW packages will be installed:
-
libgraphicsmagick++-q16-12 libgraphicsmagick++1-dev libgraphicsmagick-q16-3
-
libgraphicsmagick1-dev libwebp5
-
[...]
-
Building timg
-
make -j4
-
g++ `GraphicsMagick++-config --cppflags --cxxflags` -Wall -O3 -fPIC -c -o timg.o timg.cc
-
g++ -Wall -O3 -fPIC -c -o terminal-canvas.o terminal-canvas.cc
-
g++ -o timg timg.o terminal-canvas.o `GraphicsMagick++-config --ldflags --libs`
-
/usr/bin/ld: cannot find -lwebp
-
collect2: error: ld returned 1 exit status
-
Makefile:7: recipe for target 'timg' failed
-
make: *** [timg] Error 1
-
Command '['/bin/sh', '/tmp/tmptma45jzl', 'make', '-j4']' returned non-zero exit status 2
-
ubuntu@snaps:~/timg-snap$
虽然只指定了开发库 libgraphicsmagick+1-dev,但 Ubuntu 还安装了一些代码库,包括 libgraphicsmagick ++-q16-12,以及动态代码库 libwebp。
这里仍然有一个错误,这个是因为缺少开发版本的 webp 库(一个静态库)。我们可以通过下面的命令找到它:
-
ubuntu@snaps:~/timg-snap$ apt-cache search libwebp | grep dev
-
libwebp-dev - Lossy compression of digital photographic images.
-
ubuntu@snaps:~/timg-snap$
上面安装的 libwebp5 包只提供了一个动态库(.so)。通过 libwebp-dev 包,我们可以得到相应的静态库(.a)。好了,让我们更新下 parts: 部分:
-
parts:
-
timg:
-
source: https://github.com/hzeller/timg.git
-
source-subdir: src
-
plugin: make
-
build-packages:
-
- libgraphicsmagick++1-dev
-
- libwebp-dev
下面是更新后的 snapcraft.yaml 文件的内容:
-
name: timg
-
version: '20170226'
-
summary: A terminal image viewer
-
description: |
-
A viewer that uses 24-Bit color capabilities and unicode character blocks
-
to display images in the terminal.
-
-
grade: stable
-
confinement: devmode
-
-
parts:
-
timg:
-
source: https://github.com/hzeller/timg.git
-
source-subdir: src
-
plugin: make
-
build-packages:
-
- libgraphicsmagick++1-dev
-
- libwebp-dev
让我们运行下 snapcraft prime:
-
ubuntu@snaps:~/timg-snap$ snapcraft prime
-
Skipping pull timg (already ran)
-
Preparing to build timg
-
Building timg
-
make -j4
-
g++ `GraphicsMagick++-config --cppflags --cxxflags` -Wall -O3 -fPIC -c -o timg.o timg.cc
-
g++ -Wall -O3 -fPIC -c -o terminal-canvas.o terminal-canvas.cc
-
g++ -o timg timg.o terminal-canvas.o `GraphicsMagick++-config --ldflags --libs`
-
make install DESTDIR=/home/ubuntu/timg-snap/parts/timg/install
-
install timg /usr/local/bin
-
install: cannot create regular file '/usr/local/bin/timg': Permission denied
-
Makefile:13: recipe for target 'install' failed
-
make: *** [install] Error 1
-
Command '['/bin/sh', '/tmp/tmptq_s1itc', 'make', 'install', 'DESTDIR=/home/ubuntu/timg-snap/parts/timg/install']' returned non-zero exit status 2
-
ubuntu@snaps:~/timg-snap$
我们遇到了一个新问题。由于 Makefile 文件是手工编写的,不符合 snapcraft make 插件 的参数设置,所以不能正确安装到 prime/ 文件夹中。Makefile 会尝试安装到 usr/local/bin 中。
我们需要告诉 snapcraft make 插件 不要运行 make install,而是找到 timg 可执行文件然后把它放到 prime/ 文件夹中。根据文档的描述:
-
- artifacts:
-
(列表)
-
将 make 生成的指定文件复制或者链接到 snap 包安装目录。如果使用,则 `make install` 这步操作将被忽略。
所以,我们需要将一些东西放到 artifacts: 中。但是具体是哪些东西?
-
ubuntu@snaps:~/timg-snap/parts/timg$ ls build/src/
-
Makefile terminal-canvas.h timg* timg.o
-
terminal-canvas.cc terminal-canvas.o timg.cc
-
ubuntu@snaps:~/timg-snap/parts/timg$
在 build/ 子目录中,我们可以找到 make 的输出结果。由于我们设置了 source-subdir: 为 src,所以 artifacts: 的基目录为 build/src。在这里我们可以找到可执行文件 timg,我们需要将它设置为 artifacts: 的一个参数。通过 artifacts:,我们可以把 make 输出的某些文件复制到 snap 包的安装目录(在 prime/ 中)。
下面是更新后 snapcraft.yaml 文件 parts: 部分的内容:
-
parts:
-
timg:
-
source: https://github.com/hzeller/timg.git
-
source-subdir: src
-
plugin: make
-
build-packages:
-
- libgraphicsmagick++1-dev
-
- libwebp-dev
-
artifacts: [timg]
让我们运行 snapcraft prime:
-
ubuntu@snaps:~/timg-snap$ snapcraft prime
-
Preparing to pull timg
-
Pulling timg
-
Cloning into '/home/ubuntu/timg-snap/parts/timg/src'...
-
remote: Counting objects: 144, done.
-
remote: Total 144 (delta 0), reused 0 (delta 0), pack-reused 144
-
Receiving objects: 100% (144/144), 116.00 KiB | 207.00 KiB/s, done.
-
Resolving deltas: 100% (89/89), done.
-
Checking connectivity... done.
-
Preparing to build timg
-
Building timg
-
make -j4
-
g++ `GraphicsMagick++-config --cppflags --cxxflags` -Wall -O3 -fPIC -c -o timg.o timg.cc
-
g++ -Wall -O3 -fPIC -c -o terminal-canvas.o terminal-canvas.cc
-
g++ -o timg timg.o terminal-canvas.o `GraphicsMagick++-config --ldflags --libs`
-
Staging timg
-
Priming timg
-
ubuntu@snaps:~/timg-snap$
我们还将继续迭代。
导出命令
到目前为止,snapcraft 生成了可执行文件,但没有导出给用户使用的命令。接下来我们需要通过 apps: 导出一个命令。
首先我们需要知道命令在 prime/ 的哪个子文件夹中:
-
ubuntu@snaps:~/timg-snap$ ls prime/
-
meta/ snap/ timg* usr/
-
ubuntu@snaps:~/timg-snap$
它在 prime/ 子文件夹的根目录中。现在,我们已经准备好要在 snapcaft.yaml 中增加 apps: 的内容:
-
ubuntu@snaps:~/timg-snap$ cat snap/snapcraft.yaml
-
name: timg
-
version: '20170226'
-
summary: A terminal image viewer
-
description: |
-
A viewer that uses 24-Bit color capabilities and unicode character blocks
-
to display images in the terminal.
-
-
grade: stable
-
confinement: devmode
-
-
apps:
-
timg:
-
command: timg
-
-
parts:
-
timg:
-
source: https://github.com/hzeller/timg.git
-
source-subdir: src
-
plugin: make
-
build-packages:
-
- libgraphicsmagick++1-dev
-
- libwebp-dev
-
artifacts: [timg]
让我们再次运行 snapcraft prime,然后测试下生成的 snap 包:
-
ubuntu@snaps:~/timg-snap$ snapcraft prime
-
Skipping pull timg (already ran)
-
Skipping build timg (already ran)
-
Skipping stage timg (already ran)
-
Skipping prime timg (already ran)
-
ubuntu@snaps:~/timg-snap$ snap try --devmode prime/
-
timg 20170226 mounted from /home/ubuntu/timg-snap/prime
-
ubuntu@snaps:~/timg-snap$

图片来源: https://www.flickr.com/photos/mustangjoe/6091603784/
我们可以通过 snap try --devmode prime/ 启用该 snap 包然后测试 timg 命令。这是一种高效的测试方法,可以避免生成 .snap 文件,并且无需安装和卸载它们,因为 snap try prime/ 直接使用了 prime/ 文件夹中的内容。
限制 snap
到目前为止,snap 包一直是在不受限制的开发模式下运行的。让我们看看如何限制它的运行:
-
ubuntu@snaps:~/timg-snap$ snap list
-
Name Version Rev Developer Notes
-
core 16-2 1337 canonical -
-
timg 20170226 x1 devmode,try
-
ubuntu@snaps:~/timg-snap$ snap try --jailmode prime
-
timg 20170226 mounted from /home/ubuntu/timg-snap/prime
-
ubuntu@snaps:~/timg-snap$ snap list
-
Name Version Rev Developer Notes
-
core 16-2 1337 canonical -
-
timg 20170226 x2 jailmode,try
-
ubuntu@snaps:~/timg-snap$ timg pexels-photo-149813.jpeg
-
Trouble loading pexels-photo-149813.jpeg (Magick: Unable to open file (pexels-photo-149813.jpeg) reported by magick/blob.c:2828 (OpenBlob))
-
ubuntu@snaps:~/timg-snap$
通过这种方式,我们可以无需修改 snapcraft.yaml 文件就从开发模式(devmode)切换到限制模式(jailmode)(confinement: strict)。正如预期的那样,timg 无法读取图像,因为我们没有开放访问文件系统的权限。
现在,我们需要作出决定。使用限制模式,我们可以很容易授予某个命令访问用户 $HOME 目录中文件的权限,但是只能访问那里。如果图像文件位于其它地方,我们总是需要复制到 $HOME 目录并在 $HOME 的副本上运行 timg。如果我们觉得可行,那我们可以设置 snapcraf.yaml 为:
-
name: timg
-
version: '20170226'
-
summary: A terminal image viewer
-
description: |
-
A viewer that uses 24-Bit color capabilities and unicode character blocks
-
to display images in the terminal.
-
-
grade: stable
-
confinement: strict
-
-
apps:
-
timg:
-
command: timg
-
plugs: [home]
-
-
parts:
-
timg:
-
source: https://github.com/hzeller/timg.git
-
source-subdir: src
-
plugin: make
-
build-packages:
-
- libgraphicsmagick++1-dev
-
- libwebp-dev
-
artifacts: [timg]
另一方面,如果希望 timg snap 包能访问整个文件系统,我们可以设置传统限制来实现。对应的 snapcraft.yaml 内容如下:
-
name: timg
-
version: '20170226'
-
summary: A terminal image viewer
-
description: |
-
A viewer that uses 24-Bit color capabilities and unicode character blocks
-
to display images in the terminal.
-
-
grade: stable
-
confinement: classic
-
-
apps:
-
timg:
-
command: timg
-
-
parts:
-
timg:
-
source: https://github.com/hzeller/timg.git
-
source-subdir: src
-
plugin: make
-
build-packages:
-
- libgraphicsmagick++1-dev
-
- libwebp-dev
-
artifacts: [timg]
接下来我们将选择严格(strict)约束选项。因此,图像应该只能放在 $HOME 中。
打包和测试
让我们打包这个 snap,也就是制作 .snap 文件,然后在新安装的 Ubuntu 系统上对它进行测试。
-
ubuntu@snaps:~/timg-snap$ snapcraft
-
Skipping pull timg (already ran)
-
Skipping build timg (already ran)
-
Skipping stage timg (already ran)
-
Skipping prime timg (already ran)
-
Snapping 'timg' \
-
Snapped timg_20170226_amd64.snap
-
ubuntu@snaps:~/timg-snap$
我们如何在几秒钟内得到一个全新安装的 Ubuntu 系统来对 snap 包进行测试?
请查看 尝试在 Ubuntu 上使用 LXD 容器,并在你的系统上设置 LXD。然后回到这里,尝试运行下面的命令:
-
$ lxc launch ubuntu:x snaptesting
-
Creating snaptesting
-
Starting snaptesting
-
$ lxc file push timg_20170226_amd64.snap snaptesting/home/ubuntu/
-
$ lxc exec snaptesting -- sudo su - ubuntu
-
To run a command as administrator (user "root"), use "sudo <command>".
-
See "man sudo_root" for details.
-
-
ubuntu@snaptesting:~$ ls
-
timg_20170226_amd64.snap
-
ubuntu@snaptesting:~$ snap install timg_20170226_amd64.snap
-
error: access denied (try with sudo)
-
ubuntu@snaptesting:~$ sudo snap install timg_20170226_amd64.snap
-
error: cannot find signatures with metadata for snap "timg_20170226_amd64.snap"
-
ubuntu@snaptesting:~$ sudo snap install timg_20170226_amd64.snap --dangerous
-
error: cannot perform the following tasks:
-
- Mount snap "core" (1337) ([start snap-core-1337.mount] failed with exit status 1: Job for snap-core-1337.mount failed. See "systemctl status snap-core-1337.mount" and "journalctl -xe" for details.
-
)
-
ubuntu@snaptesting:~$ sudo apt install squashfuse
-
[...]
-
Setting up squashfuse (0.1.100-0ubuntu1~ubuntu16.04.1) ...
-
ubuntu@snaptesting:~$ sudo snap install timg_20170226_amd64.snap --dangerous
-
timg 20170226 installed
-
ubuntu@snaptesting:~$ wget https://farm7.staticflickr.com/6187/6091603784_d6960c8be2_z_d.jpg
-
[...]
-
2017-02-26 22:12:18 (636 KB/s) - ‘6091603784_d6960c8be2_z_d.jpg’ saved [240886/240886]
-
ubuntu@snaptesting:~$ timg 6091603784_d6960c8be2_z_d.jpg
-
[it worked!]
-
ubuntu@snaptesting:~$
我们启动了一个名为 snaptesting 的 LXD 容器,并将 .snap 文件复制进去。然后,通过普通用户连接到容器,并尝试安装 snap 包。最初,我们安装失败了,因为在无特权的 LXD 容器中安装 snap 包需要使用 sudo。接着又失败了,因为 .snap 没有经过签名(我们需要使用 --dangerous 参数)。然而还是失败了,这次是因为我们需要安装 squashfuse 包(Ubuntu 16.04 镜像中没有预装)。最后,我们成功安装了snap,并设法查看了图像。
在一个全新安装的 Linux 系统中测试 snap 包是很重要的,因为这样才能确保 snap 包中包含所有必须的代码库。在这个例子中,我们使用了静态库并运行良好。
发布到 Ubuntu 商店
这是 发布 snap 包到 Ubuntu 商店的说明。 在之前的教程中,我们已经发布了一些 snap 包。对于 timg 来说,我们设置了严格限制和稳定等级。因此,我们会将它发布到稳定通道。
-
$ snapcraft push timg_20170226_amd64.snap
-
Pushing 'timg_20170226_amd64.snap' to the store.
-
Uploading timg_20170226_amd64.snap [ ] 0%
-
Uploading timg_20170226_amd64.snap [=======================================] 100%
-
Ready to release!|
-
Revision 6 of 'timg' created.
-
$ snapcraft release timg 6 stable
-
Track Arch Series Channel Version Revision
-
latest amd64 16 stable 20170226 6
-
candidate ^ ^
-
beta 0.9.5 5
-
edge 0.9.5 5
-
The 'stable' channel is now open.
我们把 .snap 包推送到 Ubuntu 商店后,得到了一个 Revision 6。然后,我们将 timg Revision 6 发布到了 Ubuntu 商店的稳定通道。
在候选通道中没有已发布的 snap 包,它继承的是稳定通道的包,所以显示 ^ 字符。
在之前的测试中,我将一些较老版本的 snap 包上传到了测试和边缘通道。这些旧版本使用了 timg 标签为 0.9.5 的源代码。
我们可以通过将稳定版本发布到测试和边缘通道来移除旧的 0.9.5 版本的包。
-
$ snapcraft release timg 6 beta
-
Track Arch Series Channel Version Revision
-
latest amd64 16 stable 20170226 6
-
candidate ^ ^
-
beta 20170226 6
-
edge 0.9.5 5
-
$ snapcraft release timg 6 edge
-
Track Arch Series Channel Version Revision
-
latest amd64 16 stable 20170226 6
-
candidate ^ ^
-
beta 20170226 6
-
edge 20170226 6
使用 timg
让我们不带参数运行 timg:
-
ubuntu@snaptesting:~$ timg
-
Expected image filename.
-
usage: /snap/timg/x1/timg [options] <image> [<image>...]
-
Options:
-
-g<w>x<h> : Output pixel geometry. Default from terminal 80x48
-
-s[<ms>] : Scroll horizontally (optionally: delay ms (60)).
-
-d<dx:dy> : delta x and delta y when scrolling (default: 1:0).
-
-w<seconds>: If multiple images given: Wait time between (default: 0.0).
-
-t<seconds>: Only animation or scrolling: stop after this time.
-
-c<num> : Only Animation or scrolling: number of runs through a full cycle.
-
-C : Clear screen before showing image.
-
-F : Print filename before showing picture.
-
-v : Print version and exit.
-
If both -c and -t are given, whatever comes first stops.
-
If both -w and -t are given for some animation/scroll, -t takes precedence
-
ubuntu@snaptesting:~$
这里提到当前我们终端模拟器的缩放级别,即分辨率为:80 × 48。
让我们缩小一点,并最大化 GNOME 终端窗口。
-
-g<w>x<h> : Output pixel geometry. Default from terminal 635x428
这是一个更好的解决方案,但我几乎看不到字符,因为他们太小了。让我们调用前面的命令再次显示这辆车。

图片.png-904.9kB
你所看到的是调整后的图像(1080p)。虽然它是用彩色文本字符显示的,但看起来依旧很棒。
接下来呢?timg 其实也可以播放 gif 动画哦!
-
$ wget https://m.popkey.co/9b7141/QbAV_f-maxage-0.gif -O JonahHillAmazed.gif$ timg JonahHillAmazed.gif
你可以试着安装 timg 来体验 gif 动画。要是不想自己动手,可以在 asciinema 上查看相关记录 (如果视频看上去起伏不定的,请重新运行它)。
谢谢阅读!
译者简介:
经常混迹于 snapcraft.io,对 Ubuntu Core、Snaps 和 Snapcraft 有着浓厚的兴趣,并致力于将这些还在快速发展的新技术通过翻译或原创的方式介绍到中文世界。有兴趣的小伙伴也可以关注译者个人公众号: Snapcraft
via:https://blog.simos.info/how-to-create-a-snap-for-timg-with-snapcraft-on-ubuntu/
(责任编辑:IT) |