|
文章目录
前言
一. 实验环境
二. 安装zabbix过程
2.1. 安装zabbix源
2.2 安装zabbix相关的软件
2.3 安装数据库并启动
2.4 开始初始化数据库:
2.5 创建数据库实例及对应的用户
2.6 导入官网提供的数据
2.7 配置zabbix 服务的配置文件
2.8. 启动服务
2.9 从网页进行安装
2.10 登陆zabbix
总结
前言
大家好,我是沐风晓月,本文主要讲解在rocky9.0系统下实现zabbix6.0版本的部署。
号外:
在大佬的指导下,把csdn的专栏做了细分,目前正在更新的有以下几个专栏,会依次进行整理和更新,如果你有更好的想法,欢迎与我交流。
这份表格后面还会继续优化,希望能等到你的建议:学习永无止境,茫茫人海,一起加油努力!
python全栈领跑营 python地基-零基础入门篇 万事开头难,先进门再说
语法进阶篇 主要围绕多线程编程,正则表达式,各类项目展开
爬虫入门与实战 没有什么是爬虫解决不了的
自动化办公篇 搞定常用办公软件的自动化操作
数据库开发实战篇 无数据,不运营,搞定数据库开发
数据分析篇 待更新
python web实战篇 实现想要的网站的各种功能,拥有自己的网站
人工智能篇 这才是我们的终极目标
云原生 DevOPS 掌握devops技术栈,CI/CD
微服务和服务网格(istio) 详尽的讲解微服务架构
分布式数据库与存储 分布式是高薪必备
云原生周边-组件-安全-监控 云原生网络,安全,存储等底层技术
go语言专栏 go语言基础-零基础入门篇 万事开头难,先进门再说
语法进阶篇 主要围绕多线程编程,正则表达式,各类项目展开
go web框架 没有什么网站是不能用go实现的
go二次开发 对云原生产品做二次开发
数据库开发实战篇 无数据,不运营,搞定数据库开发
数据分析篇 待更新
go语言高并发实战 秒杀架构,高并发请求一网打尽
大数据架构实战 大数据入门 万事开头难,先进门再说
大数据必须之Java基础 没有什么是Java解决不了的
大数据其他内容 待更新
一. 实验环境
操作系统: Rocky 9.1 版本
zabbix 版本: 6.0.4 (LTS)
数据库版本: MySQL 8.0
注意:
本文不涉及rocky系统的安装,想学习rocky系统的安装可以参考之前的文章。
rocky系统安装成功后,默认没有开启ssh远程连接,需要手动开启。
开启方法如图:

关于zabbix官网对各版本的要求配图:
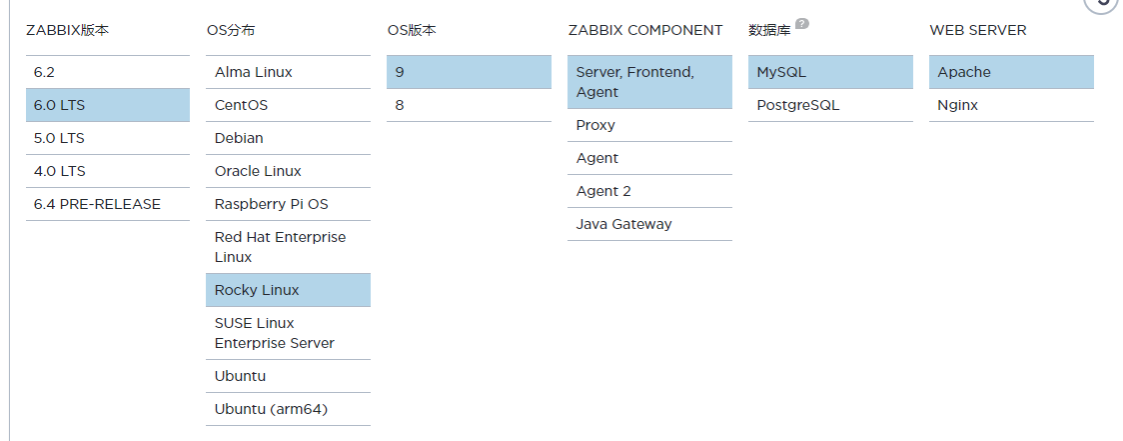
确认你的实验环境的方法:
操作系统:
[root@mufeng ~]# cat /etc/redhat-release
Rocky Linux release 9.1 (Blue Onyx)
关闭防火墙
[root@mufenggrow ~]# systemctl stop firewalld.service
关闭selinux
[root@mufenggrow ~]# setenforce 0
查看 服务器信息
[root@mufenggrow ~]# hostnamectl
Static hostname: mufenggrow
Icon name: computer-vm
Chassis: vm
Machine ID: fbfae1777e0a4f338ee24764faba55ff
Boot ID: 55e469d19fc44197a9ee251ca549c35e
Virtualization: vmware
Operating System: Red Hat Enterprise Linux 8.0 (Ootpa)
CPE OS Name: cpe:/o:redhat:enterprise_linux:8.0:GA
Kernel: Linux 4.18.0-80.el8.x86_64
Architecture: x86-64
二. 安装zabbix过程
2.1. 安装zabbix源
系统中本身并没有zabbix源,若你已经安装了epel源,建议先屏蔽掉,不要使用,因为epel安装的包会造成冲突”
rpm -Uvh https://repo.zabbix.com/zabbix/6.0/rhel/9/x86_64/zabbix-release-6.0-4.el9.noarch.rpm
1
由于zabbix官网的源比较慢,建议换成国内其他的源
sed -i "s/repo.zabbix.com/mirrors.nju.edu.cn\/zabbix/g" /etc/yum.repos.d/zabbix.repo
2.2 安装zabbix相关的软件
设置好zabbix源之后,开始安装相关的软件包:
dnf install zabbix-server-mysql zabbix-web-mysql zabbix-apache-conf zabbix-sql-scripts zabbix-selinux-policy zabbix-agent -y
2.3 安装数据库并启动
由于 6.0 的版本需要 mysql 8.0 以上,所以需要安装最新的 mysql 源 ,而 类 CentOS 8 系统和 9 系统只需要将软件源更新至最新,mysql 的版本就为 8。
所以我们只需要更新软件包,然后使用dnf install 安装即可。
[root@mufeng ~]# dnf -y update && dnf install mysql-server -y
安装成功如图:

启动数据库如下:
systemctl start mysqld && systemctl enable mysqld
[root@mufeng ~]# ps -aux |grep mysqld
mysql 55275 1.8 15.2 1850808 611492 ? Ssl 01:51 1:24 /usr/libexec/mysqld --basedir=/usr
root 57540 0.0 0.0 221812 2396 pts/1 S+ 03:08 0:00 grep --color=auto mysqld
[root@mufeng ~]#
2.4 开始初始化数据库:
初始化命令如下:
mysql_secure_installation
此处是执行过程中所出现的所有的提示,大多数地方只需要输入Y即可,比如移除匿名用户,移除test库等等, 另外选择密码的时候,可以选择low,也就是设置简单的密码。
[root@mufeng ~]# mysql_secure_installation
Securing the MySQL server deployment.
Connecting to MySQL using a blank password.
VALIDATE PASSWORD COMPONENT can be used to test passwords
and improve security. It checks the strength of password
and allows the users to set only those passwords which are
secure enough. Would you like to setup VALIDATE PASSWORD component?
Press y|Y for Yes, any other key for No: y
There are three levels of password validation policy:
LOW Length >= 8
MEDIUM Length >= 8, numeric, mixed case, and special characters
STRONG Length >= 8, numeric, mixed case, special characters and dictionary file
Please enter 0 = LOW, 1 = MEDIUM and 2 = STRONG: 0
Please set the password for root here.
New password:
Re-enter new password:
Estimated strength of the password: 50
Do you wish to continue with the password provided?(Press y|Y for Yes, any other key for No) : y
By default, a MySQL installation has an anonymous user,
allowing anyone to log into MySQL without having to have
a user account created for them. This is intended only for
testing, and to make the installation go a bit smoother.
You should remove them before moving into a production
environment.
Remove anonymous users? (Press y|Y for Yes, any other key for No) : y
Success.
Normally, root should only be allowed to connect from
'localhost'. This ensures that someone cannot guess at
the root password from the network.
Disallow root login remotely? (Press y|Y for Yes, any other key for No) : y
Success.
By default, MySQL comes with a database named 'test' that
anyone can access. This is also intended only for testing,
and should be removed before moving into a production
environment.
Remove test database and access to it? (Press y|Y for Yes, any other key for No) : y
- Dropping test database...
Success.
- Removing privileges on test database...
Success.
Reloading the privilege tables will ensure that all changes
made so far will take effect immediately.
Reload privilege tables now? (Press y|Y for Yes, any other key for No) : y
Success.
All done!
[root@mufeng ~]#
2.5 创建数据库实例及对应的用户
这一步主要是配置让zabbix用户能够通过localhost,使用密码12345678 访问 zabbix的所有表
[root@mufeng ~]# mysql -uroot -p12345678
.
mysql> create database zabbix character set utf8mb4 collate utf8mb4_bin;
Query OK, 1 row affected (0.00 sec)
mysql> create user zabbix@localhost identified by '12345678';
Query OK, 0 rows affected (0.01 sec)
mysql> grant all privileges on zabbix.* to zabbix@localhost;
Query OK, 0 rows affected (0.01 sec)
mysql> set global log_bin_trust_function_creators = 1;
Query OK, 0 rows affected (0.00 sec)
mysql> quit
Bye
主要设置了以下三个值,这三个值在后面配置zabbix的配置文件的时候,还要用到。
DBUser=zabbix
DBPassword=12345678
DBName=zabbix
2.6 导入官网提供的数据
这一步是导入官网提供的sql语句,zabbix6.0和zabbix5.0提供的路径稍微有点不同,其他的都一样。
[root@mufeng ~]# cd /usr/share/zabbix-sql-scripts/mysql/
[root@mufeng mysql]# ls
double.sql history_pk_prepare.sql proxy.sql server.sql.gz
[root@mufeng mysql]# zcat server.sql.gz |mysql --default-character-set=utf8mb4 -uzabbix -p zabbix
Enter password:
[root@mufeng mysql]#
查看导入的数据:
[root@mufeng mysql]# mysql -p12345678
mysql> use zabbix
Reading table information for completion of table and column names
You can turn off this feature to get a quicker startup with -A
Database changed
mysql> show tables;
+----------------------------+
| Tables_in_zabbix |
+----------------------------+
| acknowledges |
| actions |
2.7 配置zabbix 服务的配置文件
在上一步骤中我们已经给数据库设置好了用户名和密码,这一步我们要把上面设置好的数据库用户名,密码和用户都写入配置文件。
先找到配置文件:
[root@mufeng mysql]# find / -name zabbix_server.conf
/etc/zabbix/zabbix_server.conf
查看修改的内容
[root@mufeng mysql]# grep -v ^# /etc/zabbix/zabbix_server.conf |grep "^DB"
DBName=zabbix
DBUser=zabbix
DBPassword=12345678
配置文件中有些内容已经存在就无需配置,比如DBname默认已经存在,就不需要在配置了。
2.8. 启动服务
到现在为止已经全部配置完成了,接下来需要启动http,php,zabbix-server等服务
[root@mufeng ~]# systemctl restart zabbix-server zabbix-agent httpd php-fpm
[root@mufeng ~]# systemctl enable zabbix-server zabbix-agent httpd php-fpm
Created symlink /etc/systemd/system/multi-user.target.wants/zabbix-server.service → /usr/lib/systemd/system/zabbix-server.service.
2.9 从网页进行安装
网页登陆地址是IP/zabbix的格式,我这里登陆的方式: http://192.168.1.55/zabbix/setup.php
进入安装界面
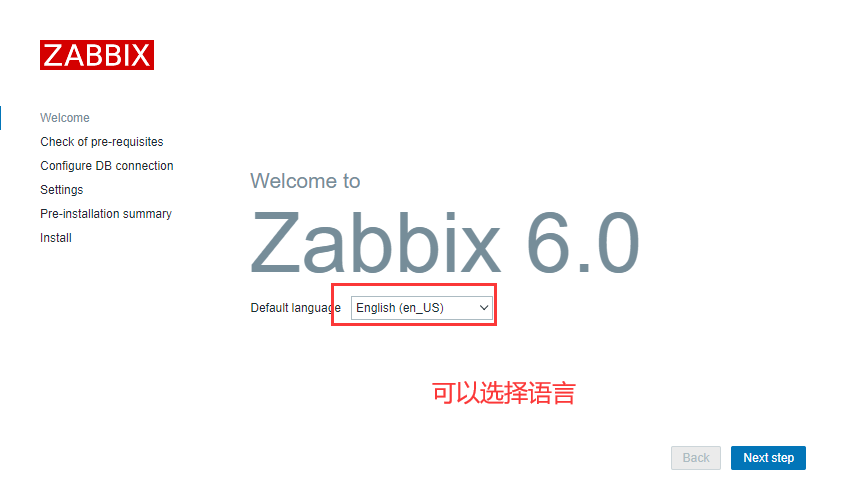
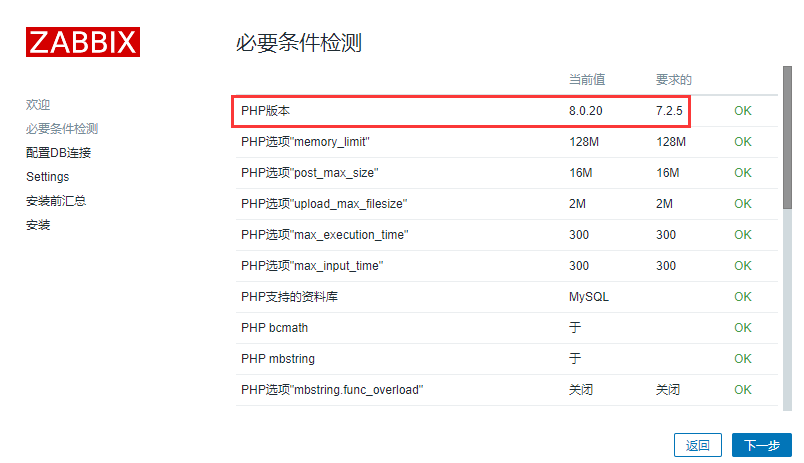
检测各个版本是否匹配,若不匹配会有提示
配置DB数据库连接, 此处的密码是在zabbix配置文件中输入的DBPasswd密码

设置时区,此时知道UTC+8 很重要,要不你还得找半天
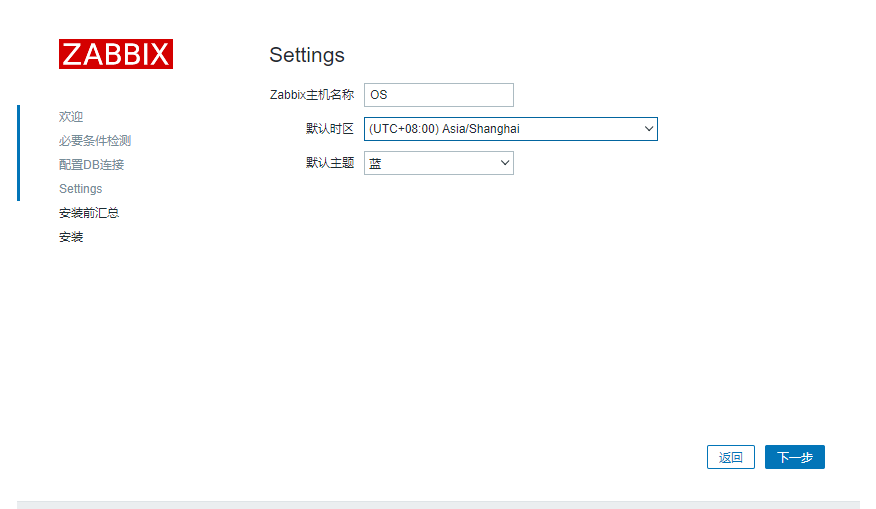
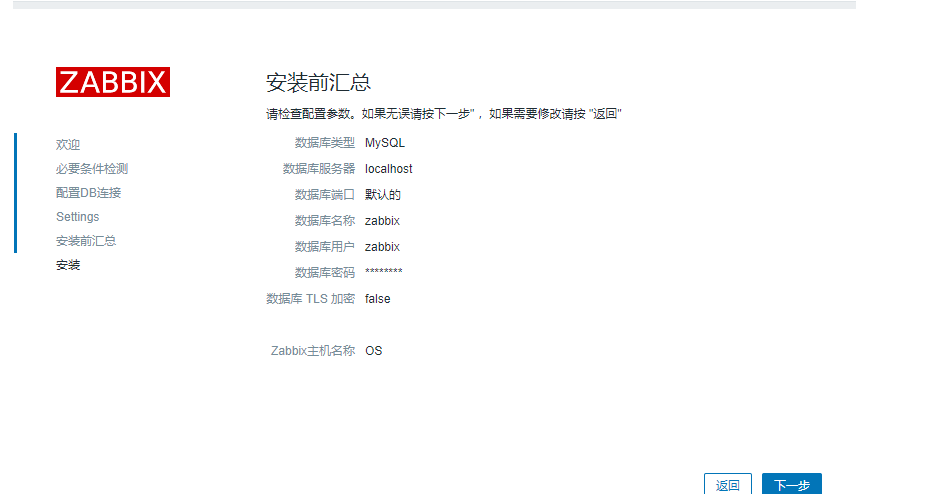
安装前的最后检查
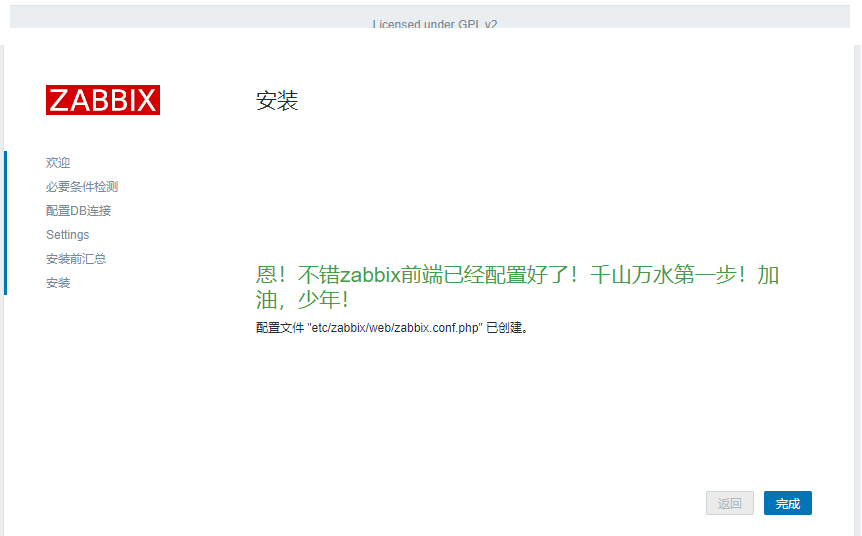
安装完成
2.10 登陆zabbix
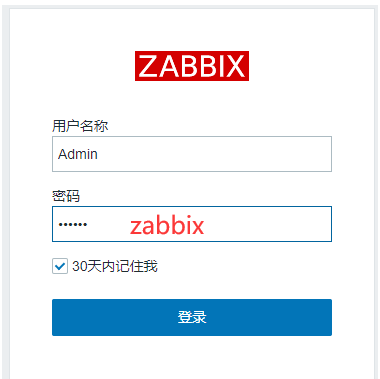
当出现如下图的内容:
用户名默认为: Admin
密码默认为: zabbix
输入后点击登陆即可登陆到如下界面:
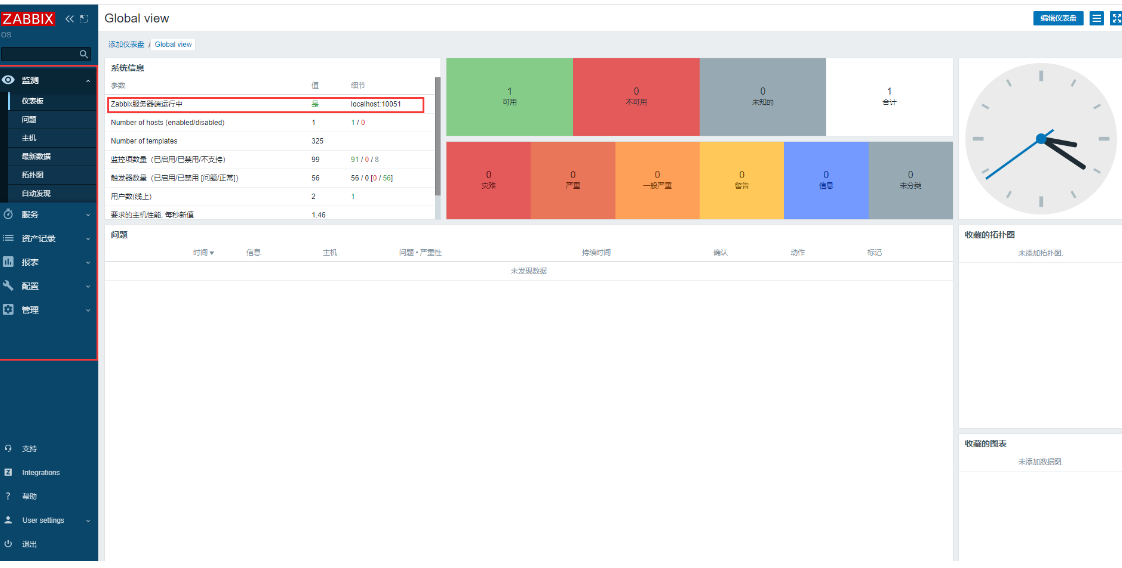
到此所有的安装就结束了,zabbix6.0部署成功。
(责任编辑:IT) |
