|
Maven(五):使用maven整合Struts2+Spring+Hibernate框架详细步骤
(项目的结构图参照文章尾部)
1、第一步:创建maven工程,在pom.xml文件中导入需要的jar包依赖:
<project xmlns="http://maven.apache.org/POM/4.0.0" xmlns:xsi="http://www.w3.org/2001/XMLSchema-instance" xsi:schemaLocation="http://maven.apache.org/POM/4.0.0 http://maven.apache.org/xsd/maven-4.0.0.xsd">
<modelVersion>4.0.0</modelVersion>
<groupId>com.zwp</groupId>
<artifactId>ssh</artifactId>
<version>0.0.1-SNAPSHOT</version>
<packaging>war</packaging>
<!-- 定义属性 -->
<properties>
<spring.version>4.2.4.RELEASE</spring.version>
<hibernate.version>5.0.7.Final</hibernate.version>
<struts.version>2.3.24</struts.version>
</properties>
<!-- 锁定版本,struts2-2.3.24、spring4.2.4、hibernate5.0.7 -->
<dependencyManagement>
<dependencies>
<dependency>
<groupId>org.springframework</groupId>
<artifactId>spring-context</artifactId>
<version>${spring.version}</version>
</dependency>
<dependency>
<groupId>org.springframework</groupId>
<artifactId>spring-aspects</artifactId>
<version>${spring.version}</version>
</dependency>
<dependency>
<groupId>org.springframework</groupId>
<artifactId>spring-orm</artifactId>
<version>${spring.version}</version>
</dependency>
<dependency>
<groupId>org.springframework</groupId>
<artifactId>spring-test</artifactId>
<version>${spring.version}</version>
</dependency>
<dependency>
<groupId>org.springframework</groupId>
<artifactId>spring-web</artifactId>
<version>${spring.version}</version>
</dependency>
<dependency>
<groupId>org.hibernate</groupId>
<artifactId>hibernate-core</artifactId>
<version>${hibernate.version}</version>
</dependency>
<dependency>
<groupId>org.apache.struts</groupId>
<artifactId>struts2-core</artifactId>
<version>${struts.version}</version>
</dependency>
<dependency>
<groupId>org.apache.struts</groupId>
<artifactId>struts2-spring-plugin</artifactId>
<version>${struts.version}</version>
</dependency>
</dependencies>
</dependencyManagement>
<!-- 依赖管理 -->
<dependencies>
<!-- spring -->
<dependency>
<groupId>org.springframework</groupId>
<artifactId>spring-context</artifactId>
</dependency>
<dependency>
<groupId>org.springframework</groupId>
<artifactId>spring-aspects</artifactId>
</dependency>
<dependency>
<groupId>org.springframework</groupId>
<artifactId>spring-orm</artifactId>
</dependency>
<dependency>
<groupId>org.springframework</groupId>
<artifactId>spring-test</artifactId>
</dependency>
<dependency>
<groupId>org.springframework</groupId>
<artifactId>spring-web</artifactId>
</dependency>
<!-- 导入 struts2 -->
<dependency>
<groupId>org.apache.struts</groupId>
<artifactId>struts2-core</artifactId>
</dependency>
<dependency>
<groupId>org.apache.struts</groupId>
<artifactId>struts2-spring-plugin</artifactId>
</dependency>
<!-- hibernate -->
<dependency>
<groupId>org.hibernate</groupId>
<artifactId>hibernate-core</artifactId>
</dependency>
<!-- 数据库驱动 -->
<dependency>
<groupId>mysql</groupId>
<artifactId>mysql-connector-java</artifactId>
<version>5.1.6</version>
<scope>runtime</scope>
</dependency>
<!-- c3p0 -->
<dependency>
<groupId>c3p0</groupId>
<artifactId>c3p0</artifactId>
<version>0.9.1.2</version>
</dependency>
<!-- servlet jsp -->
<dependency>
<groupId>javax.servlet</groupId>
<artifactId>servlet-api</artifactId>
<version>2.5</version>
<scope>provided</scope>
</dependency>
<dependency>
<groupId>javax.servlet</groupId>
<artifactId>jsp-api</artifactId>
<version>2.0</version>
<scope>provided</scope>
</dependency>
<!-- 日志 -->
<dependency>
<groupId>org.slf4j</groupId>
<artifactId>slf4j-log4j12</artifactId>
<version>1.7.2</version>
</dependency>
<!-- 单元测试 -->
<dependency>
<groupId>junit</groupId>
<artifactId>junit</artifactId>
<version>4.12</version>
<scope>test</scope>
</dependency>
<!-- jstl -->
<dependency>
<groupId>javax.servlet</groupId>
<artifactId>jstl</artifactId>
<version>1.2</version>
</dependency>
</dependencies>
<build>
<plugins>
<!-- 设置编译版本为1.8 -->
<plugin>
<groupId>org.apache.maven.plugins</groupId>
<artifactId>maven-compiler-plugin</artifactId>
<configuration>
<source>1.8</source>
<target>1.8</target>
<encoding>UTF-8</encoding>
</configuration>
</plugin>
<!-- 默认的tomcat6不支持jdk1.8,访问页面时报错:页面编译成.class失败
解决:配置tomcat7插件:mvn命令改为:tomcat7:run -->
<plugin>
<groupId>org.apache.tomcat.maven</groupId>
<artifactId>tomcat7-maven-plugin</artifactId>
<version>2.2</version>
<configuration>
<url>http://127.0.0.1:8080/manager/text</url>
<server>tomcat8</server>
<path>/ssh</path>
</configuration>
</plugin>
</plugins>
</build>
</project>
2、第二步:搭建struts2环境:
(1)创建action,创建struts.xml配置文件,配置action:
//Customer的web层:
public class CustomerAction extends ActionSupport {
//根据主键查询:
public String findOne() throws Exception{
return SUCCESS;
}
}
<?xml version="1.0" encoding="UTF-8"?>
<!DOCTYPE struts PUBLIC
"-//Apache Software Foundation//DTD Struts Configuration 2.3//EN"
"http://struts.apache.org/dtds/struts-2.3.dtd">
<struts>
<package name="demo" extends="struts-default" namespace="/">
<!-- 和spring整合后,action将交由spring创建,class的值写bean的id值 -->
<action name="customerAction_*" class="com.zwp.web.CustomerAction" method="{1}">
<result name="success">/index.jsp</result>
</action>
</package>
</struts>
(2)配置struts2的过滤器(web.xml文件):
<!-- 配置strut2过滤器 -->
<filter>
<filter-name>struts2</filter-name>
<filter-class>org.apache.struts2.dispatcher.ng.filter.StrutsPrepareAndExecuteFilter</filter-class>
</filter>
<filter-mapping>
<filter-name>struts2</filter-name>
<url-pattern>/*</url-pattern>
</filter-mapping>
3、第三步:搭建hibernate环境:
(1)创建实体类:
//Customer实体类:
public class Customer {
private String custId;
private String custName;
private String address;
public String getCustName() {
return custName;
}
public void setCustName(String custName) {
this.custName = custName;
}
public String getAddress() {
return address;
}
public void setAddress(String address) {
this.address = address;
}
public String getCustId() {
return custId;
}
public void setCustId(String custId) {
this.custId = custId;
}
}
(2)配置实体类和数据库表映射关系:Customer.hbm.xml
<?xml version="1.0" encoding="UTF-8"?>
<!DOCTYPE hibernate-mapping PUBLIC
"-//Hibernate/Hibernate Mapping DTD 3.0//EN"
"http://hibernate.sourceforge.net/hibernate-mapping-3.0.dtd">
<!-- 创建映射配置文件 -->
<hibernate-mapping>
<class name="com.zwp.domain.Customer" table="t_cust">
<id name="custId" column="custId">
<generator class="uuid"></generator>
</id>
<property name="custName" column="custName"></property>
<property name="address" column="address"></property>
</class>
</hibernate-mapping>
(3)创建hibernate核心配置文件:hibernate.cfg.xml
- 引入映射配置文件
<?xml version="1.0" encoding="UTF-8"?>
<!DOCTYPE hibernate-configuration PUBLIC
"-//Hibernate/Hibernate Configuration DTD 3.0//EN"
"http://hibernate.sourceforge.net/hibernate-configuration-3.0.dtd">
<hibernate-configuration>
<session-factory>
<property name="hibernate.dialect">org.hibernate.dialect.MySQL5Dialect</property>
<property name="hibernate.show_sql">true</property>
<property name="hibernate.format_sql">true</property>
<property name="hibernate.hbm2ddl.auto">update</property>
<!-- 把映射文件放到核心配置文件中 -->
<mapping resource="com/zwp/domain/Customer.hbm.xml" />
</session-factory>
</hibernate-configuration>
4、第四步:搭建spring环境:
(1)创建spring核心配置文件:applicationContext.xml
(2)让spring配置文件在服务器启动时候加载(web.xml文件)
- 配置监听器
- 指定spring配置文件位置
<!-- 配置监听器,并指定服务器在启动的时候加载配置文件 -->
<listener>
<listener-class>org.springframework.web.context.ContextLoaderListener</listener-class>
</listener>
<context-param>
<param-name>contextConfigLocation</param-name>
<param-value>classpath:applicationContext.xml</param-value>
</context-param>
5、第五步:struts2和spring整合:
(1)把action在spring配置(action多实例的):applicationContext.xml文件
<?xml version="1.0" encoding="utf-8"?>
<beans xmlns="http://www.springframework.org/schema/beans"
xmlns:xsi="http://www.w3.org/2001/XMLSchema-instance"
xmlns:context="http://www.springframework.org/schema/context"
xmlns:aop="http://www.springframework.org/schema/aop"
xmlns:tx="http://www.springframework.org/schema/tx"
xsi:schemaLocation="http://www.springframework.org/schema/beans
http://www.springframework.org/schema/beans/spring-beans.xsd
http://www.springframework.org/schema/context
http://www.springframework.org/schema/context/spring-context.xsd
http://www.springframework.org/schema/aop
http://www.springframework.org/schema/aop/spring-aop.xsd
http://www.springframework.org/schema/tx
http://www.springframework.org/schema/tx/spring-tx.xsd"
<!-- 创建对象与对象注入: -->
<bean id="customerAction" class="com.zwp.web.CustomerAction" scope="prototype"></bean>
</beans>
(2)在struts.xml中action标签class属性里面的值该写成 bean的id值:
<?xml version="1.0" encoding="UTF-8"?>
<!DOCTYPE struts PUBLIC
"-//Apache Software Foundation//DTD Struts Configuration 2.3//EN"
"http://struts.apache.org/dtds/struts-2.3.dtd">
<struts>
<package name="demo" extends="struts-default" namespace="/">
<!-- 将action的创建交由spring,class的值写bean的id值 -->
<action name="customerAction_*" class="customerAction" method="{1}">
<result name="success">/index.jsp</result>
</action>
</package>
</struts>
6、第六步:spring和hibernate整合:
(1)把hibernate核心配置文件中数据库配置,在spring里面配置:
(2)把hibernate的sessionFactory在spring配置
<!-- 加载属性文件 -->
<context:property-placeholder location="classpath:db.properties"/>
<!-- 配置连接池 -->
<bean id="dataSource" class="com.mchange.v2.c3p0.ComboPooledDataSource">
<property name="driverClass" value="${jdbc.driver}"></property>
<property name="jdbcUrl" value="${jdbc.url}"></property>
<property name="user" value="${jdbc.username}"></property>
<property name="password" value="${jdbc.password}"></property>
</bean>
<!-- 把hibernate的sessionFactory在spring配置文件中创建 -->
<bean id="sessionFactory" class="org.springframework.orm.hibernate5.LocalSessionFactoryBean">
<!-- 注入dataSource属性 -->
<property name="dataSource" ref="dataSource"></property>
<!-- 指定hibernate核心配置文件的位置 -->
<property name="configLocations" value="classpath:hibernate.cfg.xml"></property>
</bean>
db.properties文件:
jdbc.driver=com.mysql.jdbc.Driver
jdbc.url=jdbc:mysql:///ssh
jdbc.username=root
jdbc.password=admin
7、第七步:完成互相注入关系(在dao里面使用hibernateTemplate):
(1)在dao注入hibernateTemplate对象
(2)在hibernateTemplate对象中注入sessionFactory
(3)在service层注入dao层对象
(4)在web层注入service层对象
//Customer的Dao层接口
public interface CustomerDao {
Customer findOne(String custId);
}
//Customer的Dao层接口实现类,继承HibernateDaoSupport,该类已经注入了hibernateTemplate对象。
public class CustomerDaoImpl extends HibernateDaoSupport implements CustomerDao {
@Override
public Customer findOne(String custId) {
return this.getHibernateTemplate().get(Customer.class, custId);
}
}
//Customer的Service层接口:
public interface CustomerService {
Customer findOne(String custId);
}
//Customer的Service接口实现类:
public class CustomerServiceImpl implements CustomerService{
//注入CustomerDao
private CustomerDao customerDao;
public void setCustomerDao(CustomerDao customerDao) {
this.customerDao = customerDao;
}
public Customer findOne(String custId) {
return customerDao.findOne(custId);
}
}
//Customer的web层:
public class CustomerAction extends ActionSupport {
//注入CustomerService对象;
private CustomerService customerService;
public void setCustomerService(CustomerService customerService) {
this.customerService = customerService;
}
//属性注入:
private String custId;
public void setCustId(String custId) {
this.custId = custId;
}
//根据主键查询:
public String findOne() throws Exception{
Customer customer = customerService.findOne(custId);
ActionContext.getContext().getValueStack().push(customer);
return SUCCESS;
}
}
applicationContext.xml:
<!-- 开启事务注解:以下对象的创建和注入,可以使用注解创建 -->
<!-- 第一步:开启注解驱动;第二步:在类上使用注解 -->
<!-- <tx:annotation-driven transaction-manager="transactionManager"/> -->
<!-- 创建对象与对象注入: -->
<bean id="customerDao" class="com.zwp.dao.impl.CustomerDaoImpl">
<property name="sessionFactory" ref="sessionFactory"></property>
</bean>
<bean id="customerService" class="com.zwp.service.impl.CustomerServiceImpl">
<property name="customerDao" ref="customerDao"></property>
</bean>
<bean id="customerAction" class="com.zwp.web.CustomerAction" scope="prototype">
<property name="customerService" ref="customerService"></property>
</bean>
(5)之前在hibernate配置与本地线程绑定的session:
<!-- 配置与本地线程绑定的session -->
<property name="hibernate.current_session_context_class">thread</property>
在hibernate与spring整合后,不需要在spring里面配置与本地线程绑定的session。
8、第八步:配置事务:(applicationContext.xml)
<!-- 配置事务 -->
<bean id="transactionManager" class="org.springframework.orm.hibernate5.HibernateTransactionManager">
<!-- 注入sessionFactory,因为sessionFactory里面包含了dataSource对象 -->
<property name="sessionFactory" ref="sessionFactory"></property>
</bean>
<!-- xml方式管理事务: -->
<!-- 配置通知:具体增强逻辑 -->
<tx:advice id="txAdvice">
<tx:attributes>
<!-- 匹配业务类中方法名称 -->
<tx:method name="save*"/>
<tx:method name="update*"/>
<tx:method name="delete*"/>
<tx:method name="find*" read-only="true"/>
<tx:method name="*"/>
</tx:attributes>
</tx:advice>
<!-- 配置aop -->
<aop:config>
<!-- 配置切点:具体哪些方法要增强(真正被增强的方法) -->
<aop:pointcut expression="execution(* com.zwp.serviec.*.*(..))" id="cut"/>
<!-- 配置切面:将增强逻辑作用到切点 -->
<aop:advisor advice-ref="txAdvice" pointcut-ref="cut"/>
</aop:config>
9、第九步:编写成功页面index.jsp:
<%@ page language="java" contentType="text/html; charset=utf-8" pageEncoding="utf-8"%>
<%@ taglib prefix="s" uri="/struts-tags"%>
<!DOCTYPE html PUBLIC "-//W3C//DTD HTML 4.01 Transitional//EN" "http://www.w3.org/TR/html4/loose.dtd">
<html>
<head>
<meta http-equiv="Content-Type" content="text/html; charset=utf-8">
<title>主页</title>
</head>
<body>
<!-- 取出push进值栈里面的值 -->
<s:property value="custName"/>
欢迎光临
</body>
</html>
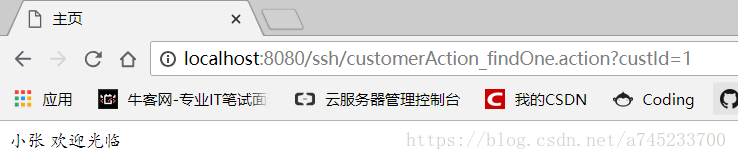
10、第十步 启动并测试:
(1)启动maven项目输入命令:tomcat7:run。
(2)在浏览器地址栏输入:http://localhost:8080/ssh/customerAction_findOne.action?custId=1
(3)出现以下界面和数据则代表成功:
附:项目的工程结构:
 (责任编辑:IT) |