|
https(全称:Hyper Text Transfer Protocol over Secure Socket Layer),是以安全为目标的 http 通道,简单讲是 http 的安全版。即 http 下加入 SSL 层,https 的安全基础是 SSL,因此加密的详细内容就需要 SSL。
一、使用 OpenSSL 生成证书请求 openssl genrsa -out teddysun.pem 2048 Generating RSA private key, 2048 bit long modulus .........................+++ ................................................................+++ e is 65537 (0x10001) 生成 csr 证书请求 openssl req -new -sha256 -key teddysun.pem -out teddysun.csr You are about to be asked to enter information that will be incorporated into your certificate request. What you are about to enter is what is called a Distinguished Name or a DN. There are quite a few fields but you can leave some blank For some fields there will be a default value, If you enter '.', the field will be left blank. ----- Country Name (2 letter code) [XX]:CN // 国家代码 State or Province Name (full name) []:Shanghai // 省 Locality Name (eg, city) [Default City]:Shanghai // 城市 Organization Name (eg, company) [Default Company Ltd]:Teddysun // 组织或公司名 Organizational Unit Name (eg, section) []: // 不填 Common Name (eg, your name or your server's hostname) []:*.teddysun.com // 此处演示是通配符域名,一般带 www 前缀即可 Email Address []:admin@teddysun.com // 邮箱地址 Please enter the following 'extra' attributes to be sent with your certificate request A challenge password []: // 不填 An optional company name []: // 不填 查看生成完毕的文件 ll *.pem *.csr -rw-r--r-- 1 root root 1058 Jan 22 14:30 teddysun.csr -rw-r--r-- 1 root root 1675 Jan 22 14:25 teddysun.pem 将上述 2 个文件下载到本地,用记事本打开 teddysun.csr,里面的完整内容就是证书请求了。 二、签发证书
如果需要默认受信任的证书,则需要花钱购买了。比如
另外,证书可以自签,但是使用的时候需要安装根证书,否则便不受信任。 生成根证书 rsa 私钥(2048位) openssl genrsa -out ca.pem 2048 Generating RSA private key, 2048 bit long modulus ...............................................+++ .........+++ e is 65537 (0x10001) 利用私钥创建根证书 openssl req -new -x509 -days 3650 -key ca.pem -out ca.crt You are about to be asked to enter information that will be incorporated into your certificate request. What you are about to enter is what is called a Distinguished Name or a DN. There are quite a few fields but you can leave some blank For some fields there will be a default value, If you enter '.', the field will be left blank. ----- Country Name (2 letter code) [XX]:CN State or Province Name (full name) []:Shanghai Locality Name (eg, city) [Default City]:Shanghai Organization Name (eg, company) [Default Company Ltd]:Teddysun Organizational Unit Name (eg, section) []: Common Name (eg, your name or your server's hostname) []:teddysun.com Root CA Email Address []:admin@teddysun.com
至此,有效期为 3650 天的根证书 ca.crt 就创建完毕了。 ll *.pem *.csr *.crt -rw-r--r-- 1 root root 1411 Jan 22 15:14 ca.crt -rw-r--r-- 1 root root 1679 Jan 22 14:48 ca.pem -rw-r--r-- 1 root root 1041 Jan 22 14:40 teddysun.csr -rw-r--r-- 1 root root 1675 Jan 22 14:25 teddysun.pem 利用根证书签发 ssl 证书 openssl ca -in teddysun.csr -out teddysun.crt -cert ca.crt -keyfile ca.pem 这一步出错了,错误信息如下
Using configuration from /etc/pki/tls/openssl.cnf
/etc/pki/CA/index.txt: No such file or directory
unable to open '/etc/pki/CA/index.txt'
140292081481544:error:02001002:system library:fopen:No such file or directory:bss_file.c:398:fopen('/etc/pki/CA/index.txt','r')
140292081481544:error:20074002:BIO routines:FILE_CTRL:system lib:bss_file.c:400:
提示缺少文件,那我们就生成一个空文件 touch /etc/pki/CA/index.txt 继续执行 openssl ca -in teddysun.csr -out teddysun.crt -cert ca.crt -keyfile ca.pem 又出错了,错误信息如下
Using configuration from /etc/pki/tls/openssl.cnf
/etc/pki/CA/serial: No such file or directory
error while loading serial number
140375536244552:error:02001002:system library:fopen:No such file or directory:bss_file.c:398:fopen('/etc/pki/CA/serial','r')
140375536244552:error:20074002:BIO routines:FILE_CTRL:system lib:bss_file.c:400:
还是缺少文件,这里生成一个内容为 01 的文件 echo '01' > /etc/pki/CA/serial 再次执行
openssl ca -in teddysun.csr -out teddysun.crt -cert ca.crt -keyfile ca.pem

Using configuration from /etc/pki/tls/openssl.cnf
Check that the request matches the signature
Signature ok
Certificate Details:
        Serial Number: 1 (0x1)
        Validity
            Not Before: Jan 22 07:35:14 2015 GMT
            Not After : Jan 22 07:35:14 2016 GMT
        Subject:
            countryName               = CN
            stateOrProvinceName       = Shanghai
            organizationName          = Teddysun
            commonName                = *.teddysun.com
            emailAddress              = admin@teddysun.com
        X509v3 extensions:
            X509v3 Basic Constraints:
                CA:FALSE
            Netscape Comment:
                OpenSSL Generated Certificate
            X509v3 Subject Key Identifier:
                E8:7F:9E:BE:12:25:22:48:A2:49:AE:D5:CB:A6:7B:24:EE:A6:E2:5B
            X509v3 Authority Key Identifier:
                keyid:C7:0C:EF:F2:73:8C:CB:01:7A:8F:9C:30:A7:80:37:FA:E7:B6:88:02

Certificate is to be certified until Jan 22 07:35:14 2016 GMT (365 days)
Sign the certificate? [y/n]:y


1 out of 1 certificate requests certified, commit? [y/n]y
Write out database with 1 new entries
Data Base Updated
至此,就签发了一个默认有效期为 365 天的通配符域名 *.teddysun.com 的 ssl 证书了。 openssl ca -in teddysun.csr -out teddysun2.crt -days 730 -cert ca.crt -keyfile ca.pem 最长不能超过根证书的有效期。 查看最终生成完毕的文件 ll *.pem *.csr *.crt -rw-r--r-- 1 root root 1411 Jan 22 15:14 ca.crt -rw-r--r-- 1 root root 1679 Jan 22 14:48 ca.pem -rw-r--r-- 1 root root 4594 Jan 22 15:35 teddysun.crt -rw-r--r-- 1 root root 1041 Jan 22 14:40 teddysun.csr -rw-r--r-- 1 root root 1675 Jan 22 14:25 teddysun.pem
分别解释一下这 5 个文件。
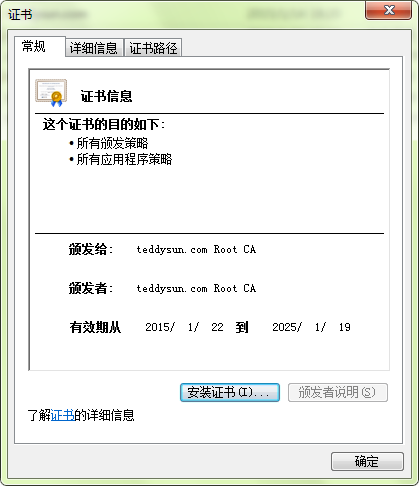
如果要使用自签名的证书,需要在本机导入根证书,步骤如下:
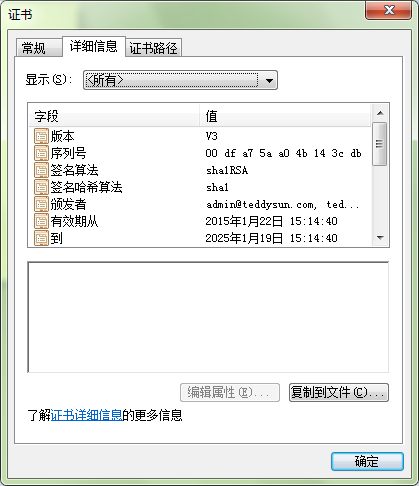
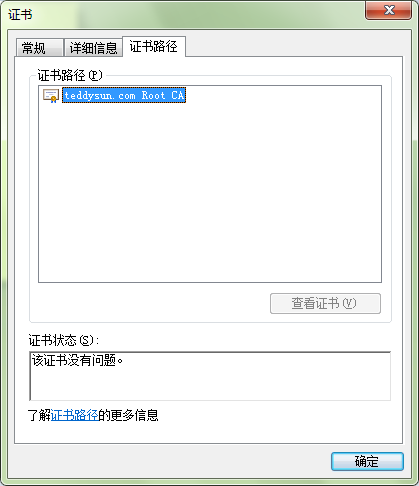
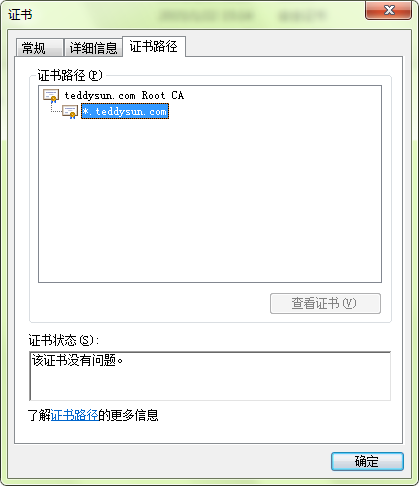
安装好根证书后,再打开后,就是这个样子的:
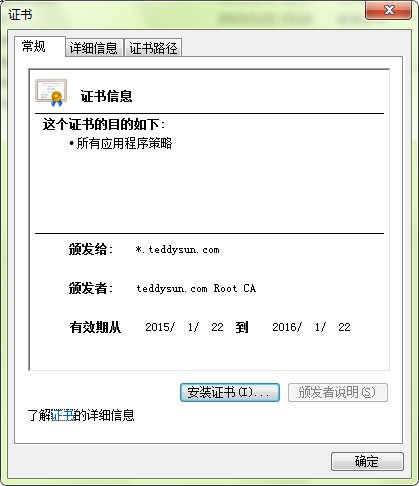
自签名证书则是这个样子的:
三、在 Apache 下部署 ssl 证书
首先需要合并一下证书文件,用记事本打开 ca.crt 文件,全选,复制,再用记事本打开 teddysun.crt ,在其内容的最后,回车,粘贴 ca.crt 的全部内容,保存。
在安装完 LAMP 环境后,默认是没有加载 https 配置的,这里需要修改一下配置文件 /usr/local/apache/conf/httpd.conf ,找到下面的
Listen 443
SSLPassPhraseDialog  builtin
SSLSessionCache  "shmcb:/usr/local/apache/logs/ssl_scache(512000)"
SSLSessionCacheTimeout  300

<VirtualHost *:443>
	DocumentRoot /data/www/default/
	ServerName teddysun.com
	ServerAlias www.teddysun.com
	ErrorLog "/usr/local/apache/logs/lamp_error_log"
	TransferLog "/usr/local/apache/logs/lamp_access_log"

	SSLEngine on
	SSLProtocol All -SSLv2 -SSLv3
	SSLHonorCipherOrder on
	SSLCipherSuite ALL:!aNULL:!eNULL:!EXPORT:!DES:!RC4:!MD5:!PSK:!aECDH:!EDH-DSS-DES-CBC3-SHA:!EDH-RSA-DES-CBC3-SHA:!KRB5-DES-CBC3-SHA

	SSLCertificateFile /usr/local/apache/conf/teddysun.crt
	SSLCertificateKeyFile /usr/local/apache/conf/teddysun.pem
	SSLCACertificateFile /usr/local/apache/conf/root.pem

	CustomLog "/usr/local/apache/logs/lamp_ssl_request_log" \
		"%t %h %{SSL_PROTOCOL}x %{SSL_CIPHER}x \"%r\" %b \"%{Referer}i\" \"%{User-Agent}i\""

	BrowserMatch "MSIE [2-5]" \
		nokeepalive ssl-unclean-shutdown \
		downgrade-1.0 force-response-1.0

	<Directory /data/www/default/>
		Options -Indexes +FollowSymLinks
		AllowOverride All
		Require all granted
	</Directory>
</VirtualHost>
上述配置都修改完毕后,注意防火墙要放行 443 端口。查看防火墙状态: /etc/init.d/iptables status 然后再重启 Apache ,命令: /etc/init.d/httpd restart
好了,现在就可以愉快地用 https 访问网站了。 |

