-
Zabbix Server安装
创建Zabbix运行的用户:
# groupadd zabbix
# useradd -g zabbix zabbix
安装libcurl和net-snmp:
# yum install net-snmp-devel curl-devel
安装Fping:
# wget -c http://fping.org/dist/fping-3.4.tar.gz
# tar zxvf fping-3.4.tar.gz
# cd fping-3.4
# ./configure
# make && make install
# chown root:zabbix /usr/local/sbin/fping
# chmod 4710 /usr/local/sbin/fping
安装Zabbix Server:
# wget -c http://downloads.sourceforge.net/project/zabbix/ZABBIX%20Latest%20Stable/2.0.6/zabbix-2.0.6.tar.gz?r=http%3A%2F%2Fsourceforge.net%2Fprojects%2Fzabbix%2F%3Fsource%3Ddlp&ts=1367916060&use_mirror=ncu
# tar zxvf zabbix-2.0.6.tar.gz
# cd zabbix-2.0.6
# ./configure --prefix=/usr/local/zabbix --enable-server --enable-agent --with-mysql=/usr/local/mysql/bin/mysql_config --with-net-snmp --with-libcurl
# make && make install
-
Zabbix Server配置与启动
创建Zabbix数据库和MySQL用户:
mysql> create schema zabbix character set utf8;
Query OK, 1 row affected (0.05 sec)

mysql> create user 'zabbix'@'%' identified by '123456';
Query OK, 0 rows affected (0.16 sec)

mysql> grant all on zabbix.* to 'zabbix'@'%';
Query OK, 0 rows affected (0.03 sec)

mysql> flush privileges;
Query OK, 0 rows affected (0.04 sec)
导入Zabbix初始数据:
# cd database/mysql/
# mysql -uroot -p
mysql> set sql_log_bin=0;
mysql> source ./schema.sql;
mysql> source ./images.sql;
mysql> source ./data.sql;
mysql> set sql_log_bin=1;
编辑/usr/local/zabbix/etc/zabbix_server.conf:
LogFile=/usr/local/zabbix/logs/zabbix_server.log
PidFile=/usr/local/zabbix/logs/zabbix_server.pid
DBHost=192.168.1.190
DBName=zabbix
DBUser=zabbix
DBPassword=123456
DBPort=3306
FpingLocation=/usr/local/sbin/fping
从安装目录拷贝zabbix_server脚本,并编辑:
# cd zabbix-2.0.6
# cp misc/init.d/Fedora/core5/zabbix_server /etc/init.d/
# mkdir -p /usr/local/zabbix/logs
# chown -R zabbix:zabbix /usr/local/zabbix
# vi /etc/init.d/zabbix_server
# cat /etc/init.d/zabbix_server
...
ZABBIX_BIN="/usr/local/zabbix/sbin/zabbix_server"
CONF_FILE="/usr/local/zabbix/etc/zabbix_server.conf"
...
start() {
        ...
        daemon $ZABBIX_BIN -c $CONF_FILE
        ...
}
调整防火墙规则(开放端口10051):
# vi /etc/sysconfig/iptables
...
-A INPUT -p tcp -m state --state NEW -m tcp --dport 10051 -j ACCEPT
...
# /etc/init.d/iptables restart
启动Zabbix Server:
# service zabbix_server start
Starting Zabbix Server:                                    [  OK  ]
停止Zabbix Server:
# service zabbix_server stop
Stopping Zabbix Server:                                    [  OK  ]
配置开机自动启动:
# chkconfig --add zabbix_server
# chkconfig --level 35 zabbix_server on
-
Zabbix的Web前端
在安装目录将frontends拷贝到指定的web root:
# mkdir -p /data/www/zabbix
# cd zabbix-2.0.6
# cp -a frontends/php/* /data/www/zabbix/
# chown -R www:www /data/www/zabbix
Nginx配置:
# cat /usr/local/nginx/conf/nginx.conf
...
server {
    listen 80;
    server_name zabbix.zrwm.com;

    error_log logs/zabbix_error.log;
    access_log logs/zabbix_access.log;

    root /data/www/zabbix;
    index index.php index.html index.htm;

    location ~ \.php$ {
        fastcgi_pass   127.0.0.1:9000;
        fastcgi_index  index.php;
        fastcgi_param  SCRIPT_FILENAME  $document_root$fastcgi_script_name;
        include        fastcgi_params;
    }
}
...
php.ini配置:
...
memory_limit = 128M
post_max_size = 16M
max_execution_time = 300
max_input_time = 300
session.auto_start = 0  ;必须为0
mbstring.func_overload = 2
...
注:PHP需要至少开启扩展:gd,bcmath,ctype,libXML,xmlreader,xmlwriter,session,sockets,mbstring,gettext,mysql
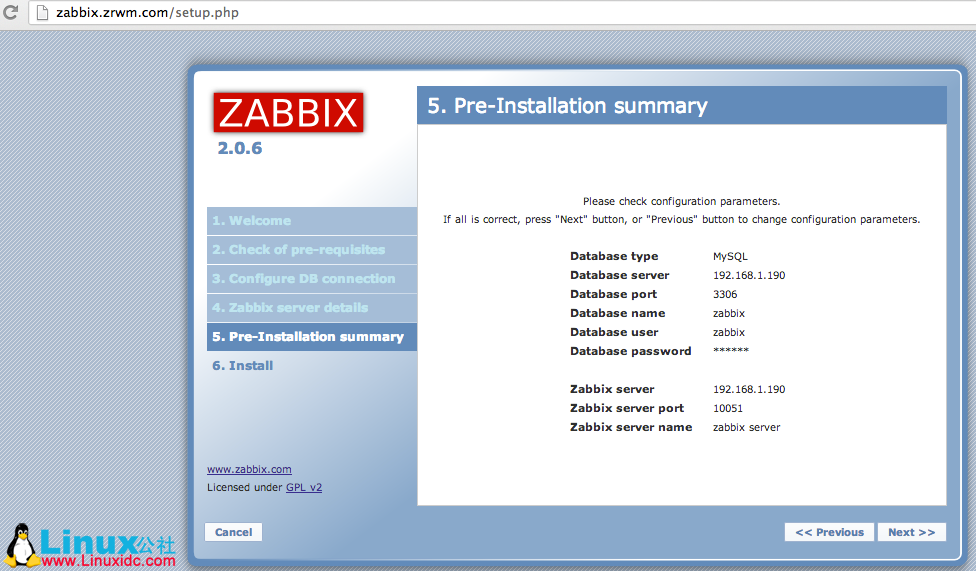
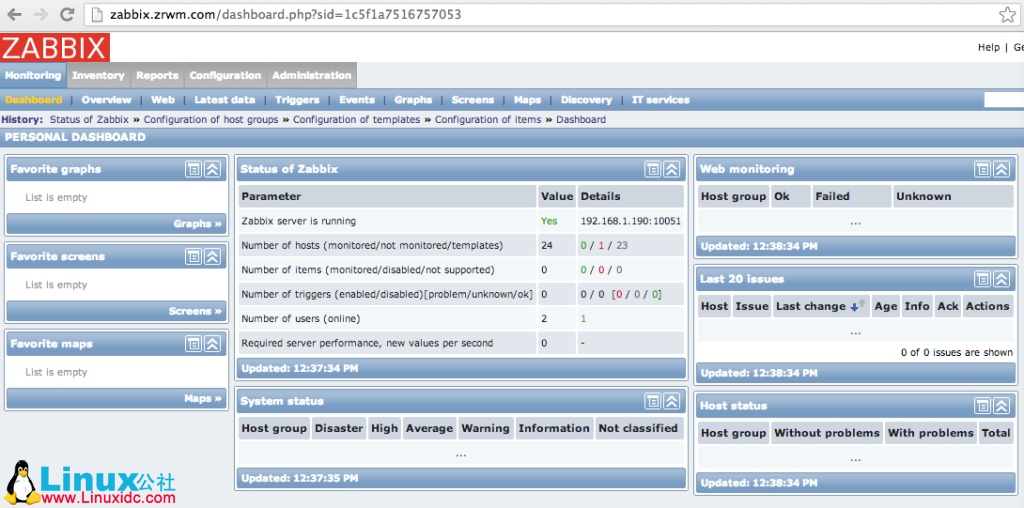
访问Web界面http://zabbix.zrwm.com,进行相关web配置,配置完成后使用默认用户admin(密码:zabbix)登陆即可.