|
大纲
一、前言
二、环境准备
三、安装与配置Nginx
四、Nginx之反向代理
五、Nginx之负载均衡
六、Nginx之页面缓存
七、Nginx之URL重写
八、Nginx之读写分离
注,操作系统为 CentOS 6.4 x86_64 , Nginx 是版本是最新版的1.4.2,系统可以到这里下:http://www.centoscn.com/CentosSoft/iso/2013/0720/371.html
一、前言
在前面的几篇博文中我们主要讲解了Nginx作为Web服务器知识点,主要的知识点有nginx的理论详解、nginx作为web服务器的操作讲解、nginx作为LNMP架构的讲解,不清楚的博友可以回头看看,在这一篇博客中我们主要讲解, nginx的反向代理、负载均衡、缓存、URL重写以及读写分离详解。好了,下面我们来具体说一说。
二、环境准备
1. 操作系统
2.软件版本
3.实验拓扑
注,实验拓扑见下文。
4.安装yum源
[root@nginx ~]
[root@web1 ~]
[root@web2 ~]
|
5.各节点时间同步
[root@nginx ~]
[root@web1 ~]
[root@web2 ~]
|
6.关闭防火墙与SELinux
[root@nginx ~]
[root@nginx ~]
[root@nginx ~]
Disabled
[root@web1 ~]
[root@web1 ~]
[root@web1 ~]
Disabled
[root@web2 ~]
[root@web2 ~]
[root@web2 ~]
Disabled
|
三、安装Nginx
1.解压
2.新建nginx用户与组
[root@nginx src]
[root@nginx src]
[root@nginx src]
uid=108(nginx) gid=108(nginx) 组=108(nginx)
|
3.准备编译配置文件
[root@nginx src]
[root@nginx nginx-1.4.2]
|
4.编译并安装
5.为nginx提供SysV init脚本
[root@nginx ~]
. /etc/rc.d/init.d/functions
. /etc/sysconfig/network
[ "$NETWORKING" = "no" ] && exit 0
nginx="/usr/sbin/nginx"
prog=$(basename $nginx)
NGINX_CONF_FILE="/etc/nginx/nginx.conf"
[ -f /etc/sysconfig/nginx ] && . /etc/sysconfig/nginx
lockfile=/var/lock/subsys/nginx
make_dirs() {
user=`nginx -V 2>&1 | grep "configure arguments:" | sed 's/[^*]*--user=\([^ ]*\).*/\1/g' -`
options=`$nginx -V 2>&1 | grep 'configure arguments:'`
for opt in $options; do
if [ `echo $opt | grep '.*-temp-path'` ]; then
value=`echo $opt | cut -d "=" -f 2`
if [ ! -d "$value" ]; then
mkdir -p $value && chown -R $user $value
fi
fi
done
}
start() {
[ -x $nginx ] || exit 5
[ -f $NGINX_CONF_FILE ] || exit 6
make_dirs
echo -n $"Starting $prog: "
daemon $nginx -c $NGINX_CONF_FILE
retval=$?
echo
[ $retval -eq 0 ] && touch $lockfile
return $retval
}
stop() {
echo -n $"Stopping $prog: "
killproc $prog -QUIT
retval=$?
echo
[ $retval -eq 0 ] && rm -f $lockfile
return $retval
}
restart() {
configtest || return $?
stop
sleep 1
start
}
reload() {
configtest || return $?
echo -n $"Reloading $prog: "
killproc $nginx -HUP
RETVAL=$?
echo
}
force_reload() {
restart
}
configtest() {
$nginx -t -c $NGINX_CONF_FILE
}
rh_status() {
status $prog
}
rh_status_q() {
rh_status >/dev/null 2>&1
}
case "$1" in
start)
rh_status_q && exit 0
$1
;;
stop)
rh_status_q || exit 0
$1
;;
restart|configtest)
$1
;;
reload)
rh_status_q || exit 7
$1
;;
force-reload)
force_reload
;;
status)
rh_status
;;
condrestart|try-restart)
rh_status_q || exit 0
;;
*)
echo $"Usage: $0 {start|stop|status|restart|condrestart|try-restart|reload|force-reload|configtest}"
exit 2
esac
|
6.为此脚本赋予执行权限
7.添加至服务管理列表,并让其开机自动启动
[root@nginx ~]
[root@nginx ~]
[root@nginx ~]
nginx 0:关闭 1:关闭 2:启用 3:启用 4:启用 5:启用 6:关闭
|
8.启动nginx
[root@nginx ~]
正在启动 nginx: [确定]
|
9.查看一下端口
[root@nginx ~]
tcp 0 0 0.0.0.0:80 0.0.0.0:* LISTEN 3889/nginx
|
10.测试一下
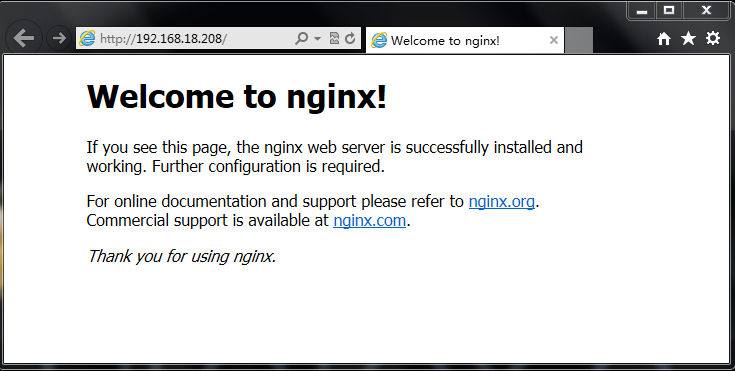
好了,Nginx安装与配置就到这里,下面我们来说一说Nginx的反向代理。
四、Nginx之反向代理
在配置nginx反向代理之间我们得先准备两台测试服务器,Web1与Web2。
1.安装httpd
[root@web1 ~]
[root@web2 ~]
|
2.提供测试页面
[root@web1 ~]
[root@web2 ~]
|
3.启动httpd服务
[root@web1 ~]
正在启动 httpd: [确定]
[root@web2 ~]
正在启动 httpd: [确定]
|
4.测试一下

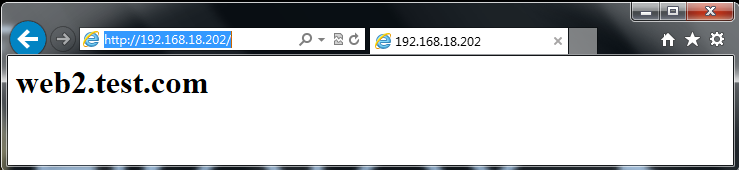
5.简单说一下,正向代理与反向代理
(1).正向代理的概念
正向代理,也就是传说中的代理,他的工作原理就像一个跳板,简单的说,我是一个用户,我访问不了某网站,但是我能访问一个代理服务器,这个代理服务器呢,他能访问那个我不能访问的网站,于是我先连上代理服务器,告诉他我需要那个无法访问网站的内容,代理服务器去取回来,然后返回给我。从网站的角度,只在代理服务器来取内容的时候有一次记录,有时候并不知道是用户的请求,也隐藏了用户的资料,这取决于代理告不告诉网站。
结论就是,正向代理 是一个位于客户端和原始服务器(origin server)之间的服务器,为了从原始服务器取得内容,客户端向代理发送一个请求并指定目标(原始服务器),然后代理向原始服务器转交请求并将获得的内容返回给客户端。客户端必须要进行一些特别的设置才能使用正向代理。
(2).反向代理的概念
继续举例:
例用户访问 http://www.test.com/readme,但www.test.com上并不存在readme页面,他是偷偷从另外一台服务器上取回来,然后作为自己的内容返回用户,但用户并不知情。这里所提到的 www.test.com 这个域名对应的服务器就设置了反向代理功能。
结论就是,反向代理正好相反,对于客户端而言它就像是原始服务器,并且客户端不需要进行任何特别的设置。客户端向反向代理的命名空间(name-space)中的内容发送普通请求,接着反向代理将判断向何处(原始服务器)转交请求,并将获得的内容返回给客户端,就像这些内容原本就是它自己的一样。
(3).两者区别
从用途上来讲:
正向代理的典型用途是为在防火墙内的局域网客户端提供访问Internet的途径。正向代理还可以使用缓冲特性减少网络使用率。反向代理的典型用途是将防火墙后面的服务器提供给Internet用户访问。反向代理还可以为后端的多台服务器提供负载平衡,或为后端较慢的服务器提供缓冲服务。另外,反向代理还可以启用高级URL策略和管理技术,从而使处于不同web服务器系统的web页面同时存在于同一个URL空间下。
从安全性来讲:
正向代理允许客户端通过它访问任意网站并且隐藏客户端自身,因此你必须采取安全措施以确保仅为经过授权的客户端提供服务。反向代理对外都是透明的,访问者并不知道自己访问的是一个代理。
6.nginx 代理模块
http 代理官方中文文档:http://www.howtocn.org/nginx:nginx%E6%A8%A1%E5%9D%97%E5%8F%82%E8%80%83%E6%89%8B%E5%86%8C%E4%B8%AD%E6%96%87%E7%89%88:standardhttpmodules:httpproxy
说明:代理模块的指令有很多我这里只讲解重要的proxy_pass,想了解更多代理指令请参考官方中文文档。
这个模块可以转发请求到其他的服务器。HTTP/1.0无法使用keepalive(后端服务器将为每个请求创建并且删除连接)。nginx为浏览器发送HTTP/1.1并为后端服务器发送HTTP/1.0,这样浏览器就可以为浏览器处理keepalive。
如下例:
location / {
proxy_pass http://localhost:8000;
proxy_set_header X-Real-IP $remote_addr;
}
|
注意,当使用http proxy模块(甚至FastCGI),所有的连接请求在发送到后端服务器之前nginx将缓存它们,因此,在测量从后端传送的数据时,它的进度显示可能不正确。
实验拓扑:
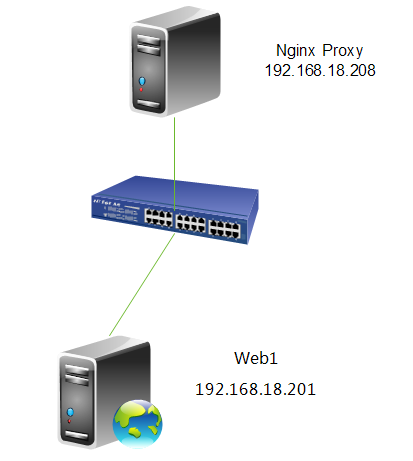
需求分析,前端一台nginx做负载均衡反向代理,后面两台httpd服务器。整个架构是提供BBS(论坛)服务,有一需求得实现读写分离,就是上传附件的功能,我们上传的附件只能上传到Web1,然后在Web1上利用rsync+inotify实现附件同步,大家都知道rsync+inotify只能是主向从同步,不能双向同步。所以Web1可进行写操作,而Web2只能进行读操作,这就带来读写分离的需求,下面我们就来说一下,读写分离怎么实现。
2.WebDAV功能说明
WebDAV (Web-based Distributed Authoring and Versioning) 一种基于 HTTP 1.1协议的通信协议。它扩展了HTTP 1.1,在GET、POST、HEAD等几个HTTP标准方法以外添加了一些新的方法,使应用程序可直接对Web Server直接读写,并支持写文件锁定(Locking)及解锁(Unlock),还可以支持文件的版本控制。这样我们就能配置读写分离功能了,下面我们来具体配置一下。
3.修改配置文件
|
1
2
3
4
5
6
7
8
9
10
11
12
13
|
[root@nginx nginx]
server {
listen 80;
server_name localhost;
location / {
proxy_pass http://192.168.18.202;
if ($request_method = "PUT"){
proxy_pass http://192.168.18.201;
}
}
}
|
4.重新加载一下配置文件
|
1
2
3
4
|
[root@nginx ~]
nginx: the configuration file /etc/nginx/nginx.conf syntax is ok
nginx: configuration file /etc/nginx/nginx.conf test is successful
重新载入 nginx: [确定]
|
5.配置httpd的WebDAV功能

注,在<Directory "/var/www/html">下启用就行。
6.重新启动一下httpd
|
1
2
3
|
[root@web1 ~]
停止 httpd: [确定]
正在启动 httpd: [确定]
|
7.测试一下
|
1
2
3
4
|
[root@nginx ~]
<h1>web1.test.com</h1>
[root@nginx ~]
<h1>web2.test.com</h1>
|
注,web1与web2访问都没问题。
|
1
2
3
4
5
6
7
8
9
10
|
[root@nginx ~]
<!DOCTYPE HTML PUBLIC "-//IETF//DTD HTML 2.0//EN">
<html><head>
<title>405 Method Not Allowed</title>
</head><body>
<h1>Method Not Allowed</h1>
The requested method PUT is not allowed for the URL /issue.
<hr>
<address>Apache/2.2.15 (CentOS) Server at 192.168.18.202 Port 80</address>
</body></html>
|
注,我们上传文件到,web2上时,因为web2只人读功能,所以没有开户WebDAV功能,所以显示是405 Method Not Allowed。
|
1
2
3
4
5
6
7
8
9
10
11
|
[root@nginx ~]
<!DOCTYPE HTML PUBLIC "-//IETF//DTD HTML 2.0//EN">
<html><head>
<title>403 Forbidden</title>
</head><body>
<h1>Forbidden</h1>
You don't have permission to access /issue
on this server.
<hr>
<address>Apache/2.2.15 (CentOS) Server at 192.168.18.201 Port 80</address>
</body></html>
|
注,我们在Web1开启了WebDAV功能,但我们目录是root目录是不允许apache用户上传的,所以显示的是403 Forbidden。下面我们给apache授权,允许上传。
下面我们再来测试一下,
|
1
2
3
4
5
6
7
8
9
10
|
[root@nginx ~]
<!DOCTYPE HTML PUBLIC "-//IETF//DTD HTML 2.0//EN">
<html><head>
<title>201 Created</title>
</head><body>
<h1>Created</h1>
Resource /issue has been created.
<hr />
<address>Apache/2.2.15 (CentOS) Server at 192.168.18.201 Port 80</address>
</body></html>
|
注,大家可以看到我们成功的上传了文件,说明nginx读写分离功能配置完成。最后,我们来查看一下上传的文件。
|
1
2
3
4
5
6
|
[root@web1 ~]
[root@web1 html]
总用量 12
drwxr-xr-x 2 root root 4096 9月 4 13:16 forum
-rw-r--r-- 1 root root 23 9月 3 23:37 index.html
-rw-r--r-- 1 apache apache 47 9月 4 14:06 issue
|
好了,到这里nginx的反向代理、负载均衡、页面缓存、URL重写及读写分离就全部讲解完成。希望大家有所收获
(责任编辑:IT) |
