centos5.5简单内核升级
时间:2014-12-12 02:39 来源:linux.it.net.cn 作者:IT
相信很多人都听过不要随便升级内核,但很多时候出去面试,第一句就问你会升级内核吗?为了解决这样尴尬的局面,最少我们都要知道怎样去升级内核.
系统:centos 5.5
需要的软件包:linux-2.6.36.tar.bz2
1.下载内核包
wget --no-check-certificate http://www.kernel.org/pub/linux/kernel/v2.6/linux-2.6.36.tar.bz2
2.准备编译工具
yum -y install gcc* ncurses ncurses-devel make bzip2
3.配置内核并安装
tar jxf linux-2.6.36.tar.bz2 && cd linux-2.6.36
make menuconfig 在菜单模式下选择需要编译的内核模块:
networking support—>networking options—>network packet filtering framework(netfilter)
(1).core netfilter configuration
A 勾中”Netfilter connection tracking support” -m state相关模块是依赖它的,不选则没有。
B 将netbios name service protocal support(new) 编译成模块,不然后面升级iptables后启动时会出错
C 勾中“Netfilter Xtables support (required for ip_tables)”
(2).IP: Netfilter Configuration
A 将 “IPv4 connection tracking support (require for NAT)” 编译成模块。
B 勾中IP tables support (required for filtering/masq/NAT) 。
C 将 “Full NAT” 下的 “MASQUERADE target support” 和 “REDIRECT target support” 编译成模块
(3).其它模块可以根据自己的需要进行选择,若不懂可以参考内核配置手册.
执行完make menuconfig后,修改/data/soft/linux-2.6.36/.config
将#CONFIG_SYSFS_DEPRECATED_V2 is not set
默认被注释掉的,将其改为y。即修改为
CONFIG_SYSFS_DEPRECATED_V2=y
再接着编译安装内核,如果没有修改重启进入系统的时候将会报错:“mount: could not find filesystem ‘/dev/root’”
make bzImage 生成内核文件
make modules 编译模块
make modules_install 安装模块
make install 安装
先别忙重启系统,下面我们来修改grub的配置.
4.修改grub
# grub.conf generated by anaconda
#
# Note that you do not have to rerun grub after making changes to this file
# NOTICE: You have a /boot partition. This means that
# all kernel and initrd paths are relative to /boot/, eg.
# root (hd0,0)
# kernel /vmlinuz-version ro root=/dev/VolGroup00/LogVol00
# initrd /initrd-version.img
#boot=/dev/sda
default=1
timeout=15
splashimage=(hd0,0)/grub/splash.xpm.gz
hiddenmenu
title CentOS (2.6.36)
root (hd0,0)
kernel /vmlinuz-2.6.36 ro root=/dev/VolGroup00/LogVol00
initrd /initrd-2.6.36.img
title CentOS (2.6.18-194.el5)
root (hd0,0)
kernel /vmlinuz-2.6.18-194.el5 ro root=/dev/VolGroup00/LogVol00
initrd /initrd-2.6.18-194.el5.img
如果你的跟我一样,2.6.36的在上面,那么就把default=1改成default=0,如下:
# grub.conf generated by anaconda
#
# Note that you do not have to rerun grub after making changes to this file
# NOTICE: You have a /boot partition. This means that
# all kernel and initrd paths are relative to /boot/, eg.
# root (hd0,0)
# kernel /vmlinuz-version ro root=/dev/VolGroup00/LogVol00
# initrd /initrd-version.img
#boot=/dev/sda
default=0
timeout=15
splashimage=(hd0,0)/grub/splash.xpm.gz
hiddenmenu
title CentOS (2.6.36)
root (hd0,0)
kernel /vmlinuz-2.6.36 ro root=/dev/VolGroup00/LogVol00
initrd /initrd-2.6.36.img
title CentOS (2.6.18-194.el5)
root (hd0,0)
kernel /vmlinuz-2.6.18-194.el5 ro root=/dev/VolGroup00/LogVol00
initrd /initrd-2.6.18-194.el5.img
改完之后,就可以重启系统了.
reboot
启动的时候会出现报错信息:“”insmod: error inserting ‘/lib/dm-region-hash.ko’: –1 File exits”,”
不过不影响进入系统,进入系统后查看内核:
uname -r
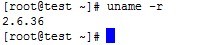
大家可以看到已经是2.6.36的内核了.如果不想开机的时候出现报错信息,那么可以进行下面的操作:
cp /boot/initrd-2.6.36.img /tmp
cd /tmp
mkdir newinitrd && cd newinitrd
zcat ../initrd-2.6.36.img |cpio -i
vi init
删掉重复的如下两行:
echo “Loading dm-region-hash.ko module”
insmod /lib/dm-region-hash.ko
find .|cpio -c -o > ../initrd
cd ../
gzip -9 < initrd > initrd-2.6.36.img
ll
-rw-r--r-- 1 root root 7651840 Nov 3 15:47 initrd
-rw------- 1 root root 3361182 Nov 3 15:48 initrd-2.6.36.img
drwxr-xr-x 9 root root 4096 Nov 3 15:47 newinitrd
mv /boot/initrd-2.6.36.img /boot/initrd-2.6.36.img.bak
cp initrd-2.6.36.img /boot/
reboot
这下就对了,好了,一次简单的内核升级就到此为止了.
(责任编辑:IT)
| 相信很多人都听过不要随便升级内核,但很多时候出去面试,第一句就问你会升级内核吗?为了解决这样尴尬的局面,最少我们都要知道怎样去升级内核. 系统:centos 5.5 需要的软件包:linux-2.6.36.tar.bz2 1.下载内核包 wget --no-check-certificate http://www.kernel.org/pub/linux/kernel/v2.6/linux-2.6.36.tar.bz2 2.准备编译工具 yum -y install gcc* ncurses ncurses-devel make bzip2 3.配置内核并安装 tar jxf linux-2.6.36.tar.bz2 && cd linux-2.6.36 make menuconfig 在菜单模式下选择需要编译的内核模块: networking support—>networking options—>network packet filtering framework(netfilter) (1).core netfilter configuration A 勾中”Netfilter connection tracking support” -m state相关模块是依赖它的,不选则没有。 B 将netbios name service protocal support(new) 编译成模块,不然后面升级iptables后启动时会出错 C 勾中“Netfilter Xtables support (required for ip_tables)” (2).IP: Netfilter Configuration A 将 “IPv4 connection tracking support (require for NAT)” 编译成模块。 B 勾中IP tables support (required for filtering/masq/NAT) 。 C 将 “Full NAT” 下的 “MASQUERADE target support” 和 “REDIRECT target support” 编译成模块 (3).其它模块可以根据自己的需要进行选择,若不懂可以参考内核配置手册. 执行完make menuconfig后,修改/data/soft/linux-2.6.36/.config 将#CONFIG_SYSFS_DEPRECATED_V2 is not set 默认被注释掉的,将其改为y。即修改为 CONFIG_SYSFS_DEPRECATED_V2=y 再接着编译安装内核,如果没有修改重启进入系统的时候将会报错:“mount: could not find filesystem ‘/dev/root’” make bzImage 生成内核文件 make modules 编译模块 make modules_install 安装模块 make install 安装 先别忙重启系统,下面我们来修改grub的配置. 4.修改grub # grub.conf generated by anaconda # # Note that you do not have to rerun grub after making changes to this file # NOTICE: You have a /boot partition. This means that # all kernel and initrd paths are relative to /boot/, eg. # root (hd0,0) # kernel /vmlinuz-version ro root=/dev/VolGroup00/LogVol00 # initrd /initrd-version.img #boot=/dev/sda default=1 timeout=15 splashimage=(hd0,0)/grub/splash.xpm.gz hiddenmenu title CentOS (2.6.36) root (hd0,0) kernel /vmlinuz-2.6.36 ro root=/dev/VolGroup00/LogVol00 initrd /initrd-2.6.36.img title CentOS (2.6.18-194.el5) root (hd0,0) kernel /vmlinuz-2.6.18-194.el5 ro root=/dev/VolGroup00/LogVol00 initrd /initrd-2.6.18-194.el5.img 如果你的跟我一样,2.6.36的在上面,那么就把default=1改成default=0,如下: # grub.conf generated by anaconda # # Note that you do not have to rerun grub after making changes to this file # NOTICE: You have a /boot partition. This means that # all kernel and initrd paths are relative to /boot/, eg. # root (hd0,0) # kernel /vmlinuz-version ro root=/dev/VolGroup00/LogVol00 # initrd /initrd-version.img #boot=/dev/sda default=0 timeout=15 splashimage=(hd0,0)/grub/splash.xpm.gz hiddenmenu title CentOS (2.6.36) root (hd0,0) kernel /vmlinuz-2.6.36 ro root=/dev/VolGroup00/LogVol00 initrd /initrd-2.6.36.img title CentOS (2.6.18-194.el5) root (hd0,0) kernel /vmlinuz-2.6.18-194.el5 ro root=/dev/VolGroup00/LogVol00 initrd /initrd-2.6.18-194.el5.img 改完之后,就可以重启系统了. reboot 启动的时候会出现报错信息:“”insmod: error inserting ‘/lib/dm-region-hash.ko’: –1 File exits”,” 不过不影响进入系统,进入系统后查看内核: uname -r 大家可以看到已经是2.6.36的内核了.如果不想开机的时候出现报错信息,那么可以进行下面的操作: cp /boot/initrd-2.6.36.img /tmp cd /tmp mkdir newinitrd && cd newinitrd zcat ../initrd-2.6.36.img |cpio -i vi init 删掉重复的如下两行: echo “Loading dm-region-hash.ko module” insmod /lib/dm-region-hash.ko find .|cpio -c -o > ../initrd cd ../ gzip -9 < initrd > initrd-2.6.36.img ll -rw-r--r-- 1 root root 7651840 Nov 3 15:47 initrd -rw------- 1 root root 3361182 Nov 3 15:48 initrd-2.6.36.img drwxr-xr-x 9 root root 4096 Nov 3 15:47 newinitrd mv /boot/initrd-2.6.36.img /boot/initrd-2.6.36.img.bak cp initrd-2.6.36.img /boot/ reboot 这下就对了,好了,一次简单的内核升级就到此为止了. (责任编辑:IT) |