CentOS 7上如何安装Subversion
时间:2015-02-12 02:24 来源:linux.it.net.cn 作者:IT
CentOS 7上如何安装Subversion
How To Install Subversion On CentOS 7
From Wikipedia:
Apache Subversion (often abbreviated SVN, after the command name svn) is a software versioning and revision control system distributed as free software under the Apache License.
Developers use Subversion to maintain current and historical versions of files such as source code, web pages, and documentation. Its goal is to be a mostly compatible successor to the widely used Concurrent Versions System (CVS).
The free software community has used Subversion widely: for example in projects such as Apache Software Foundation, Free Pascal, FreeBSD, GCC, Mono and SourceForge. Google Code also provides Subversion hosting for their free software projects. CodePlex offers access to Subversion as well as to other types of clients.
The corporate world has also started to adopt Subversion. A 2007 report by Forrester Research recognized Subversion as the sole leader in the Standalone Software Configuration Management (SCM) category and as a strong performer in the Software Configuration and Change Management (SCCM) category.
1 – Install Subversion
yum install mod_dav_svn subversion
Sample Output:
================================================================================
 Package              Arch        Version                    Repository    Size
================================================================================
Installing:
 mod_dav_svn          x86_64      1.7.14-6.el7               base         101 k
 subversion           x86_64      1.7.14-6.el7               base         1.0 M
Installing for dependencies:
 apr                  x86_64      1.4.8-3.el7                base         103 k
 apr-util             x86_64      1.5.2-6.el7                base          92 k
 httpd                x86_64      2.4.6-18.el7.centos        updates      2.7 M
 httpd-tools          x86_64      2.4.6-18.el7.centos        updates       77 k
 mailcap              noarch      2.1.41-2.el7               base          31 k
 neon                 x86_64      0.30.0-3.el7               base         165 k
 pakchois             x86_64      0.4-10.el7                 base          14 k
 subversion-libs      x86_64      1.7.14-6.el7               base         921 k

Transaction Summary
================================================================================
2 – Add this config file to apache
LoadModule dav_svn_module     modules/mod_dav_svn.so
LoadModule authz_svn_module   modules/mod_authz_svn.so

<Location /svn>
   DAV svn
   SVNParentPath /var/www/unixmensvn
   AuthType Basic
   AuthName "Subversion repositories"
   AuthUserFile /etc/svn-auth-users
   Require valid-user
</Location>
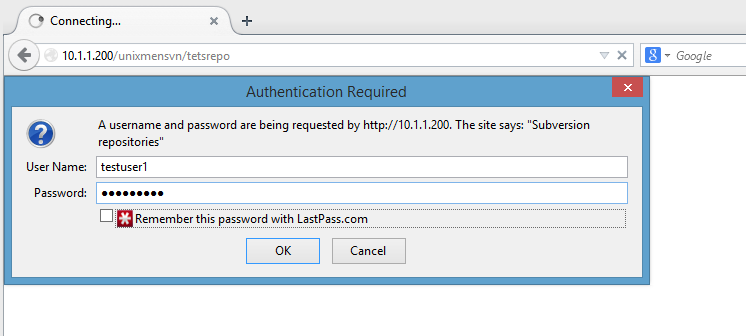
3 – Create SVN users
[root@unixmen-centos7 ~]# htpasswd -cm /etc/svn-auth-users testuser1
New password:
Re-type new password:
Adding password for user testuser1
[root@unixmen-centos7 ~]#
4 – Create and configure SVN repository
mkdir /var/www/unixmensvn
cd  /var/www/unixmensvn
svnadmin create repo
chown -R apache.apache repo

# If you still have issues with SELinux Security please apply this:
chcon -R -t httpd_sys_content_t /var/www/unixmensvn/repo
chcon -R -t httpd_sys_rw_content_t /var/www/unixmensvn/repo
5 – You can open the http and https on the file with this way
firewall-cmd --permanent --zone=public --add-service=http
firewall-cmd --permanent --zone=public --add-service=https
firewall-cmd --reload
6 – Enable and start the http services
systemctl enable httpd.service
systemctl restart httpd.service

7 – Secure your repository with adding this to conf/svnserve.conf
 anon-access = none
 auth-access = authz
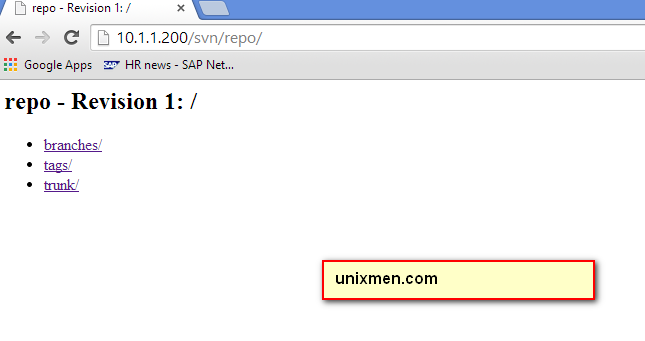
8 – Make trunk, branches and tags structure under repo
mkdir -p /tmp/svn-structure-template/{trunk,branches,tags}

svn import -m "Initial repository" /tmp/svn-structure-template   file:///var/www/unixmensvn/repo/
Adding         /tmp/svn-structure-template/branches
Adding         /tmp/svn-structure-template/tags
Adding         /tmp/svn-structure-template/trunk

Committed revision 1.
Done!!
 That’s it. Cheers!
(责任编辑:IT)
| CentOS 7上如何安装Subversion How To Install Subversion On CentOS 7 From Wikipedia:
1 – Install Subversion yum install mod_dav_svn subversion Sample Output: ================================================================================ Package Arch Version Repository Size ================================================================================ Installing: mod_dav_svn x86_64 1.7.14-6.el7 base 101 k subversion x86_64 1.7.14-6.el7 base 1.0 M Installing for dependencies: apr x86_64 1.4.8-3.el7 base 103 k apr-util x86_64 1.5.2-6.el7 base 92 k httpd x86_64 2.4.6-18.el7.centos updates 2.7 M httpd-tools x86_64 2.4.6-18.el7.centos updates 77 k mailcap noarch 2.1.41-2.el7 base 31 k neon x86_64 0.30.0-3.el7 base 165 k pakchois x86_64 0.4-10.el7 base 14 k subversion-libs x86_64 1.7.14-6.el7 base 921 k Transaction Summary ================================================================================ 2 – Add this config file to apacheLoadModule dav_svn_module modules/mod_dav_svn.so LoadModule authz_svn_module modules/mod_authz_svn.so <Location /svn> DAV svn SVNParentPath /var/www/unixmensvn AuthType Basic AuthName "Subversion repositories" AuthUserFile /etc/svn-auth-users Require valid-user </Location> 3 – Create SVN users[root@unixmen-centos7 ~]# htpasswd -cm /etc/svn-auth-users testuser1 New password: Re-type new password: Adding password for user testuser1 [root@unixmen-centos7 ~]# 4 – Create and configure SVN repositorymkdir /var/www/unixmensvn cd /var/www/unixmensvn svnadmin create repo chown -R apache.apache repo # If you still have issues with SELinux Security please apply this: chcon -R -t httpd_sys_content_t /var/www/unixmensvn/repo chcon -R -t httpd_sys_rw_content_t /var/www/unixmensvn/repo 5 – You can open the http and https on the file with this wayfirewall-cmd --permanent --zone=public --add-service=http firewall-cmd --permanent --zone=public --add-service=https firewall-cmd --reload 6 – Enable and start the http servicessystemctl enable httpd.service systemctl restart httpd.service
7 – Secure your repository with adding this to conf/svnserve.confanon-access = none auth-access = authz 8 – Make trunk, branches and tags structure under repo
mkdir -p /tmp/svn-structure-template/{trunk,branches,tags}
svn import -m "Initial repository" /tmp/svn-structure-template file:///var/www/unixmensvn/repo/
Adding /tmp/svn-structure-template/branches
Adding /tmp/svn-structure-template/tags
Adding /tmp/svn-structure-template/trunk
Committed revision 1.
Done!!
|