Installing Centos 6.4
时间:2016-05-07 18:25 来源:linux.it.net.cn 作者:IT
CentOS (Community Enterprise Operating System) is a free Linux operating system that has 100% binary comparability with RHEL (Red hat Enterprise Linux). Because of this compatibility, many organisations choose CentOS as their choice of Linux. In the example that follows, we will show you how to install a minimal system without a graphical desktop. We will then go through the process of adding the graphical desktop and other components from the command line. To install CentOS 6.4 simply follow the instructions below:
To download your iso image of CentOS 6.4, simply follow this Link: CentOS 6.4 Download
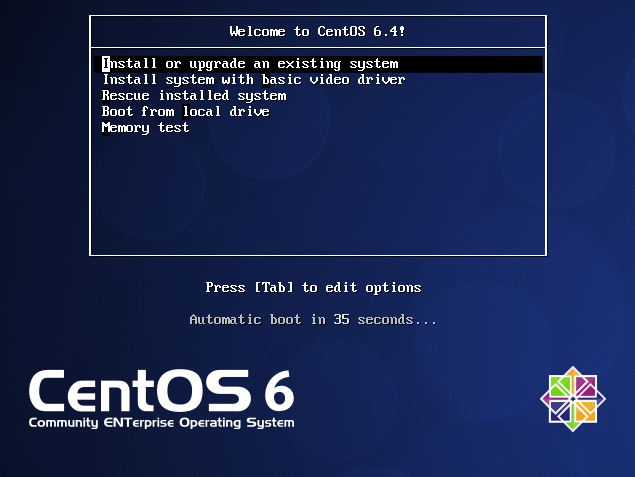
Welcome to CentOS 6.4 Installer Menu
To start your installation of Centos 6.4, simply highlight the "Install or upgrade an existing system" and press enter. Your installation will now start.
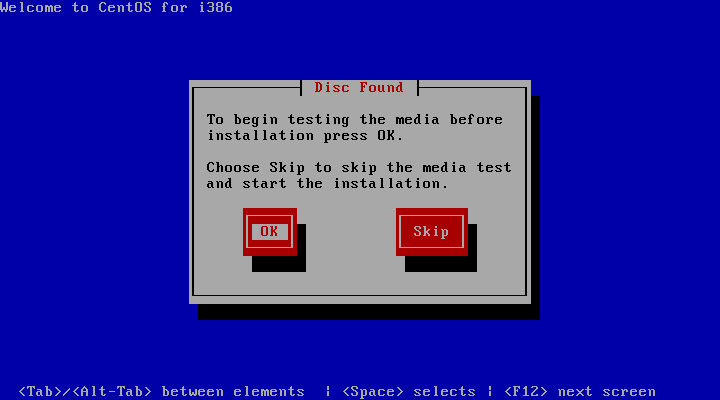
Test Media
It is always recommended that you test your media before carrying out an installation. If you are happy that your media is OK, then select "skip" to continue.
CentOS Logo
To continue with your installation, click "Next".
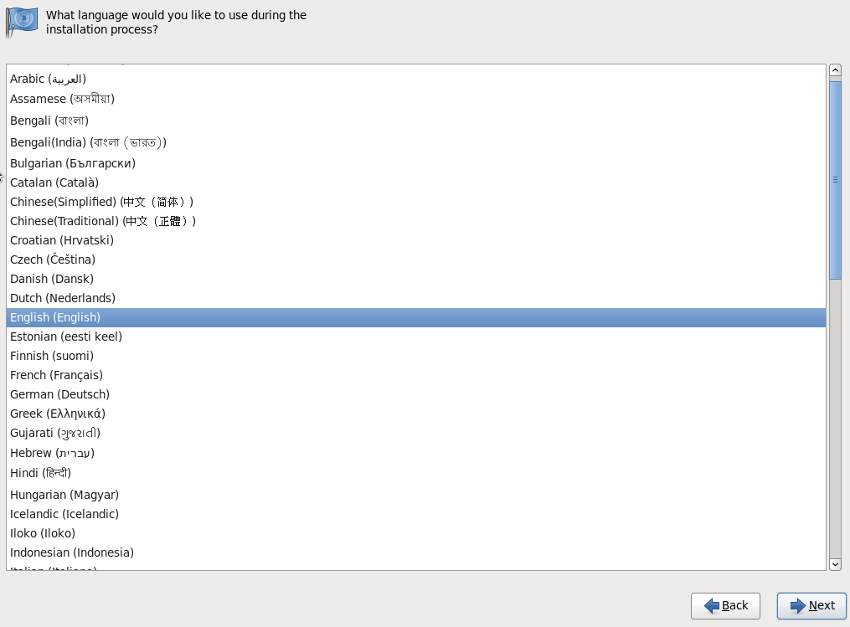
Select Installation Language
At this screen you will need to select the language to be used during your installation.
Select Keyboard
From this screen you need to select the keyboard type to be used with your installation. I have selected "united Kingdom" in the example.

Select Installation Device
From this menu, select "Basic Storage Devices" (assuming you will be using a standard hard drive).

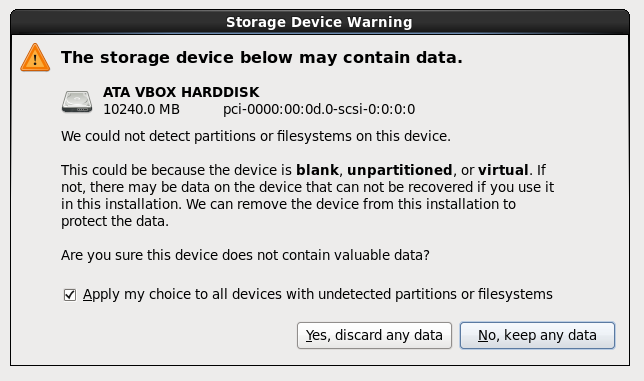
Storage Device Warning
From this screen you must confirm that any data on the specified disk can be discarded. Choose the option "Yes, discard any data" if you ar happy to continue.
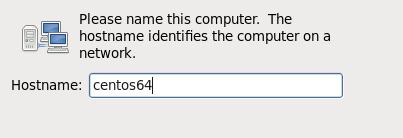
Select a hostname for your system
Select the name you want to use for your system on your network. This name should be a unique name on your network. It is good practice to use a naming convention that perhaps describes the server type and number if you have numerous servers. For this example I have gone with " centos64".
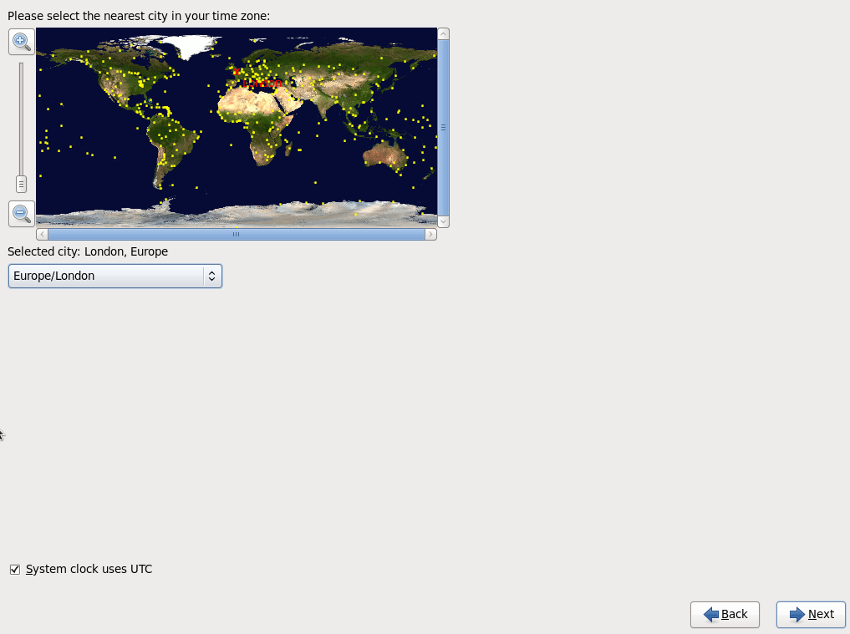
Select Time Zone Location
Choose the location that you are located in. In the example, I have chosen "Europe/London" as this is my location.
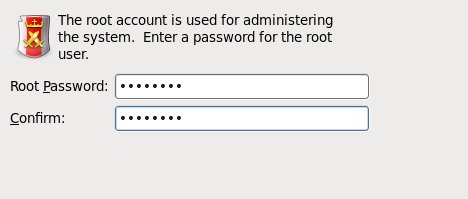
Root Password
You must now specify a root password to be used for administering your system.
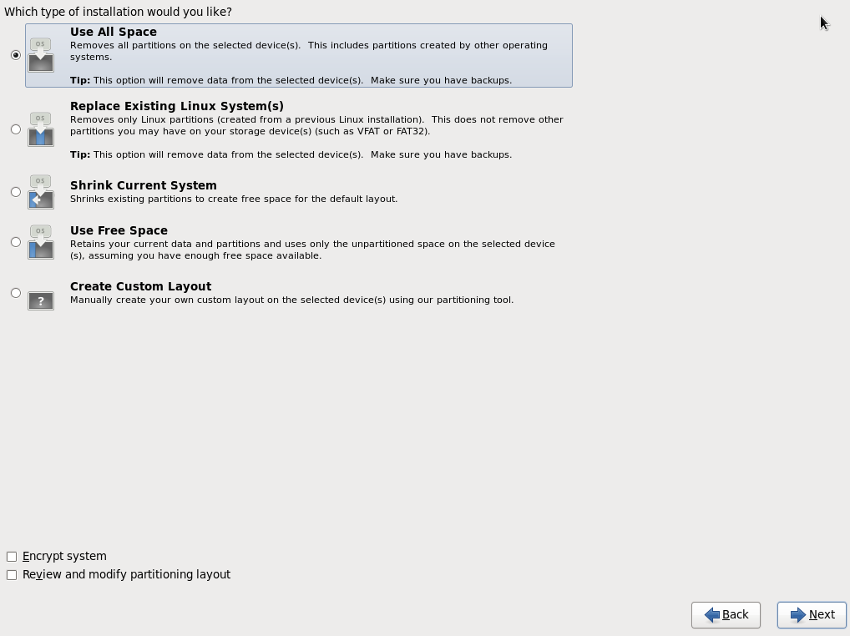
Installation Type?
From this screen you must select one of the options. In the example I have chosen "Use All Space" as this is a virtual disk and no other operating systems are present.
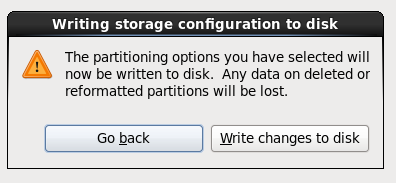
Write Configuration to Disk
If you are happy with your selections, you need to choose the ""Write changes to disk" to continue with the installation.
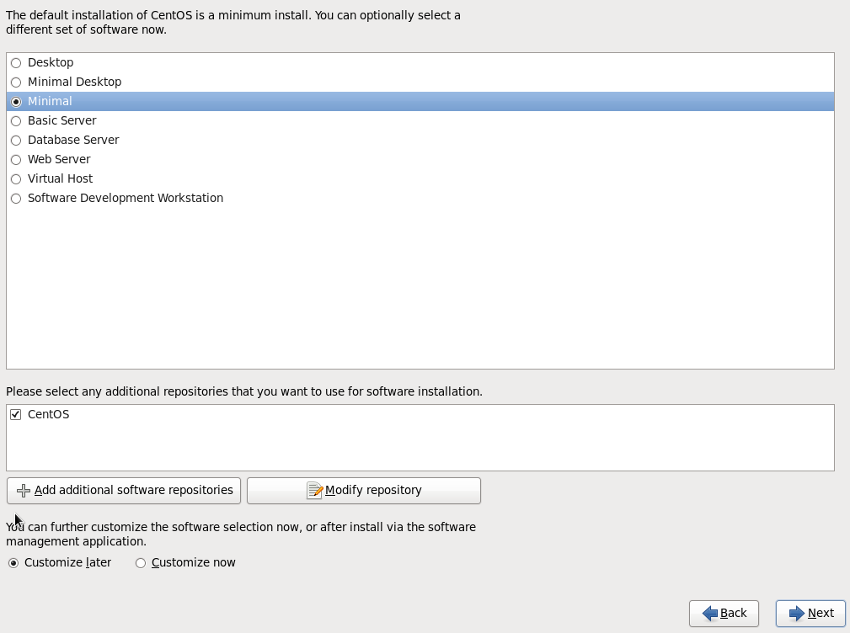
Choose OS Installation Type
Various choices are available to choose from depending on your planned use for your system. In this example I have chosen the default installation option. This will provide a basic system without a graphical interface. A Graphical interface (desktop) can be added after your installation. This will be covered later. To complete your installation, click "Next".
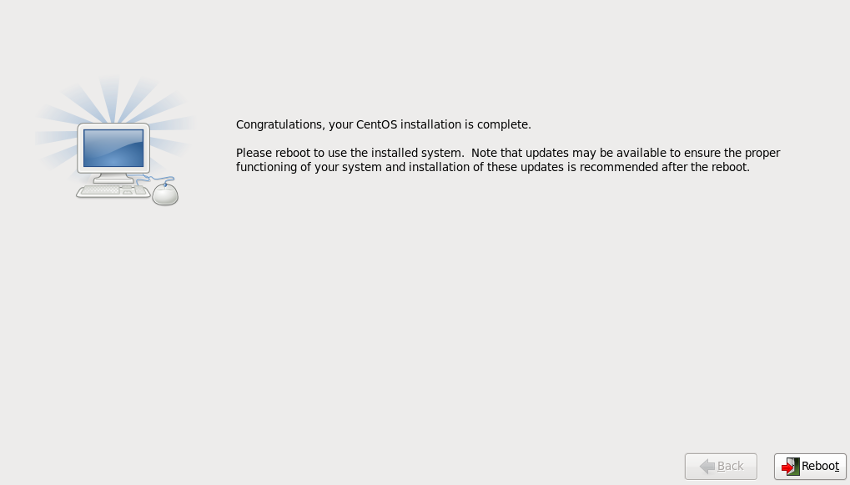
Installation complete
Congratulations, your minimal CentOS 6.4 installation is now complete. You must remove any media from your CD/DVD drive and reboot your system.
CentOS Loading Screen
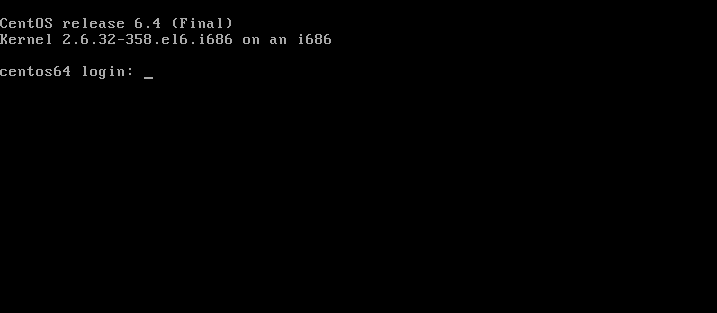
If all goes well, you should see the following loading screen while your system is booting.

Login Screen
From the login screen, you will need to login with the "root" user account and password.
Configuring the Network
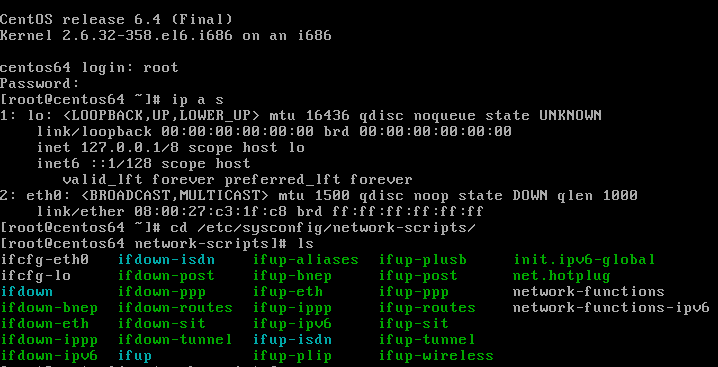
Before we continue with creating any additional accounts, we need to define our network connection "eth0".
The command ip a s is used to display our current interfaces . The one we are interested in is "eth0". Currently their is no IP address assigned and the interface is indicating that it is in a DOWN state.
To configure "eth0" to obtain an IP address automatically, we need to check that it is using "dhcp" and that the interface should be started automatically at boot". We can check the current configuration by navigating to "/etc/sysconfig/network-scripts". Our interface configuration is stored in a file called "ifcfg-eth0".
Configuring interface eth0
Using an editor of your choice, you will need to edit the file "ifcfg-eth0" file an change its settings to match the ones below. You must not change the "HWADDR" or "UUID" options as these will be correct for your system. The only change should be to ensure that the "ONBOOT" option is set to "yes".:
DEVICE=eth0
HWADDR=08:00:27:C3:1F:C8
TYPE=Ethernet
UUID=399e364f-e278-4969-9dc7-3481618ede62
ONBOOT=yes
NM_CONTROLLED=yes
BOOTPROTO=dhcp
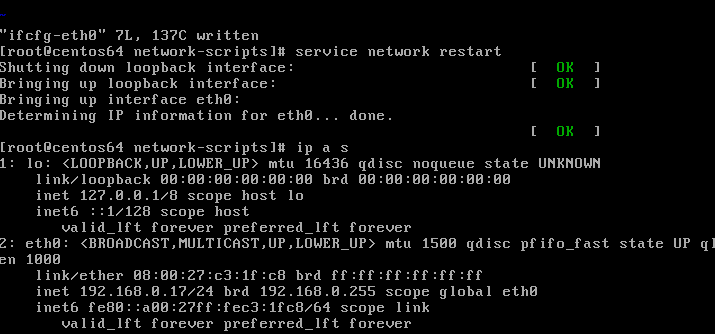
Once you have made your changes and saved these. You will need to restart your network services with the command:
service network restart
Now if we issue the command ip a s we should see that our interface has now been assigned an IP address.
Adding a new user account
At some point you will need to create a local account on your installation. The easiest way to achieve this is to issue the "useradd" command. In the example below the following commands were issued to create a user called "john". (amend accordingly)
useradd -m -c "John Local Account" john
The above will create the user "john" with a home area of "/home/john". Before you can use the account, you will need to set a password.
The command for assigning a password is passwd
passwd john
You will be asked to verify your password.

Reboot your system
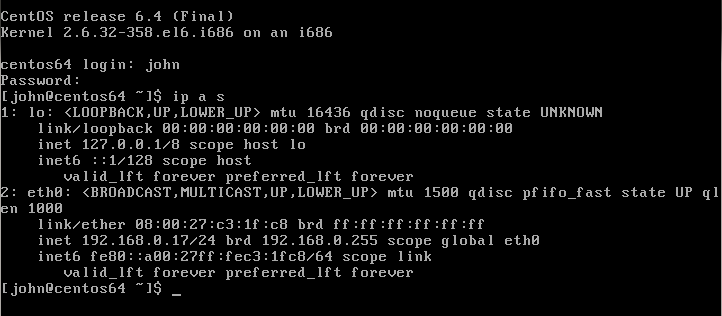
To test out our new account and our network interface, we are going to reboot our server. The command to reboot is:
shutdown -r now
Our server should now shut down and restart. Once the server is backup we can use our new account:
Installing a Graphical Desktop (GNOME or KDE)
To install the GNOME desktop simply issue the command:
yum -y groupinstall "Desktop" "Desktop Platform" "X Window System" "Fonts"
You may also install the KDE desktop if you prefer with the command:
yum -y groupinstall kde-desktop
Change Current runlevel
As we have decided to add the GNOME desktop, we will need to change our default runlevel from "3" to "5" for the graphical environment to load. To do this we need to edit the following line in the file "/etc/inittab"
id:3:initdefault:
Currently this line specifies to start in a none graphical mode (runlevel 3). We need to change this to specify runlevel "5". Amend the line to read:
id:5:initdefault:
After installing the above, you will need to reboot your system by issuing the command:
shutdown -r now
Other Popular packages
You may also wish to install some of the following packages:
yum -y groupinstall "Internet Browser"
yum -y groupinstall "General Purpose Desktop"
yum -y groupinstall "Office Suite and Productivity"
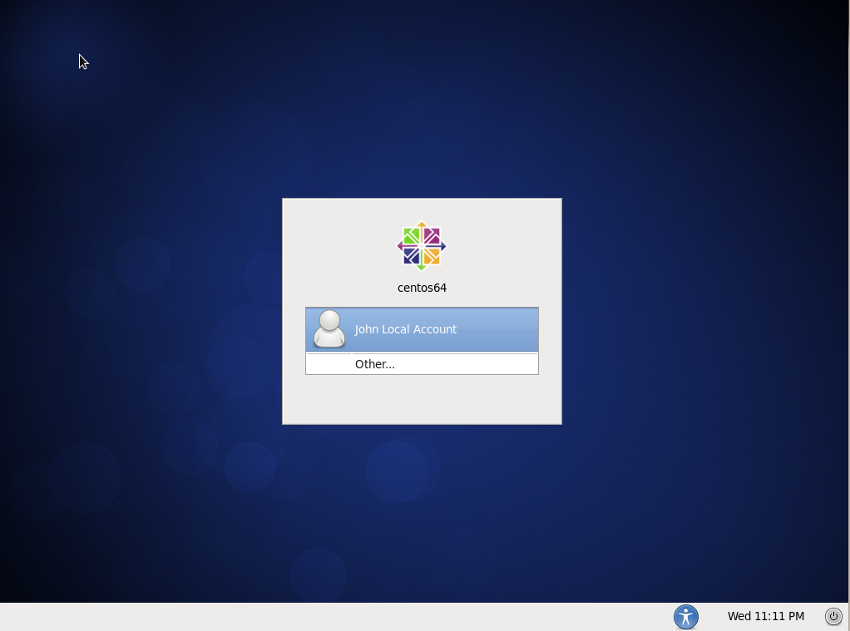
Login Screen
After your reboot, your screen should be similar to the one in the example. Here you need to click on your local account and login with the password you created earlier.
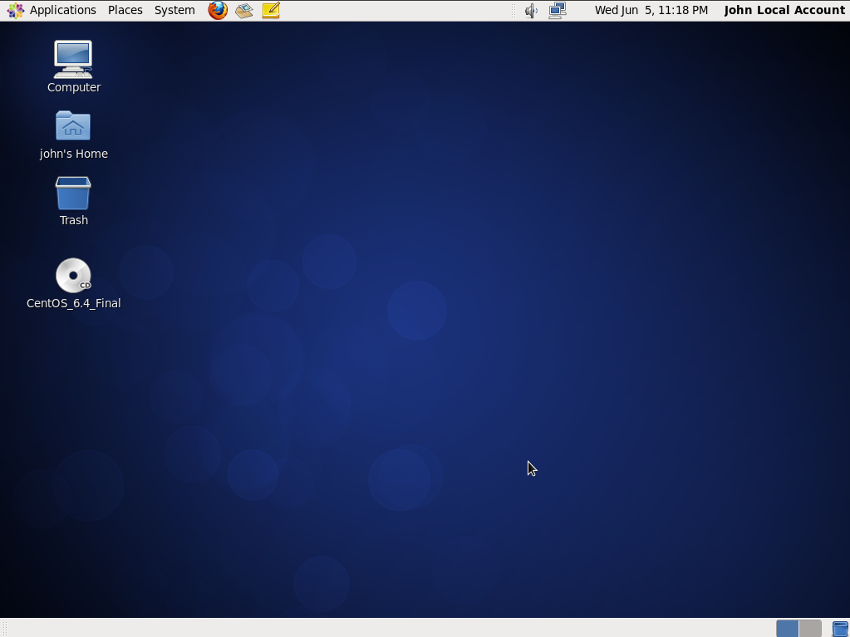
GNOME Desktop
After you have logged in, you should now see your GNOME desktop and any of the additional software that you have installed.
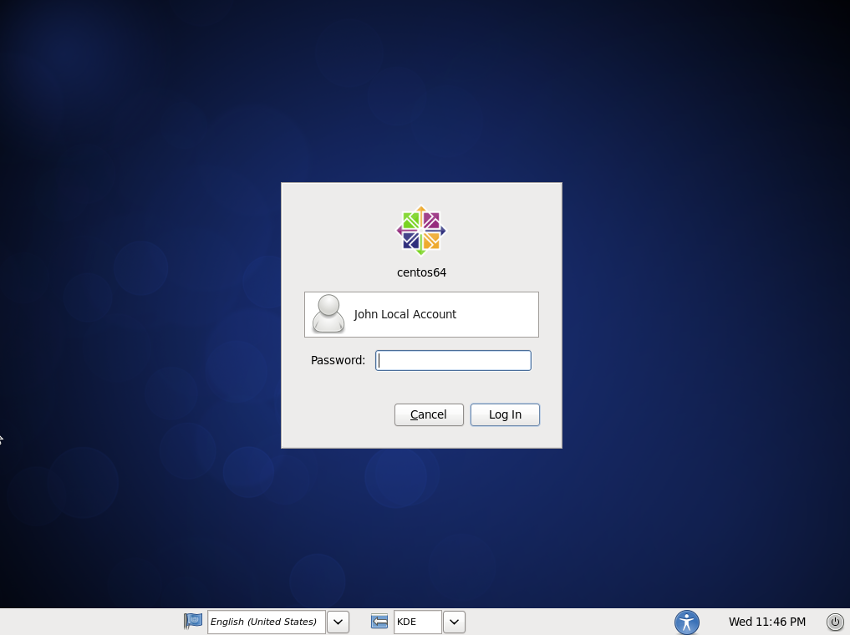
KDE Login Screen
If you installed both desktop options GNOME and KDE, then you you will offered a choice of desktop to use. You can switch between either KDE or GNOME from the menu located at the bottom of the screen.
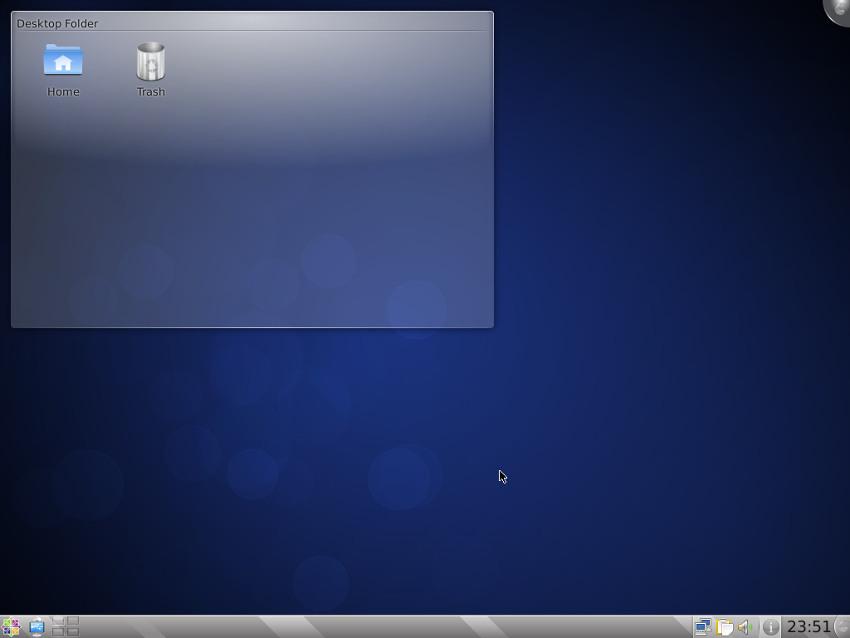
KDE Desktop
After you have logged in, you should now see your KDE desktop and any of the additional software that you have installed.
 (责任编辑:IT)
| CentOS (Community Enterprise Operating System) is a free Linux operating system that has 100% binary comparability with RHEL (Red hat Enterprise Linux). Because of this compatibility, many organisations choose CentOS as their choice of Linux. In the example that follows, we will show you how to install a minimal system without a graphical desktop. We will then go through the process of adding the graphical desktop and other components from the command line. To install CentOS 6.4 simply follow the instructions below: To download your iso image of CentOS 6.4, simply follow this Link: CentOS 6.4 Download Welcome to CentOS 6.4 Installer MenuTo start your installation of Centos 6.4, simply highlight the "Install or upgrade an existing system" and press enter. Your installation will now start.  Test MediaIt is always recommended that you test your media before carrying out an installation. If you are happy that your media is OK, then select "skip" to continue.  CentOS LogoTo continue with your installation, click "Next".  Select Installation LanguageAt this screen you will need to select the language to be used during your installation.  Select KeyboardFrom this screen you need to select the keyboard type to be used with your installation. I have selected "united Kingdom" in the example.  Select Installation DeviceFrom this menu, select "Basic Storage Devices" (assuming you will be using a standard hard drive).  Storage Device WarningFrom this screen you must confirm that any data on the specified disk can be discarded. Choose the option "Yes, discard any data" if you ar happy to continue.  Select a hostname for your systemSelect the name you want to use for your system on your network. This name should be a unique name on your network. It is good practice to use a naming convention that perhaps describes the server type and number if you have numerous servers. For this example I have gone with " centos64".  Select Time Zone LocationChoose the location that you are located in. In the example, I have chosen "Europe/London" as this is my location.  Root PasswordYou must now specify a root password to be used for administering your system.  Installation Type?From this screen you must select one of the options. In the example I have chosen "Use All Space" as this is a virtual disk and no other operating systems are present.  Write Configuration to DiskIf you are happy with your selections, you need to choose the ""Write changes to disk" to continue with the installation.  Choose OS Installation TypeVarious choices are available to choose from depending on your planned use for your system. In this example I have chosen the default installation option. This will provide a basic system without a graphical interface. A Graphical interface (desktop) can be added after your installation. This will be covered later. To complete your installation, click "Next".  Installation completeCongratulations, your minimal CentOS 6.4 installation is now complete. You must remove any media from your CD/DVD drive and reboot your system.  CentOS Loading ScreenIf all goes well, you should see the following loading screen while your system is booting.  Login ScreenFrom the login screen, you will need to login with the "root" user account and password.  Configuring the Network
Before we continue with creating any additional accounts, we need to define our network connection "eth0".  Configuring interface eth0Using an editor of your choice, you will need to edit the file "ifcfg-eth0" file an change its settings to match the ones below. You must not change the "HWADDR" or "UUID" options as these will be correct for your system. The only change should be to ensure that the "ONBOOT" option is set to "yes".: DEVICE=eth0 HWADDR=08:00:27:C3:1F:C8 TYPE=Ethernet UUID=399e364f-e278-4969-9dc7-3481618ede62 ONBOOT=yes NM_CONTROLLED=yes BOOTPROTO=dhcp
Once you have made your changes and saved these. You will need to restart your network services with the command:  Adding a new user account
At some point you will need to create a local account on your installation. The easiest way to achieve this is to issue the "useradd" command. In the example below the following commands were issued to create a user called "john". (amend accordingly)  Reboot your system
To test out our new account and our network interface, we are going to reboot our server. The command to reboot is:  Installing a Graphical Desktop (GNOME or KDE)
To install the GNOME desktop simply issue the command: Change Current runlevel
As we have decided to add the GNOME desktop, we will need to change our default runlevel from "3" to "5" for the graphical environment to load. To do this we need to edit the following line in the file "/etc/inittab" Other Popular packages
You may also wish to install some of the following packages: Login ScreenAfter your reboot, your screen should be similar to the one in the example. Here you need to click on your local account and login with the password you created earlier.  GNOME DesktopAfter you have logged in, you should now see your GNOME desktop and any of the additional software that you have installed.  KDE Login ScreenIf you installed both desktop options GNOME and KDE, then you you will offered a choice of desktop to use. You can switch between either KDE or GNOME from the menu located at the bottom of the screen.  KDE DesktopAfter you have logged in, you should now see your KDE desktop and any of the additional software that you have installed.  (责任编辑:IT) (责任编辑:IT) |