Centos6.7 64位安装配置kvm虚拟化
时间:2016-05-17 12:10 来源:51cto.com 作者:51cto
首先,需要我们的cpu支持虚拟化,有的机器支持但是并未在bios开启,这个需要事先开启。
1. Dell R710安装centos6.7 64位 ,Dell R710在开机后按F2进入BIOS,Processor Setting->Virtualization Technology->空格键切换模式为Enabled
然后回车,ESC保存退出
2.安装kvm前的准备工作
a. 清除iptables规则
service iptables stop; service iptables save
b. 关闭selinux
sed -i 's/SELINUX=enforcing/SELINUX=disabled/' /etc/selinux/config
setenforce 0
3. 开始安装kvm
a. 检查你的系统是否支持虚拟化
grep -Ei 'vmx|svm' /proc/cpuinfo
如果有输出内容,则支持,其中intel cpu支持会有vmx,amd cpu支持会有svm
b. 通过yum安装虚拟化的软件包
yum install -y kvm virt-*libvirtbridge-utils qemu-img
说明:
kvm:软件包中含有KVM内核模块,它在默认linux内核中提供kvm管理程序
libvirts:安装虚拟机管理工具,使用virsh等命令来管理和控制虚拟机。
bridge-utils:设置网络网卡桥接。
virt-*:创建、克隆虚拟机命令,以及图形化管理工具virt-manager
qemu-img:安装qemu组件,使用qemu命令来创建磁盘等。
c. 检查kvm模块是否加载
lsmod |grep kvm
正常应该是:
kvm_intel 554963
kvm 3377721 kvm_intel
如果没有,需要执行
modprobe kvm-intel
还没有就重启一下试试
d. 配置网卡
cd /etc/sysconfig/network-scripts/
cp ifcfg-em1 ifcfg-br1
分别编辑em1和br1
ifcfg-em1改成如下:
DEVICE=em1
HWADDR=A4:BA:DB:20:93:23
TYPE=Ethernet
UUID=488fe6b3-45e8-413b-881d-539c9b453e31
ONBOOT=yes
NM_CONTROLLED=yes
BOOTPROTO=none
BRIDGE=br1
ifcfg-br1改成如下:
DEVICE=br1
#HWADDR=A4:BA:DB:20:93:23
TYPE=Bridge
#UUID=488fe6b3-45e8-413b-881d-539c9b453e31
ONBOOT=yes
NM_CONTROLLED=yes
BOOTPROTO=static
IPADDR=112.65.140.133
NETMASK=255.255.255.248
GATEWAY=112.65.140.129
DNS1=210.22.84.3
DNS2=8.8.8.8
说明: 我的虚拟机是桥接模式,所以设置br0的ip和我的真机同样的网段,包括网关也是我路由器的ip,大家可以根据自己的环境去配置,目的是为了让虚拟机可以上网。
/etc/init.d/network restart
查看网卡如下:
[root@daixuan network-scripts]# ifconfig
br1 Link encap:Ethernet HWaddr A4:BA:DB:20:93:23
inet addr:112.65.140.133 Bcast:112.65.140.135 Mask:255.255.255.248
inet6 addr: fe80::a6ba:dbff:fe20:9323/64 Scope:Link
UP BROADCAST RUNNING MULTICAST MTU:1500 Metric:1
RX packets:32 errors:0 dropped:0 overruns:0 frame:0
TX packets:24 errors:0 dropped:0 overruns:0 carrier:0
collisions:0 txqueuelen:0
RX bytes:2114 (2.0 KiB) TX bytes:3136 (3.0 KiB)
em1 Link encap:Ethernet HWaddr A4:BA:DB:20:93:23
inet6 addr: fe80::a6ba:dbff:fe20:9323/64 Scope:Link
UP BROADCAST RUNNING MULTICAST MTU:1500 Metric:1
RX packets:22 errors:0 dropped:0 overruns:0 frame:0
TX packets:15 errors:0 dropped:0 overruns:0 carrier:0
collisions:0 txqueuelen:1000
RX bytes:1700 (1.6 KiB) TX bytes:2472 (2.4 KiB)
lo Link encap:Local Loopback
inet addr:127.0.0.1 Mask:255.0.0.0
inet6 addr: ::1/128 Scope:Host
UP LOOPBACK RUNNING MTU:65536 Metric:1
RX packets:0 errors:0 dropped:0 overruns:0 frame:0
TX packets:0 errors:0 dropped:0 overruns:0 carrier:0
collisions:0 txqueuelen:0
RX bytes:0 (0.0 b) TX bytes:0 (0.0 b)
virbr0 Link encap:Ethernet HWaddr 52:54:00:5C:6D:1B
inet addr:192.168.122.1 Bcast:192.168.122.255 Mask:255.255.255.0
UP BROADCAST RUNNING MULTICAST MTU:1500 Metric:1
RX packets:0 errors:0 dropped:0 overruns:0 frame:0
TX packets:0 errors:0 dropped:0 overruns:0 carrier:0
collisions:0 txqueuelen:0
RX bytes:0 (0.0 b) TX bytes:0 (0.0 b)
e. 启动或重启libvirtd服务和messagebus 服务
[root@daixuan network-scripts]# /etc/init.d/libvirtd start
[root@daixuan network-scripts]# /etc/init.d/messagebus restart
此时可以查看网络接口列表
brctl show 结果如下:
[root@daixuan network-scripts]# brctl show
bridge name bridge id STP enabled interfaces
br1 8000.a4badb209323 no em1
virbr0 8000.5254005c6d1b yes virbr0-nic
4. 创建虚拟机
mkdir /data/ //创建一个存储虚拟机虚拟磁盘的目录,该目录所在分区必须足够大
[root@daixuan ~]#virt-install \
--name daixuan1 \
--ram 512 \
--disk path=/data/daixuan1.img,size=30 \
--vcpus 1 \
--os-type linux \
--os-variant rhel6 \
--network bridge=br1 \
--graphics none \
--console pty,target_type=serial \
--location 'http://mirrors.163.com/centos/6.7/os/x86_64/' \
--extra-args 'console=ttyS0,115200n8 serial'
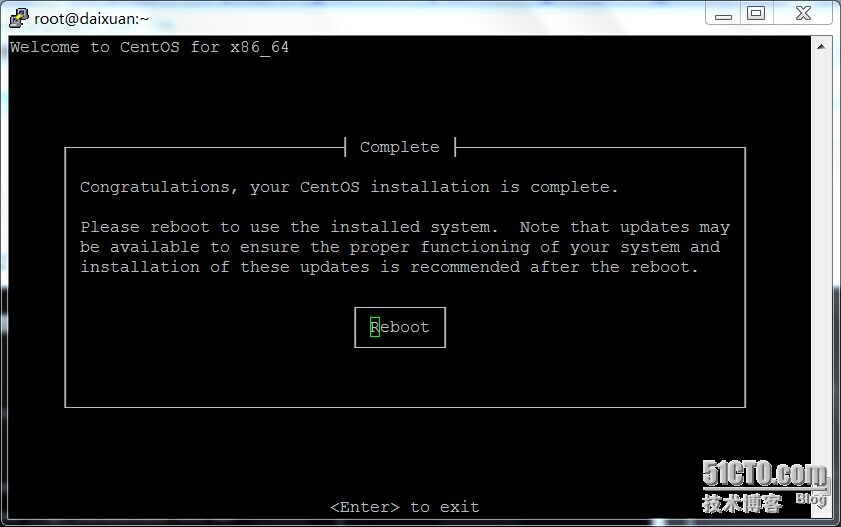
之后手动配置IP地址,该虚拟机能够上网,就可以进入安装界面了,Re-initilialize all,时区选择亚洲上海,省略linux安装过程。
说明:
--name指定虚拟机的名字
--ram 指定内存分配多少
--vcpus 指定分配cpu几个
--os-type 指定系统类型为linux
--os-variant 指定系统版本
--network指定网络类型
--graphics 指定安装通过哪种类型,可以是vnc,也可以没有图形,在这里我们没有使用图形直接使用文本方式
--console 指定控制台类型
--disk path 指定虚拟磁盘放到哪里,size=30 指定磁盘大小为30G,这样磁盘文件格式为raw,raw格式不能做快照,后面有说明,需要转换为qcow2格式,如果要使用qcow2格式的虚拟磁盘,需要事先创建qcow2格式的虚拟磁盘。 参考http://www.361way.com/kvm-qcow2-preallocation-metadata/3354.html
示例:
qemu-img create -f qcow2 -o preallocation=metadata/data/daixuan2.img 10G
[root@daixuan ~]#virt-install \
--name daixuan2 \
--ram 512 \
--disk path=/data/daixuan2.img,format=qcow2,size=10,bus=virtio \
--vcpus 1 \
--os-type linux \
--os-variant rhel6 \
--network bridge=br1 \
--graphics none \
--console pty,target_type=serial \
--location 'http://mirrors.163.com/centos/6.7/os/x86_64/' \
--extra-args 'console=ttyS0,115200n8 serial'
--location 指定安装介质地址,可以是网络地址,也可以是本地的一个绝对路径,(--location '/mnt/', 其中/mnt/下就是我们挂载的光盘镜像mount /dev/cdrom /mnt)如果是绝对路径,那么后面还需要指定一个安装介质,比如NFS,假如虚拟机设置ip后,不能连外网,那么就会提示让我们选择安装途径:
┌───┤ Installation Method ├───┐
│ │
│ What type of media contains │
│ the installation image? │
│ │
│ Local CD/DVD │
│ Hard drive │
│ NFS directory │
│ URL │
│ │
│ ┌────┐ ┌──────┐ │
│ │ OK │ │ Back │ │
│ └────┘ └──────┘ │
│ │
│ │
└─────────────────────┘
我在这里选择NFS,设置参数如下(前提是光盘中的linux的iso镜像挂载到本地/mnt下,母机配置了nfs共享了/mnt):
┌───────────────────────────┤ NFS Setup ├─────────
│ │
│ Please enter the server and NFSv3 path to your CentOS installation │
│ image and optionally additional NFS mount options. │
│ │
│ NFS server name: 112.65.140.133______________ │
│ CentOS directory: /mnt/images/install.img_ │
│ NFS mount options (optional): ro______________________ │
--extra-args 设定内核参数
当按下回车后,稍等几秒钟就可以看到安装提示了。
开始安装......
搜索文件 .treeinfo...... |720 B 00:00 ...
搜索文件 vmlinuz...... | 7.7 MB 00:02 ...
搜索文件 initrd.img...... |63 MB 00:23 ...
创建存储文件 centos6.6_1.img |30 GB 00:00
创建域...... | 0 B 00:00
连接到域 centos6.6_1
Escape character is ^]
然后就是我们非常熟悉的OK orNext 了 ,只不过这个过程是文本模式,如果想使用图形,只能开启vnc啦。


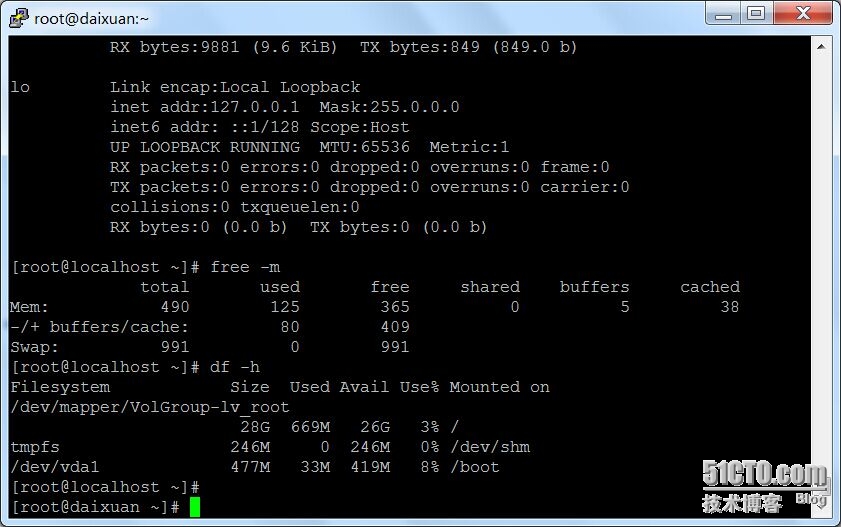
最后安装完,reboot就进入刚刚创建的虚拟机了。要想退回到宿主机,ctrl] 即可。
virsh list 可以列出当前的子机列表。
virsh console centos6.6_1可以进入指定的子机
(责任编辑:IT)
首先,需要我们的cpu支持虚拟化,有的机器支持但是并未在bios开启,这个需要事先开启。 1. Dell R710安装centos6.7 64位 ,Dell R710在开机后按F2进入BIOS,Processor Setting->Virtualization Technology->空格键切换模式为Enabled 然后回车,ESC保存退出
DEVICE=em1 HWADDR=A4:BA:DB:20:93:23 TYPE=Ethernet UUID=488fe6b3-45e8-413b-881d-539c9b453e31 ONBOOT=yes NM_CONTROLLED=yes BOOTPROTO=none BRIDGE=br1
DEVICE=br1 #HWADDR=A4:BA:DB:20:93:23 TYPE=Bridge #UUID=488fe6b3-45e8-413b-881d-539c9b453e31 ONBOOT=yes NM_CONTROLLED=yes BOOTPROTO=static IPADDR=112.65.140.133 NETMASK=255.255.255.248 GATEWAY=112.65.140.129 DNS1=210.22.84.3 DNS2=8.8.8.8
[root@daixuan network-scripts]# ifconfig br1 Link encap:Ethernet HWaddr A4:BA:DB:20:93:23 inet addr:112.65.140.133 Bcast:112.65.140.135 Mask:255.255.255.248 inet6 addr: fe80::a6ba:dbff:fe20:9323/64 Scope:Link UP BROADCAST RUNNING MULTICAST MTU:1500 Metric:1 RX packets:32 errors:0 dropped:0 overruns:0 frame:0 TX packets:24 errors:0 dropped:0 overruns:0 carrier:0 collisions:0 txqueuelen:0 RX bytes:2114 (2.0 KiB) TX bytes:3136 (3.0 KiB)
em1 Link encap:Ethernet HWaddr A4:BA:DB:20:93:23 inet6 addr: fe80::a6ba:dbff:fe20:9323/64 Scope:Link UP BROADCAST RUNNING MULTICAST MTU:1500 Metric:1 RX packets:22 errors:0 dropped:0 overruns:0 frame:0 TX packets:15 errors:0 dropped:0 overruns:0 carrier:0 collisions:0 txqueuelen:1000 RX bytes:1700 (1.6 KiB) TX bytes:2472 (2.4 KiB)
lo Link encap:Local Loopback inet addr:127.0.0.1 Mask:255.0.0.0 inet6 addr: ::1/128 Scope:Host UP LOOPBACK RUNNING MTU:65536 Metric:1 RX packets:0 errors:0 dropped:0 overruns:0 frame:0 TX packets:0 errors:0 dropped:0 overruns:0 carrier:0 collisions:0 txqueuelen:0 RX bytes:0 (0.0 b) TX bytes:0 (0.0 b)
virbr0 Link encap:Ethernet HWaddr 52:54:00:5C:6D:1B inet addr:192.168.122.1 Bcast:192.168.122.255 Mask:255.255.255.0 UP BROADCAST RUNNING MULTICAST MTU:1500 Metric:1 RX packets:0 errors:0 dropped:0 overruns:0 frame:0 TX packets:0 errors:0 dropped:0 overruns:0 carrier:0 collisions:0 txqueuelen:0 RX bytes:0 (0.0 b) TX bytes:0 (0.0 b)
[root@daixuan network-scripts]# /etc/init.d/libvirtd start
[root@daixuan network-scripts]# /etc/init.d/messagebus restart [root@daixuan network-scripts]# brctl show bridge name bridge id STP enabled interfaces br1 8000.a4badb209323 no em1 virbr0 8000.5254005c6d1b yes virbr0-nic
之后手动配置IP地址,该虚拟机能够上网,就可以进入安装界面了,Re-initilialize all,时区选择亚洲上海,省略linux安装过程。
说明:
--name指定虚拟机的名字
--os-type 指定系统类型为linux --disk path 指定虚拟磁盘放到哪里,size=30 指定磁盘大小为30G,这样磁盘文件格式为raw,raw格式不能做快照,后面有说明,需要转换为qcow2格式,如果要使用qcow2格式的虚拟磁盘,需要事先创建qcow2格式的虚拟磁盘。 参考http://www.361way.com/kvm-qcow2-preallocation-metadata/3354.html 示例: qemu-img create -f qcow2 -o preallocation=metadata/data/daixuan2.img 10G
[root@daixuan ~]#virt-install \
最后安装完,reboot就进入刚刚创建的虚拟机了。要想退回到宿主机,ctrl] 即可。 (责任编辑:IT) |