2019IT运维笔记 Nginx
时间:2019-02-02 17:30 来源:www.it.net.cn 作者:IT
安装nginx
centos 6安装
http://nginx.org/en/linux_packages.html#stable 找到链接,安装:
rpm -ivh http://nginx.org/packages/centos/6/noarch/RPMS/nginx-release-centos-6-0.el6.ngx.noarch.rpm
centos 7安装
rpm -ivh http://nginx.org/packages/centos/7/noarch/RPMS/nginx-release-centos-7-0.el7.ngx.noarch.rpm
如果执行yum install nginx出错
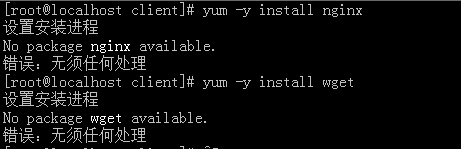
nginx安装错误:No package nginx available
出现错误:
1,备份
mv /etc/yum.repos.d/CentOS-Base.repo /etc/yum.repos.d/CentOS-Base.repo.backup
2、下载新的CentOS-Base.repo 到/etc/yum.repos.d/
centos 5

wget -O /etc/yum.repos.d/CentOS-Base.repo http://mirrors.aliyun.com/repo/Centos-5.repo

或者

curl -o /etc/yum.repos.d/CentOS-Base.repo http://mirrors.aliyun.com/repo/Centos-5.repo

centos 6

wget -O /etc/yum.repos.d/CentOS-Base.repo http://mirrors.aliyun.com/repo/Centos-6.repo

或者

curl -o /etc/yum.repos.d/CentOS-Base.repo http://mirrors.aliyun.com/repo/Centos-6.repo

 centos 7

wget -O /etc/yum.repos.d/CentOS-Base.repo http://mirrors.aliyun.com/repo/Centos-7.repo

或者

curl -o /etc/yum.repos.d/CentOS-Base.repo http://mirrors.aliyun.com/repo/Centos-7.repo
3,运行 yum makecache
4,运行yum install epel-release
5,运行yum install -y nginx
Nginx默认目录
输入命令:whereis nginx
即可看到类似于如下的内容:
nginx: /usr/sbin/nginx /usr/lib64/nginx /etc/nginx /usr/share/nginx
以下是Nginx的默认路径:
(1) Nginx配置路径:/etc/nginx/
(2) PID目录:/var/run/nginx.pid
(3) 错误日志:/var/log/nginx/error.log
(4) 访问日志:/var/log/nginx/access.log
(5) 默认站点目录:/usr/share/nginx/html
事实上,只需知道Nginx配置路径,其他路径均可在/etc/nginx/nginx.conf 以及/etc/nginx/conf.d/default.conf 中查询到。
常用命令
(1) 启动:
nginx
(2) 测试Nginx配置是否正确:
nginx -t
(3) 优雅重启:
nginx -s reload
(4) 查看nginx的进程号:
ps -ef |grep nginx
(5)nginx服务停止
nginx -s stop
kill -9 pid
当然,Nginx也可以编译源码安装,步骤相对要繁琐一些
如果安装失败:
移除掉刚才安装的nginx
执行:yum remove nginx
2,添加Centos Nginx yum资源库
执行:rpm -Uvh http://nginx.org/packages/centos/7/noarch/RPMS/nginx-release-centos-7-0.el7.ngx.noarch.rpm Retrieving http://nginx.org/packages/centos/7/noarch/RPMS/nginx-release-centos-7-0.el7.ngx.noarch.rpm
3,安装nginx
执行:yum install -y nginx
----------------------------------------------
安装过程中出错的解决办法:
Job for nginx.service failed because the control process exited with error code. See "systemctl status nginx.service" and "journalctl -xe" for details.
关闭selinux
1、selinux引起nginx启动失败
问题描述:
修改了nginx的配置文件,绑定了监听9089端口,重启nginx的时候失败了。发现报错“nginx: [emerg] bind() to 0.0.0.0:9089 failed (13: Permission denied)”:
[root@test101 nginx]# systemctl restart nginx
Job for nginx.service failed because the control process exited with error code. See "systemctl status nginx.service" and "journalctl -xe" for details.
[root@test101 nginx]# systemctl status nginx.service
● nginx.service - nginx - high performance web server
Loaded: loaded (/usr/lib/systemd/system/nginx.service; disabled; vendor preset: disabled)
Active: failed (Result: exit-code) since 五 2018-07-20 09:27:01 CST; 8s ago
Docs: http://nginx.org/en/docs/
Process: 50264 ExecStop=/bin/kill -s TERM $MAINPID (code=exited, status=0/SUCCESS)
Process: 50329 ExecStart=/usr/sbin/nginx -c /etc/nginx/nginx.conf (code=exited, status=1/FAILURE)
Main PID: 50243 (code=exited, status=0/SUCCESS)
7月 20 09:27:01 test101 systemd[1]: Starting nginx - high performance web server...
7月 20 09:27:01 test101 nginx[50329]: nginx: [emerg] bind() to 0.0.0.0:9089 failed (13: Permission denied)
7月 20 09:27:01 test101 systemd[1]: nginx.service: control process exited, code=exited status=1
7月 20 09:27:01 test101 systemd[1]: Failed to start nginx - high performance web server.
7月 20 09:27:01 test101 systemd[1]: Unit nginx.service entered failed state.
7月 20 09:27:01 test101 systemd[1]: nginx.service failed.
解决方法:
发现是因为selinux状态是enforcing,关闭了selinux再启动nginx就好了
[root@test101 nginx]# vim /etc/selinux/config
# This file controls the state of SELinux on the system.
# SELINUX= can take one of these three values:
# enforcing - SELinux security policy is enforced.
# permissive - SELinux prints warnings instead of enforcing.
# disabled - No SELinux policy is loaded.
SELINUX=enforcing #改成disabled就OK了
# SELINUXTYPE= can take one of three two values:
# targeted - Targeted processes are protected,
# minimum - Modification of targeted policy. Only selected processes are protected.
# mls - Multi Level Security protection.
SELINUXTYPE=targeted
2、OPENSSL引起nginx启动失败
问题描述:
在部署深圳电信nginx的时候,启动失败了,报错说找不到OPENSSL_1.0.2:
[root@host-172-0-0-11 conf.d]# systemctl start nginx
Job for nginx.service failed because the control process exited with error code. See "systemctl status nginx.service" and "journalctl -xe" for details.
查看报错原因,发现提示“version `OPENSSL_1.0.2' not found”:
[root@host-172-0-0-11 conf.d]# systemctl status nginx.service
â— nginx.service - nginx - high performance web server
Loaded: loaded (/usr/lib/systemd/system/nginx.service; disabled; vendor preset: disabled)
Active: failed (Result: exit-code) since Thu 2018-08-02 11:11:40 CST; 7s ago
Docs: http://nginx.org/en/docs/
Process: 18995 ExecStart=/usr/sbin/nginx -c /etc/nginx/nginx.conf (code=exited, status=1/FAILURE)
Aug 02 11:11:40 host-172-51-121-11 systemd[1]: Starting nginx - high performance web server...
Aug 02 11:11:40 host-172-51-121-11 nginx[18995]: /usr/sbin/nginx: /lib64/libcrypto.so.10: version `OPENSSL_1.0.2' not found (required by /usr/sbin/nginx)
Aug 02 11:11:40 host-172-51-121-11 systemd[1]: nginx.service: control process exited, code=exited status=1
Aug 02 11:11:40 host-172-51-121-11 systemd[1]: Failed to start nginx - high performance web server.
Aug 02 11:11:40 host-172-51-121-11 systemd[1]: Unit nginx.service entered failed state.
Aug 02 11:11:40 host-172-51-121-11 systemd[1]: nginx.service failed.
查看本机的openssl,发现本机的openssl确实与nginx要求的版本不符合
[root@host-172-51-121-11 conf.d]# rpm -qa openssl
openssl-1.0.1e-60.el7.x86_64
[root@host-172-0-0-11 conf.d]#
解决方法:
重新安装OPENSSL_1.0.2,然后启动nginx,成功
3、pid文件丢失,nginx起不来,页面无法访问
---------------------------------------------
编译安装nginx
CentOS 7 作为安装环境。
一. gcc 安装
安装 nginx 需要先将官网下载的源码进行编译,编译依赖 gcc 环境,如果没有 gcc 环境,则需要安装:
yum install gcc-c++
二. PCRE pcre-devel 安装
PCRE(Perl Compatible Regular Expressions) 是一个Perl库,包括 perl 兼容的正则表达式库。nginx 的 http 模块使用 pcre 来解析正则表达式,所以需要在 linux 上安装 pcre 库,pcre-devel 是使用 pcre 开发的一个二次开发库。nginx也需要此库。命令:
yum install -y pcre pcre-devel
三. zlib 安装
zlib 库提供了很多种压缩和解压缩的方式, nginx 使用 zlib 对 http 包的内容进行 gzip ,所以需要在 Centos 上安装 zlib 库。
yum install -y zlib zlib-devel
四. OpenSSL 安装
OpenSSL 是一个强大的安全套接字层密码库,囊括主要的密码算法、常用的密钥和证书封装管理功能及 SSL 协议,并提供丰富的应用程序供测试或其它目的使用。
nginx 不仅支持 http 协议,还支持 https(即在ssl协议上传输http),所以需要在 Centos 安装 OpenSSL 库。
yum install -y openssl openssl-devel
官网下载
1.直接下载.tar.gz安装包,地址:https://nginx.org/en/download.html
2.使用wget命令下载(推荐)。确保系统已经安装了wget,如果没有安装,执行 yum install wget 安装。
wget -c https://nginx.org/download/nginx-1.12.0.tar.gz
我下载的是1.12.0版本,这个是目前的稳定版。
解压
依然是直接命令:
tar -zxvf nginx-1.12.0.tar.gz
cd nginx-1.12.0
配置
其实在 nginx-1.12.0 版本中你就不需要去配置相关东西,默认就可以了。当然,如果你要自己配置目录也是可以的。
1.使用默认配置
./configure
2.自定义配置(不推荐)
./configure \
--prefix=/usr/local/nginx \
--conf-path=/usr/local/nginx/conf/nginx.conf \
--pid-path=/usr/local/nginx/conf/nginx.pid \
--lock-path=/var/lock/nginx.lock \
--error-log-path=/var/log/nginx/error.log \
--http-log-path=/var/log/nginx/access.log \
--with-http_gzip_static_module \
--http-client-body-temp-path=/var/temp/nginx/client \
--http-proxy-temp-path=/var/temp/nginx/proxy \
--http-fastcgi-temp-path=/var/temp/nginx/fastcgi \
--http-uwsgi-temp-path=/var/temp/nginx/uwsgi \
--http-scgi-temp-path=/var/temp/nginx/scgi
注:将临时文件目录指定为/var/temp/nginx,需要在/var下创建temp及nginx目录
编译安装
make
make install
查找安装路径:
whereis nginx
nginx-whereis.png
启动、停止nginx
cd /usr/local/nginx/sbin/
./nginx
./nginx -s stop
./nginx -s quit
./nginx -s reload
启动时报80端口被占用:
nginx: [emerg] bind() to 0.0.0.0:80 failed (98: Address already in use)
解决办法:1、安装net-tool 包:
yum install net-tools
./nginx -s quit:此方式停止步骤是待nginx进程处理任务完毕进行停止。
./nginx -s stop:此方式相当于先查出nginx进程id再使用kill命令强制杀掉进程。
查询nginx进程:
ps aux|grep nginx
重启 nginx
1.先停止再启动(推荐):
对 nginx 进行重启相当于先停止再启动,即先执行停止命令再执行启动命令。如下:
./nginx -s quit
./nginx
2.重新加载配置文件:
当 ngin x的配置文件 nginx.conf 修改后,要想让配置生效需要重启 nginx,使用-s reload不用先停止 ngin x再启动 nginx 即可将配置信息在 nginx 中生效,如下:
./nginx -s reload
启动成功后,在浏览器可以看到这样的页面:
nginx-welcome.png
开机自启动
即在rc.local增加启动代码就可以了。
vi /etc/rc.local
增加一行 /usr/local/nginx/sbin/nginx
设置执行权限:
chmod 755 rc.local
nginx-rclocal.png
(责任编辑:IT)
| 安装nginx centos 6安装 http://nginx.org/en/linux_packages.html#stable 找到链接,安装:
rpm -ivh http://nginx.org/packages/centos/6/noarch/RPMS/nginx-release-centos-6-0.el6.ngx.noarch.rpm 出现错误:
1,备份 mv /etc/yum.repos.d/CentOS-Base.repo /etc/yum.repos.d/CentOS-Base.repo.backup 2、下载新的CentOS-Base.repo 到/etc/yum.repos.d/ centos 5 wget -O /etc/yum.repos.d/CentOS-Base.repo http://mirrors.aliyun.com/repo/Centos-5.repo 或者 curl -o /etc/yum.repos.d/CentOS-Base.repo http://mirrors.aliyun.com/repo/Centos-5.repo centos 6 wget -O /etc/yum.repos.d/CentOS-Base.repo http://mirrors.aliyun.com/repo/Centos-6.repo 或者 curl -o /etc/yum.repos.d/CentOS-Base.repo http://mirrors.aliyun.com/repo/Centos-6.repo centos 7 wget -O /etc/yum.repos.d/CentOS-Base.repo http://mirrors.aliyun.com/repo/Centos-7.repo 或者 curl -o /etc/yum.repos.d/CentOS-Base.repo http://mirrors.aliyun.com/repo/Centos-7.repo 3,运行 yum makecache 4,运行yum install epel-release 5,运行yum install -y nginx
移除掉刚才安装的nginx
执行:yum remove nginx
2,添加Centos Nginx yum资源库
执行:rpm -Uvh http://nginx.org/packages/centos/7/noarch/RPMS/nginx-release-centos-7-0.el7.ngx.noarch.rpm Retrieving http://nginx.org/packages/centos/7/noarch/RPMS/nginx-release-centos-7-0.el7.ngx.noarch.rpm
3,安装nginx
执行:yum install -y nginx
--------------------------------------------- |