|
内存分配为:512M 利用镜像或本地yum源进行安装 进去后进行以下修改: (1). rm -fr/etc/udev/rules.d/70-persistent-net.rules #网卡备份信息文件的修改 (2).rm -fr /etc/ssh/ssh_host_* (3).vim /etc/selinux/config文件 SELINUX=disabled #修改selinux为disabled (4).vim /etc/sysconfig/network NETWORKING=yes NOZEROCONF=yes #自动分配主机名 (5).vim /etc/yum.repos.d/rhel-source.repo #配置yun源 [rhel-source] name=Red Hat Enterprise Linux $releasever -$basearch - Source baseurl=http://172.25.9.250/rhel6.5 #本地私有网段的yum源 enabled=1 gpgcheck=0 (6).vim /etc/sysconfig/network-scripts/ifcfg-eth0 #配置网络 DEVICE="eth0" BOOTPROTO="dhcp" #IPADDR="172.25.9.109" #NETMASK="255.255.255.0" ONBOOT="yes" (7).chkconfig iptables off #关闭防火墙 2、创建新的虚拟机; [root@localhost ~]# cd/var/lib/libvirt/images/ #文件存在位置 [root@localhost images]# ls example.img rh124-desktop-vdb.qcow2 rh124-server-vdb.qcow2 porvider.img rh124-desktop.xml rh124-server.xml rh124-desktop-vda.ovl rh124-server-vda.ovl test-pt1 rh124-desktop-vda.qcow2 rh124-server-vda.qcow2 test-pt2 rh124-desktop-vdb.ovl rh124-server-vdb.ovl [root@localhost images]# qemu-img create -fqcow2 -b example.img pt1 #用封装好的虚拟机example.img创建新的虚拟机pt1 Formatting 'pt1', fmt=qcow2 size=8589934592backing_file='example.img' encryption=off cluster_size=65536 lazy_refcounts=off [root@localhost images]# qemu-img create -fqcow2 -b example.img pt2 #用封装好的虚拟机example.img创建新的虚拟机p2 Formatting 'pt2', fmt=qcow2 size=8589934592backing_file='example.img' encryption=off cluster_size=65536 lazy_refcounts=off 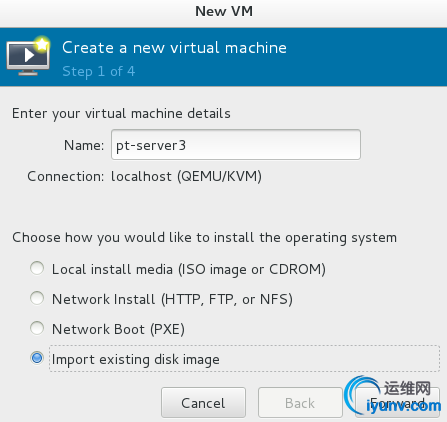 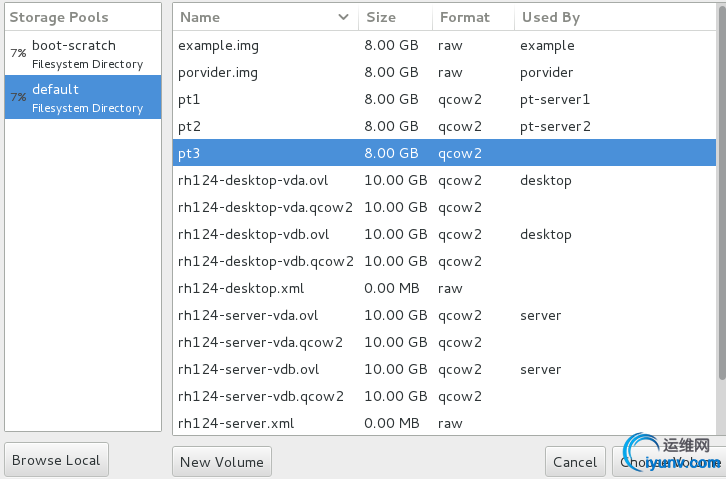  PS:特别注意每次创建新的虚拟机时,一定要用封装好的虚拟机进行新的创建,不能用同一个创建不同的虚拟机 创建好以后,进去查看ip以及主机名,然后配置好即可。 (责任编辑:IT) |