ESXi脚本式安装
时间:2019-09-03 21:14 来源:linux.it.net.cn 作者:IT
对于小型环境的部署可以选择脚本安装,简化安装过程的重复过程,安装脚本必须存储在主机可以通过HTTP、HTTPS、FTP、NFS、CD-ROM 或 USB 访问的位置中。可以以 PXE方式引导 ESXi 安装程序或从 CD/DVD 或 USB 驱动器中引导。
默认安装脚本介绍:
默认 ks.cfg 安装脚本位于 /etc/vmware/weasel/ks.cfg 的初始内存磁盘中,如果想要修改安装脚本可以选择一台安装好的ESXi,将其导出并进行修改,修改参数可参考官方文档,可以设置license、密码、网络等相关参数,如下:
#ks.cfg
# Sample scripted installation file
# Accept the VMware End User License Agreement
vmaccepteula
# Set the root password for the DCUI and Tech Support Mode
rootpw 1qaz!QAZ

# The install media is in the CD-ROM drive
install --firstdisk --overwritevmfs

# custom
vmserialnum  --esx=JA0Q0-4029Q-8ZWZ9-J28NK-1380Y
network --bootproto=static --device=vmnic0 --ip=192.168.233.150 --gateway=192.168.233.1 --nameserver=8.8.8.8 --netmask=255.255.255.0 --hostname=Test-ESXi01
# A sample post-install script
%post --interpreter=python --ignorefailure=true
import time
stampFile = open('/finished.stamp', mode='w')
stampFile.write( time.asctime() )
修改后需要在ESXi安装镜像文件中的boot.cfg文件中指定ks.cfg 的位置。
将kickstart文件放置到TFP服务器安装示例:
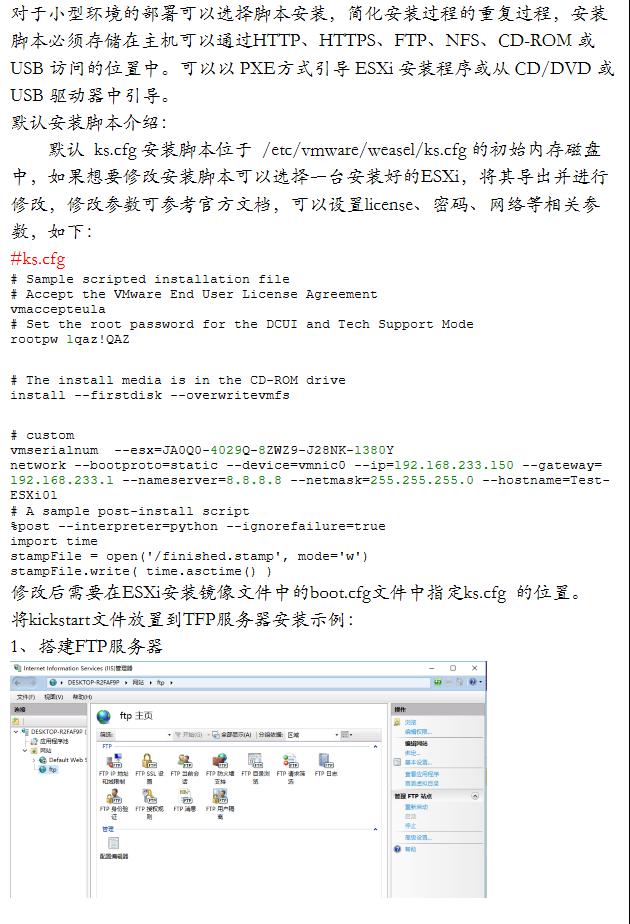
1、搭建FTP服务器

2、在Linux(centos)系统中将 ESXi安装镜像解压并复制到NEWESXi目录下
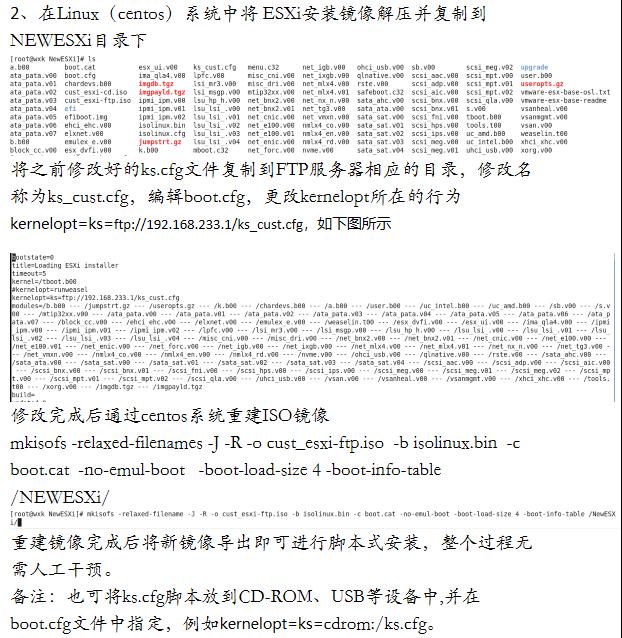
将之前修改好的ks.cfg文件复制到FTP服务器相应的目录,修改名称为ks_cust.cfg,编辑boot.cfg,更改kernelopt所在的行为 kernelopt=ks=ftp://192.168.233.1/ks_cust.cfg,如下图所示
修改完成后通过centos系统重建ISO镜像
mkisofs -relaxed-filenames -J -R -o cust_esxi-ftp.iso -b isolinux.bin -c boot.cat -no-emul-boot -boot-load-size 4 -boot-info-table /NEWESXi/
重建镜像完成后将新镜像导出即可进行脚本式安装,整个过程无需人工干预。
备注:也可将ks.cfg脚本放到CD-ROM、USB等设备中,并在boot.cfg文件中指定,例如kernelopt=ks=cdrom:/ks.cfg。

(责任编辑:IT)
对于小型环境的部署可以选择脚本安装,简化安装过程的重复过程,安装脚本必须存储在主机可以通过HTTP、HTTPS、FTP、NFS、CD-ROM 或 USB 访问的位置中。可以以 PXE方式引导 ESXi 安装程序或从 CD/DVD 或 USB 驱动器中引导。
# Sample scripted installation file
# Accept the VMware End User License Agreement
vmaccepteula
# Set the root password for the DCUI and Tech Support Mode
rootpw 1qaz!QAZ
# The install media is in the CD-ROM drive
install --firstdisk --overwritevmfs
# custom
vmserialnum --esx=JA0Q0-4029Q-8ZWZ9-J28NK-1380Y
network --bootproto=static --device=vmnic0 --ip=192.168.233.150 --gateway=192.168.233.1 --nameserver=8.8.8.8 --netmask=255.255.255.0 --hostname=Test-ESXi01
# A sample post-install script
%post --interpreter=python --ignorefailure=true
import time
stampFile = open('/finished.stamp', mode='w')
stampFile.write( time.asctime() )
修改后需要在ESXi安装镜像文件中的boot.cfg文件中指定ks.cfg 的位置。
修改完成后通过centos系统重建ISO镜像
重建镜像完成后将新镜像导出即可进行脚本式安装,整个过程无需人工干预。 (责任编辑:IT) |