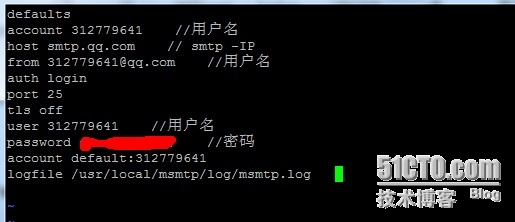
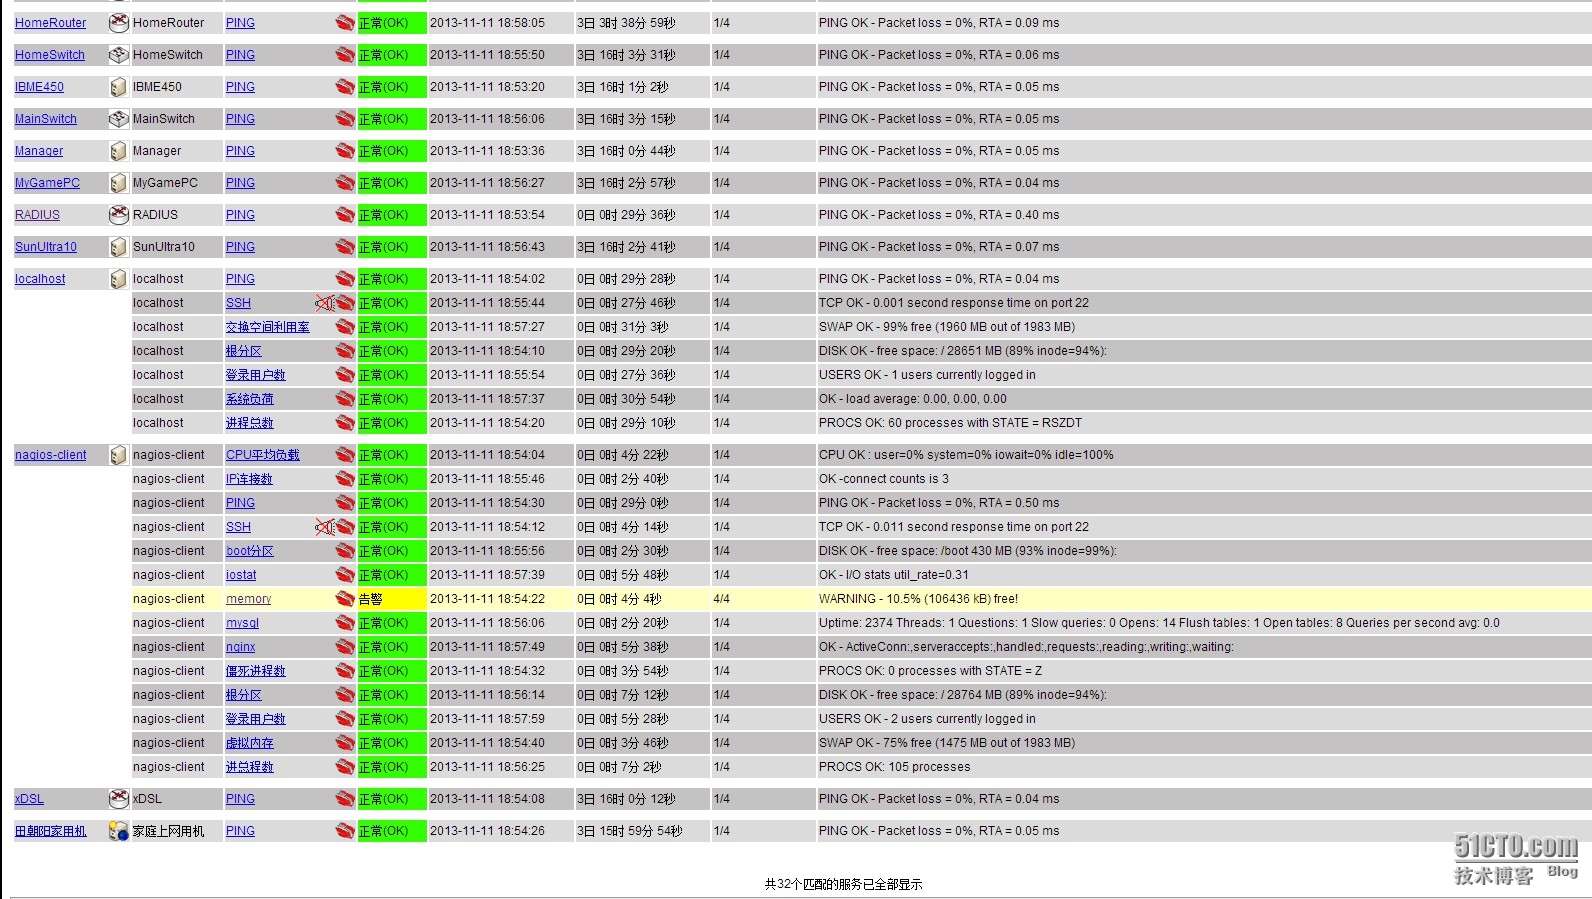
CentOS 6.2+Nginx+Nagios,手机短信和qq邮箱提醒
时间:2014-03-04 00:37 来源:51cto.com 作者:51cto
1
2
3
4
5
6
7
8
9
10
11
12
tarxvf nagios-cn-3.2.3.tar.bz2
cdnagios-cn-3.2.3
useradd-m -s /bin/bashnagios
usermod-a -G nagcmd nagios
./configure--prefix=/usr/local/nagios--with-command-group=nagcmd
make
makeall
makeinstall
makeinstall-init # 生成init启动脚本
makeinstall-config # 安装示例配置文件
makeinstall-commandmode # 设置相应的目录权限
chmodo+rwx /usr/local/nagios/var/rw
1
2
3
4
5
6
7
8
wget http://prdownloads.sourceforge.net/sourceforge/nagiosplug/nagios-plugins
tarzxvf nagios-plugins-1.4.16.tar.gz
cdnagios-plugins-1.4.16
yum installmakeapr* autoconf automake curl curl-devel gcc gcc-c++ zlib-devel \
openssl openssl-devel pcre-devel gd gd-devel kernel keyutils patch perl perl-devel \
kernel keyutils kernel-headers compat* mpfr cpp glibc libgomp libstdc++-devel ppl \
cloog-ppl keyutils-libs-devel libcom_err-devel libsepol-devel libselinux-devel \
krb5-devel zlib-devel libXpm* freetype libjpeg* libpng* php-common php-gd ncurses* libtool* libxml2 libxml2-devel patch -y
1
2
3
./configure--prefix=/usr/local/nagios--with-mysql=/home/mysql/
make
makeinstall
1
2
3
4
5
6
7
8
9
10
11
12
tarxzvf nrpe-2.12.tar.gz
cdnrpe-2.12
./configure
make
./configure
makeall
makeinstall-plugin
makeinstall-daemon
makeinstall-daemon-config
\cpsrc/check_nrpe/usr/local/nagios/libexec/
/usr/local/nagios/bin/nrpe-c /usr/local/nagios/etc/nrpe.cfg -d
echo'/usr/local/nagios/bin/nrpe -c /usr/local/nagios/etc/nrpe.cfg -d'>> /etc/rc.local
1
2
3
4
5
要重启nrpe进行就先杀掉进行,然后重启
kill`psaux |grepnrpe |grep-vgrep|awk'{print $2}'`
/usr/local/nagios/bin/nrpe-c /usr/local/nagios/etc/nrpe.cfg -d
本机测试下:
/usr/local/nagios/libexec/check_nrpe-H localhost -c check_users
1
2
3
4
5
6
加入系统服务并设为开机自动
chkconfig --add nagios
chkconfig nagios on
chownnagios.nagios /usr/local/nagios/var/rw
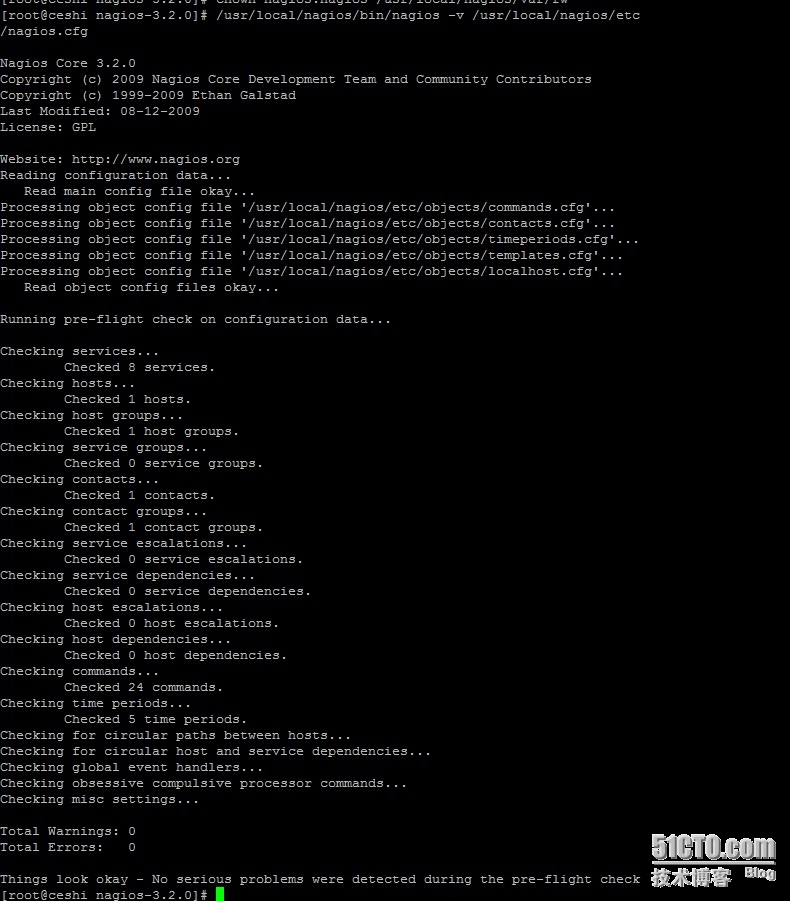
# 测试配置文件是否正确
/usr/local/nagios/bin/nagios-v/usr/local/nagios/etc/nagios.cfg
1
2
3
4
5
vi~/.bashrc
在里面用alias来自定义一个命令来代替,这里我用check
aliascheck='/usr/local/nagios/bin/nagios -v /usr/local/nagios/etc/nagios.cfg'
source~/.bashrc
此时可以用check命令来检测配置文件了
1
2
3
4
5
6
7
8
9
10
11
12
13
14
15
16
17
18
19
20
21
22
23
24
25
26
27
28
29
30
31
32
33
34
35
36
37
38
39
40
41
42
43
44
45
46
47
48
49
50
51
vi/usr/local/nagios/etc/objects/contacts.cfg
###############################################################################
# CONTACTS.CFG - SAMPLE CONTACT/CONTACTGROUP DEFINITIONS
#
# Last Modified: 05-31-2007
#
# NOTES: This config file provides you with some example contact and contact
# group definitions that you can reference in host and service
# definitions.
#
# You don't need to keep these definitions in a separate file from your
# other object definitions. This has been done just to make things
# easier to understand.
#
###############################################################################
###############################################################################
###############################################################################
#
# CONTACTS
#
###############################################################################
###############################################################################
# Just one contact defined by default - the Nagios admin (that's you)
# This contact definition inherits a lot of default values from the 'generic-contact'
# template which is defined elsewhere.
define contact{
contact_name nagiosadmin ; Short name of user
use generic-contact ; Inherit default values from generic-contact template (defined above)
aliasNagios Admin ; Full name of user
email nagios@localhost ; <<***** CHANGE THIS TO YOUR EMAIL ADDRESS ******
}
###############################################################################
###############################################################################
#
# CONTACT GROUPS
#
###############################################################################
###############################################################################
# We only have one contact in this simple configuration file, so there is
# no need to create more than one contact group.
define contactgroup{
contactgroup_name admins
aliasNagios Administrators
members nagiosadmin
}
定义check_nrpe命令
vi/usr/local/nagios/etc/objects/commands.cfg
define command{
command_name check_nrpe
command_line /usr/local/nagios/libexec/check_nrpe-H $HOSTADDRESS$ -c $ARG1$
}
1
2
3
4
5
6
7
8
9
10
11
12
13
14
15
16
17
18
19
20
21
22
23
24
25
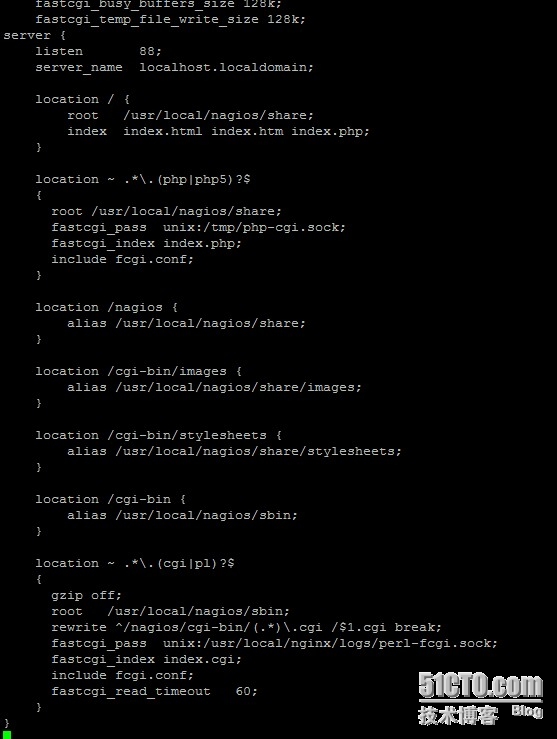
nginx 配置,Nginx fastcgi perl (pl、cgi)支持
安装FCGI模块
cd
tarzxvf FCGI-0.70.tar.gz
cdFCGI-0.70
perl Makefile.PL
make
makeinstall
cd
安装 IO 和 IO::ALL模块
tarzxvf IO-1.25.tar.gz
cdIO-1.25
perl Makefile.PL
make
makeinstall
cd
tarzxvf IO-All-0.41.tar.gz
cdIO-All-0.41
perl Makefile.PL
make
makeinstall
cd
unzip perl-fcgi.zip
cpperl-fcgi.pl /usr/local/nginx/
chmod755 /usr/local/nginx/perl-fcgi.pl
1
2
3
4
5
6
7
8
9
10
11
12
13
14
15
16
17
18
19
20
21
22
23
24
25
26
27
28
29
30
31
32
33
34
vi/usr/local/nginx/start_perl_cgi.sh
#!/bin/bash
#set -x
dir=/usr/local/nginx/
stop ()
{
#pkill -f $dir/perl-fcgi.pl
kill$(cat$dir/logs/perl-fcgi.pid)
rm$dir/logs/perl-fcgi.pid 2>/dev/null
rm$dir/logs/perl-fcgi.sock 2>/dev/null
echo"stop perl-fcgi done"
}
start ()
{
rm$dir/now_start_perl_fcgi.sh 2>/dev/null
chownnobody.root $dir/logs
echo"$dir/perl-fcgi.pl -l $dir/logs/perl-fcgi.log -pid $dir/logs/perl-fcgi.pid -S $dir/logs/perl-fcgi.sock">>$dir/now_start_perl_fcgi.sh
chownnobody.nobody $dir/now_start_perl_fcgi.sh
chmodu+x $dir/now_start_perl_fcgi.sh
sudo-u nobody $dir/now_start_perl_fcgi.sh
echo"start perl-fcgi done"
}
case$1 in
stop)
stop
;;
start)
start
;;
restart)
stop
start
;;
esac
1
2
3
sed-i 's@nobody@nagios@g'/usr/local/nginx/start_perl_cgi.sh
chmod755 /usr/local/nginx/start_perl_cgi.sh
/usr/local/nginx/start_perl_cgi.sh start
1
2
3
4
5
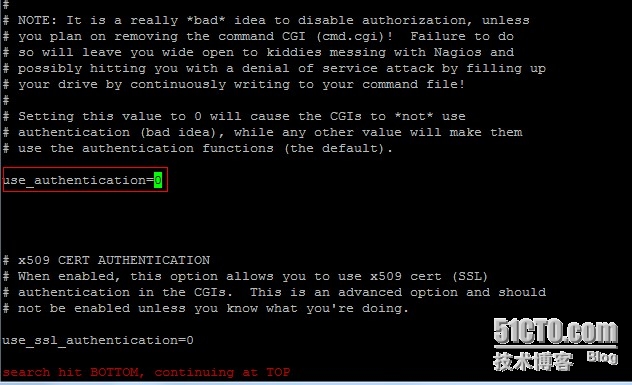
# 取消用户认证(方便调试)
vi/usr/local/nagios/etc/cgi.cfg
找到use_authentication=1并把值改为0
修改联系人邮箱,修改为用于报警接收的邮件地址
vi/usr/local/nagios/etc/objects/contacts.cfg
1
2
3
4
5
6
7
8
9
10
11
12
13
14
15
16
yum installopenssl-devel -y
1. nagios-plugins安装
groupadd nagios
useraddnagios -M -s /sbin/nologin-g nagios
tarxvf nagios-plugins-1.4.16.tar.gz
cdnagios-plugins-1.4.16
./configure--prefix=/usr/local/nagios--with-nagios-user=nagios --with-nagios-gourp=nagios --with-mysql=/usr/local/mysql&& make&& makeinstall
cd
2. nrpe安装
tarzxvf nrpe-2.13.tar.gz
cdnrpe-2.13
./configure
makeall
makeinstall-plugin
makeinstall-daemon
makeinstall-daemon-config
1
2
3
启动nrpe
/usr/local/nagios/bin/nrpe-c /usr/local/nagios/etc/nrpe.cfg -d
echo'/usr/local/nagios/bin/nrpe -c /usr/local/nagios/etc/nrpe.cfg -d'>> /etc/rc.local
1
2
3
unzip libexec.zip
\cplibexec/* /usr/local/nagios/libexec
chmod-R +x /usr/local/nagios/libexec
1
2
3
4
5
创建一个空的数据库nagios,授权nagios这个用户从任何地方访问nagios这个数据库,刷新授权设置,查询下nagios这个用户是否创建成功
create database nagios;
grant selecton nagios.* to nagios @'%'identified by '123456';
flush privileges;
selectUser,Password,Host from mysql.user;
1
2
3
4
5
6
7
8
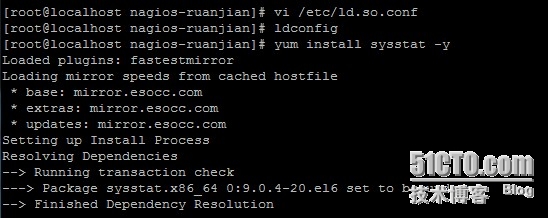
添加mysql库到系统搜索库
vim /etc/ld.so.conf
/usr/local/mysql/lib
ldconfig
要监控磁盘io,还得安装sysstat这个工具包
yum installsysstat -y
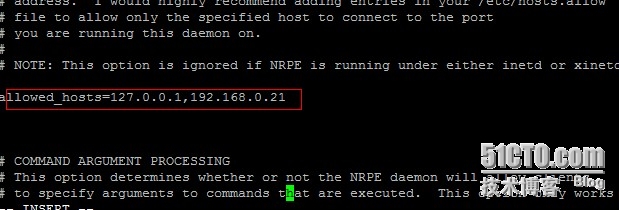
配置客户端上面的nrpe
vim /usr/local/nagios/etc/nrpe.cfg
1
2
3
4
5
6
7
8
9
10
11
12
13
14
15
16
17
18
19
20
21
22
23
24
25
26
27
28
29
30
31
32
33
34
35
36
37
38
39
40
41
42
43
44
45
46
47
48
49
50
51
52
53
54
55
56
57
58
59
60
61
62
63
64
65
66
67
68
69
70
71
72
73
74
75
76
77
78
79
80
81
82
83
84
85
86
87
88
89
90
91
92
93
94
95
96
97
98
99
100
101
102
103
104
105
106
107
108
109
110
111
112
113
114
115
116
117
118
119
120
121
122
123
124
125
126
127
128
129
130
131
132
133
134
135
136
137
138
139
140
141
142
143
144
145
146
147
148
149
150
151
152
153
154
155
156
157
158
159
160
161
162
163
164
165
166
167
168
169
170
171
172
173
174
175
176
177
178
179
180
181
182
183
184
配置客户端上面的nrpe
vim /usr/local/nagios/etc/nrpe.cfg
command[check_users]=/usr/local/nagios/libexec/check_users-w 5 -c 10
command[check_load]=/usr/local/nagios/libexec/check_cpu.sh -w 80% -c 90%
command[check_sda1]=/usr/local/nagios/libexec/check_disk-w 20% -c 10% -p /dev/sda1
command[check_sda2]=/usr/local/nagios/libexec/check_disk-w 20% -c 10% -p /dev/sda2
command[check_zombie_procs]=/usr/local/nagios/libexec/check_procs-w 5 -c 10 -s Z
command[check_total_procs]=/usr/local/nagios/libexec/check_procs-w 150 -c 200
command[check_swap]=/usr/local/nagios/libexec/check_swap-w 20% -c 10%
command[check_iostat]=/usr/local/nagios/libexec/check_iostat.sh -d sda -w 6 -c 10
command[check_mysql]=/usr/local/nagios/libexec/check_mysql-H 192.168.0.22 -u nagios -p 123456 -d nagios
command[check_nginx]=/usr/local/nagios/libexec/check_nginx.sh -u 192.168.0.22 -p /status-w 4000 -c 5000
command[check_mem]=/usr/local/nagios/libexec/check_memory.pl -f -w 20 -c 10
command[check_ip_conn]=/usr/local/nagios/libexec/ip_conn.sh 200 250
command[check_ssh]=/usr/local/nagios/libexec/check_tcp-p 22 -w 1.0 -c 10.0
配置完成后,重启nrpe
kill`psaux |grepnrpe |grep-vgrep|awk'{print $2}'`
/usr/local/nagios/bin/nrpe-c /usr/local/nagios/etc/nrpe.cfg -d
服务端配置:
监控服务端本机的配置:
vim /usr/local/nagios/etc/objects/localhost.cfg
修改里面的配置,最后修改完成的配置如下
define host{
use linux-server
host_name localhost
aliaslocalhost
address 127.0.0.1
icon_image server.gif
statusmap_image server.gd2
2d_coords 500,200
3d_coords 500,200,100
}
define hostgroup{
hostgroup_name linux-servers ; The name of the hostgroup
aliasLinux Servers ; Long name of the group
members * ; Comma separated list of hosts that belong to this group
}
define servicegroup{
servicegroup_name 全部联通性检查
alias联通性检查
members localhost,PING,nagios-client,PING
}
define service{
use local-service ; Name of service template to use
host_name *
service_description PING
check_command check_ping!100.0,20%!500.0,60%
}
define service{
use local-service ; Name of service template to use
host_name localhost
service_description 根分区
check_command check_local_disk!20%!10%!/
}
define service{
use local-service ; Name of service template to use
host_name localhost
service_description 登录用户数
check_command check_local_users!20!50
}
define service{
use local-service ; Name of service template to use
host_name localhost
service_description 进程总数
check_command check_local_procs!250!400!RSZDT
}
define service{
use local-service ; Name of service template to use
host_name localhost
service_description 系统负荷
check_command check_local_load!5.0,4.0,3.0!10.0,6.0,4.0
}
define service{
use local-service ; Name of service template to use
host_name localhost
service_description 交换空间利用率
check_command check_local_swap!20!10
}
define service{
use local-service ; Name of service template to use
host_name localhost
service_description SSH
check_command check_tcp!22!1.0!10.0
notifications_enabled 0
}
服务器监控客户端的配置:
保存退出后复制这个文件一份,作为nagios-client的监控模版文件
cp/usr/local/nagios/etc/objects/localhost.cfg /usr/local/nagios/etc/objects/nagios-client.cfg
vim /usr/local/nagios/etc/objects/nagios-client.cfg 修改完成后的配置如下
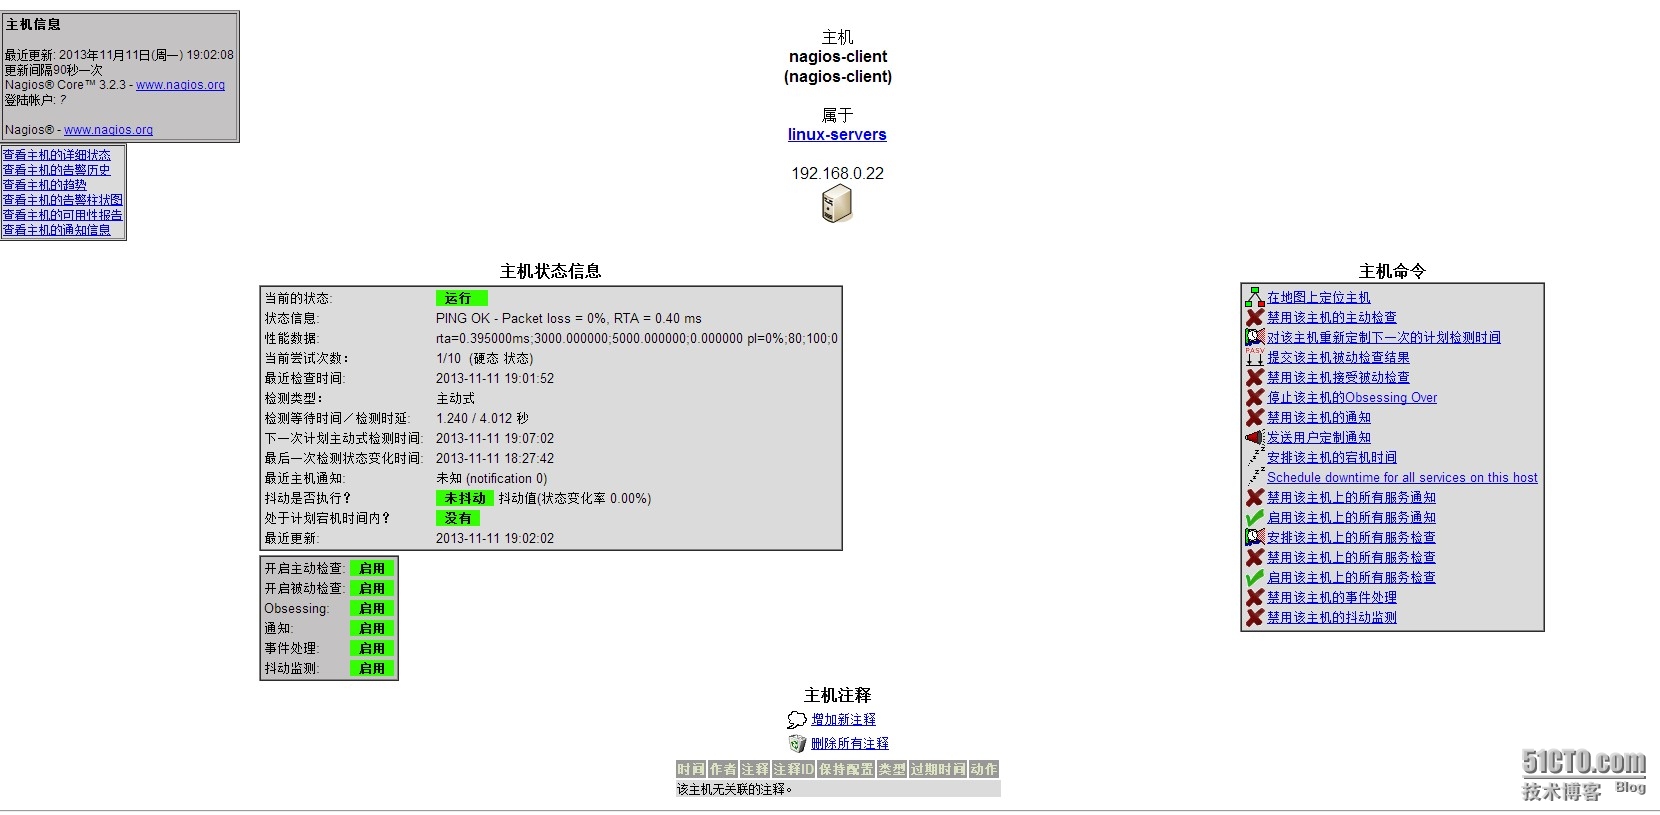
define host{
use linux-server
host_name nagios-client
aliasnagios-client
address 192.168.0.22
icon_image server.gif
statusmap_image server.gd2
2d_coords 500,200
3d_coords 500,200,100
}
define service{
use local-service ; Name of service template to use
host_name *
service_description PING
check_command check_ping!100.0,20%!500.0,60%
}
define service{
use local-service ; Name of service template to use
host_name nagios-client
service_description boot分区
check_command check_nrpe!check_sda1
}
define service{
use local-service ; Name of service template to use
host_name nagios-client
service_description 根分区
check_command check_nrpe!check_sda2
}
define service{
use local-service ; Name of service template to use
host_name nagios-client
service_description 登录用户数
check_command check_nrpe!check_users
}
define service{
use local-service ; Name of service template to use
host_name nagios-client
service_description 进总程数
check_command check_nrpe!check_total_procs
}
define service{
use local-service ; Name of service template to use
host_name nagios-client
service_description CPU平均负载
check_command check_nrpe!check_load
}
define service{
use local-service ; Name of service template to use
host_name nagios-client
service_description 虚拟内存
check_command check_nrpe!check_swap
}
define service{
use local-service ; Name of service template to use
host_name nagios-client
service_description SSH
check_command check_nrpe!check_ssh
notifications_enabled 0
}
define service{
use local-service ; Name of service template to use
host_name nagios-client
service_description 僵死进程数
check_command check_nrpe!check_zombie_procs
}
define service{
use local-service ; Name of service template to use
host_name nagios-client
service_description iostat
check_command check_nrpe!check_iostat
}
define service{
use local-service ; Name of service template to use
host_name nagios-client
service_description mysql
check_command check_nrpe!check_mysql
}
define service{
use local-service ; Name of service template to use
host_name nagios-client
service_description nginx
check_command check_nrpe!check_nginx
}
define service{
use local-service ; Name of service template to use
host_name nagios-client
service_description memory
check_command check_nrpe!check_mem
}
define service{
use local-service ; Name of service template to use
host_name nagios-client
service_description IP连接数
check_command check_nrpe!check_ip_conn
}
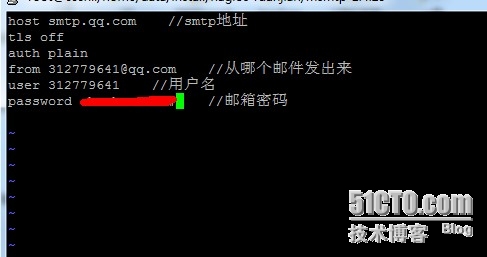
直接把原来的邮件报警的两条命令中的/bin/mail修改为/usr/bin/mutt即可,如下图
加快nagios的报警时间设置:
1.修改模版文件:
vim /usr/local/nagios/etc/objects/templates.cfg
修改所有normal_check_interval项的值为1,既发现故障后1分钟就报警
修改所有check_interval项的值为1,即正常情况下每分钟检查一次
修改所有notification_interval 的值为20分钟 #在主机出现异常后,故障一直没有解决,nagios再次对使用者发出通知的时间
service nagios restart 重启nagios
(责任编辑:IT)
|
