|
inotify+rsync+mutt+msmtp 实现linux文件或者目录自动更新并且实现发邮件给管理员
实现文件实时同步,并且监控目录发送邮件给管理员 需求,需要一次性更新多台服务器,人工手动,时间较长。 并且实时监控发邮件到管理员邮箱里.
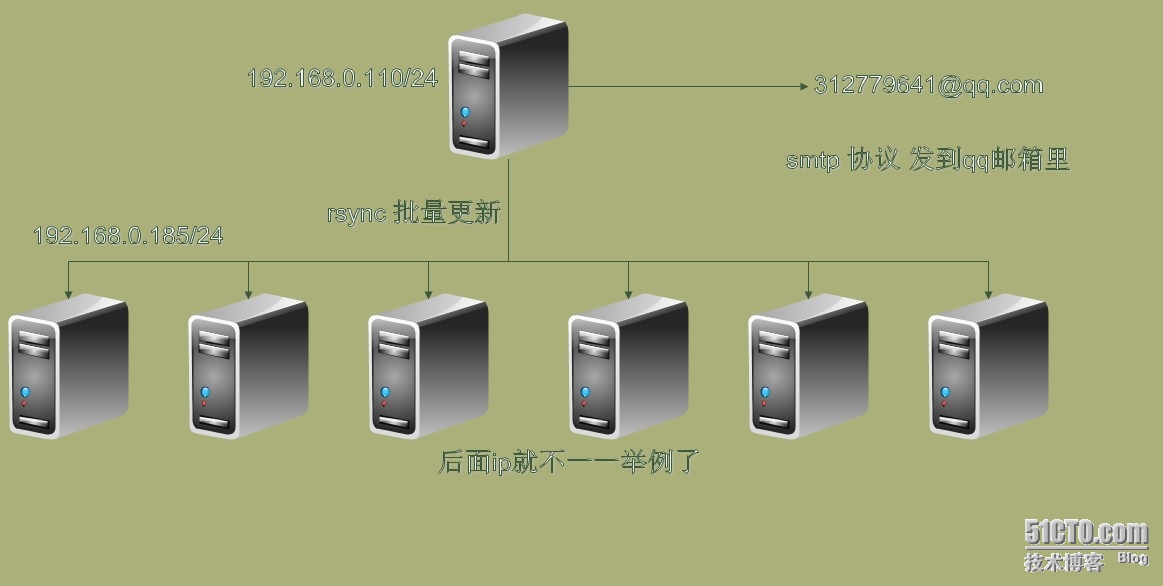
服务器架构图
更新源ip:192.168.0.110 服务器ip:192.168.0.185
192.168.0.185配置 首先安装rsync yum -y install rsync 然后等待 定义rsync配置文件/etc/rsyncd.conf 直接写了shell脚本
#!/bin/bash cat >> /etc/rsyncd.conf << EOF uid = nobody gid = nobody use chroot = no max connections = 100 timeout = 600 pid file=/var/run/rsyucd.pid lock file = /var/run/rsyncd.lock log file = /var/log/rsyncd.log [static] path = 更新目录地址 ignore errors read only = no list = no hosts allow = 192.168.0.0/255.255.255.0 auth users = www1 secrets file = /etc/www1.pwd EOF /etc/rsyncd.conf 其实直接在上面修改也可以的
然后运行
讲解配置参数
uid = nobody //运行RSYNC守护进程的用户
下面这些文件是安装完RSYNC服务后自动生成的文件
Timeout = 300
Log format = %t %a %m %f %b
#transfer logging = yes
syslog facility = local3
模块参数
secrets file = /etc/www1.pwd //密码和用户名对比表,密码文件自己生成
hosts allow = 192.168.0.0/255.255.255.0 //允许主机或网段 hosts deny = 0.0.0.0/0 //禁止主机
vi /etc/www1.pwd www1:123 chmod 600 /etc/www1.pwd
----启动、关闭rsync程序--- rsync --daemon netstat -anpt | grep rsync killall -3 rsync
---使用xinetd管理rsync程序---- yum -y install xinetd vi /etc/xinetd.d/rsync service rsync { disable = no
服务器IP:192.168.0.110
vi /etc/sysctl.conf 内核参数修改 fs.inotify.max_queued_events = 16384 fs.inotify.max_user_instances = 1024 fs.inotify.max_user_watches = 1048576 sysctl -p 初始化内核参数
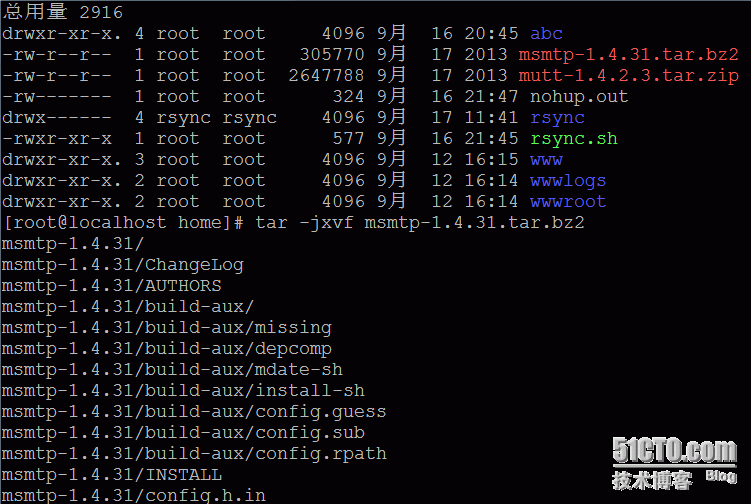
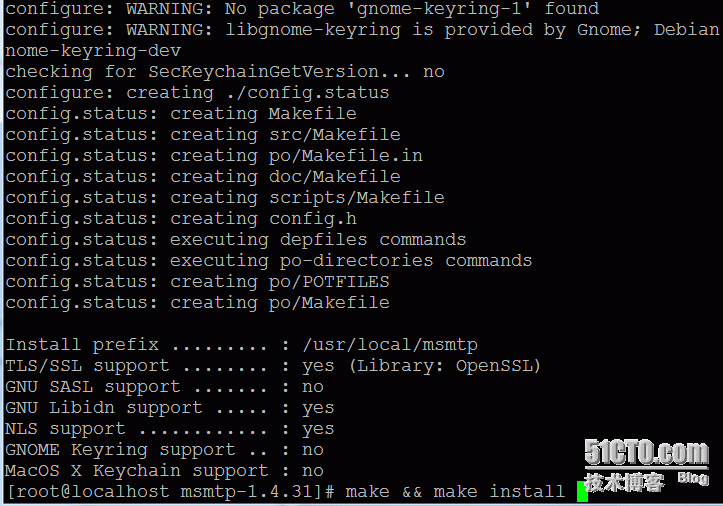
首先安装包
#!/bin/bash yum install rsync -y mkdir -p 更新目录地址,可以根据实际需要添加目录 wget http://cloud.github.com/downloads/rvoicilas/inotify-tools/inotify-tools-3.14.tar.gz tar xzvf inotify-tools-3.14.tar.gz cd inotify-tools-3.14 ./configure make make install cat >>/home/rsync.sh <<EOF
vi 1.sh #!/bin/bash rsync -vzrtopg --delete --progress 更新目录地址www1@192.168.0.185::static --password-file=/etc/www1.pwd
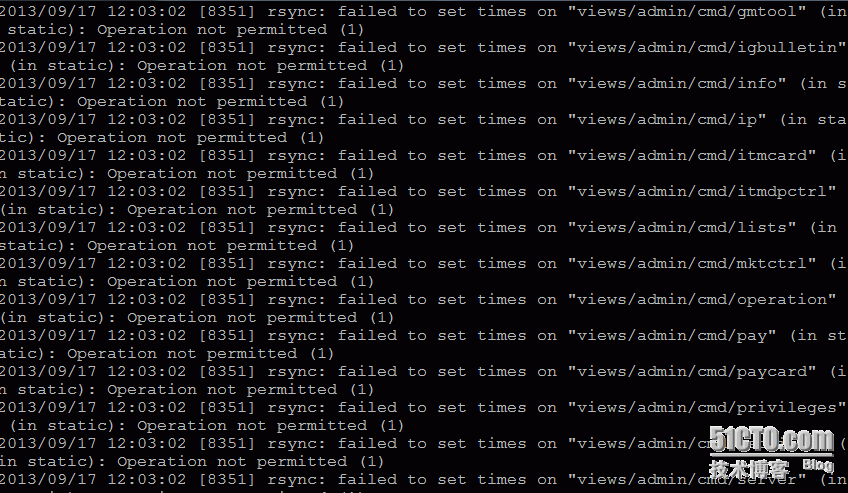
发现很多报错 2013/09/17 12:03:02 [8351] rsync: failed to set times on "views/main" (in static): Operation not permitted (1) 2013/09/17 12:03:02 [8351] rsync: failed to set times on "views/website" (in static): Operation not permitted (1) 2013/09/17 12:03:02 [8351] rsync: failed to set times on "views/website/xy" (in static): Operation not permitted
这个问题是由于权限的问题,chown nobody.nobody
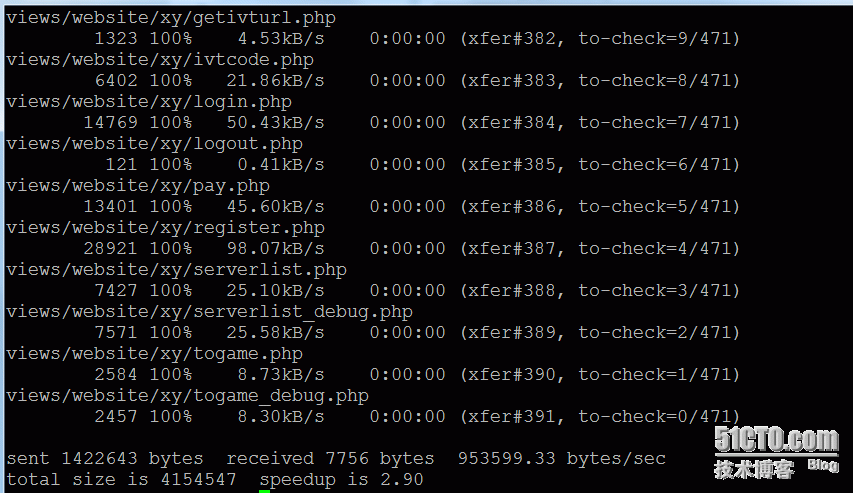
(1)修改前,rsync 推送文件到目标服务器出错 :
views/admin/cmd/sys/setplatgm.php 3281 100% 11.48kB/s 0:00:00 (xfer#356, to-check=40/471) views/admin/cmd/sys/user.head.php 1071 100% 3.75kB/s 0:00:00 (xfer#357, to-check=39/471) views/admin/cmd/sys/user.mod.head.php 709 100% 2.48kB/s 0:00:00 (xfer#358, to-check=38/471) views/admin/cmd/sys/user.mod.php 4064 100% 14.22kB/s 0:00:00 (xfer#359, to-check=37/471) views/admin/cmd/sys/user.php 2800 100% 9.80kB/s 0:00:00 (xfer#360, to-check=36/471) views/admin/cmd/sysmsg/ views/admin/cmd/sysmsg/broadcast.head.php 1045 100% 3.66kB/s 0:00:00 (xfer#361, to-check=35/471) views/admin/cmd/sysmsg/broadcast.php 1232 100% 4.31kB/s 0:00:00 (xfer#362, to-check=34/471) views/admin/cmd/test/ views/admin/cmd/test/test.php 101 100% 0.35kB/s 0:00:00 (xfer#363, to-check=33/471) views/admin/cmd/uinfo/ views/admin/datepicker/ views/admin/datepicker/My97DatePicker.htm 1389 100% 4.84kB/s 0:00:00 (xfer#364, to-check=32/471) views/admin/datepicker/WdatePicker.js 8409 100% 29.33kB/s 0:00:00 (xfer#365, to-check=31/471) views/admin/datepicker/calendar.js 21639 100% 75.20kB/s 0:00:00 (xfer#366, to-check=30/471) views/admin/datepicker/config.js 223 100% 0.77kB/s 0:00:00 (xfer#367, to-check=29/471) views/admin/datepicker/lang/ views/admin/datepicker/lang/en.js 644 100% 2.24kB/s 0:00:00 (xfer#368, to-check=26/471) views/admin/datepicker/lang/zh-cn.js 1089 100% 3.77kB/s 0:00:00 (xfer#369, to-check=25/471) views/admin/datepicker/lang/zh-tw.js 1088 100% 3.77kB/s 0:00:00 (xfer#370, to-check=24/471)
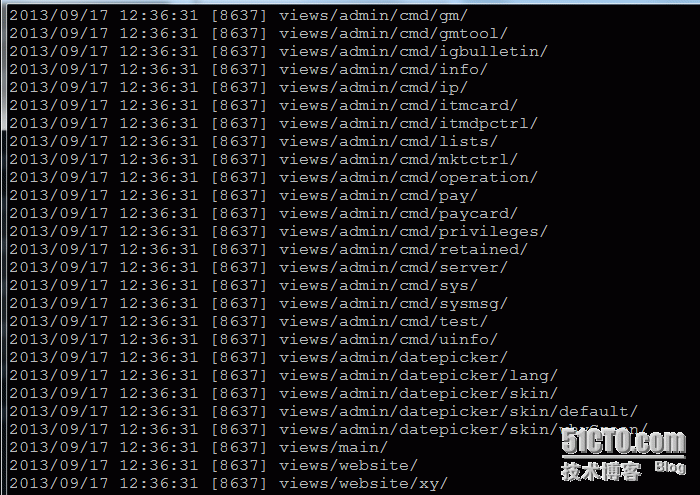
测试脚本:发现可以使用了,下面安装mutt+msmtp
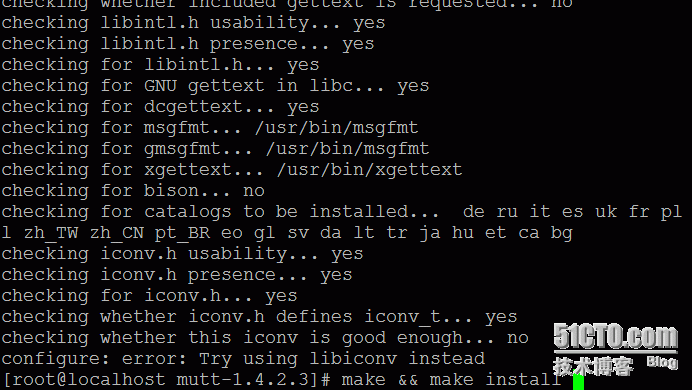
发现一个错误,解决如下
[root@localhost mutt-1.4.2.3]# find /usr/ -name "libiconv.so*" /usr/local/lib/libiconv.so.2 /usr/local/lib/libiconv.so /usr/local/lib/libiconv.so.2.5.0 [root@localhost mutt-1.4.2.3]# li -s /usr/local/lib/libiconv.so libiconv.so libiconv.so.2 libiconv.so.2.5.0 [root@localhost mutt-1.4.2.3]# ln -s /usr/local/lib/libiconv.so.2 /usr/lib/libiconv.so.2
[root@localhost mutt-1.4.2.3]# echo "/usr/local/lib/" >>/etc/ld.so.conf [root@localhost mutt-1.4.2.3]# ldconfig [root@localhost mutt-1.4.2.3]# ./configure --prefix=/root/mutt-1.4.2.3 [root@localhost mutt-1.4.2.3]# mkdir -p /usr/local/msmtp/etc
修改配置文件
[root@localhost mutt-1.4.2.3]# vi /root/.muttrc set sendmail="/usr/local/msmtp/bin/msmtp" //msmtp 配置文件目录 set use_from=yes set from=312779641@qq.com //发给谁的邮件 set envelope_from=yes
[root@localhost mutt-1.4.2.3]# vi /root/.msmtprc host smtp.qq.com tls off auth plain from 312779641@qq.com //从哪个邮件发出来 user 312779641 //用户名 password 密码
[root@localhost mutt-1.4.2.3]# vi /usr/local/msmtp/etc/msmtprc defaults account 312779641 host smtp.qq.com from 312779641@qq.com auth login port 25 tls off user 312779641@qq.com password 密码 account default:312779641
[root@localhost mutt-1.4.2.3]# mkdir -p /usr/local/msmtp/log [root@localhost mutt-1.4.2.3]# echo 'set sendmail="/usr/local/msmtp/bin/msmtp"' >>/etc/Muttrc [root@localhost mutt-1.4.2.3]# echo "set use_from=yes" >>/etc/Muttrc [root@localhost mutt-1.4.2.3]# echo 'set realname="312779641@qq.com"' >>/etc/Muttrc [root@localhost mutt-1.4.2.3]# echo 'set editor="vim"' >>/etc/Muttrc [root@localhost mutt-1.4.2.3]# ln -s /usr/local/msmtp/bin/msmtp /usr/bin [root@localhost mutt-1.4.2.3]# /usr/local/mutt/bin/mutt -s "test" -c 312779641@qq.com</1.txt 发送邮件测试 -s 邮件标题 紧接的是接收邮件地址 -c 抄送地址 "< "为邮件正文 -a是附件。 如果发送不成功,请检测下配置文件。
[root@localhost ~]# vi mon.sh 监控目录 #!/bin/bash clear src=更新目录地址 /usr/local/inotify/bin/inotifywait -m -r -d -o /tmp/monitor.log --timefmt '%F%T' --format '%T%w%f%e' -e modify,attrib,move,close_write,create,delete,delete_self $src
#!/bin/bash src=更新目录地址 des1=static user1=www1 host1="192.168.0.185" /usr/local/bin/inotifywait -m -r -d -o /tmp/monitor.log --timefmt '%F%T' --format '%T%w%f%e' -e modify,attrib,move,close_write,create,delete,delete_self $src| while read DIRECTORY EVENT FILE do rsync -vzrtopg --delete --progress 更新目录www1@192.168.0.185::static --password-file=/etc/www1.pwd echo "${files} was rsynced" >> /tmp/rsync.log 2>&1 done -m, 即--monitor,表示始终保持事件监听状态。 -r, 即--recursive,表示递归查询目录。 -q, 即--quiet,表示打印出监控事件。 -e, 即--event,通过此参数可以指定要监控的事件,常见的事件有modify、delete、create、attrib等 --timefmt:指定时间的输出格式 --format:指定变化文件的详细信息
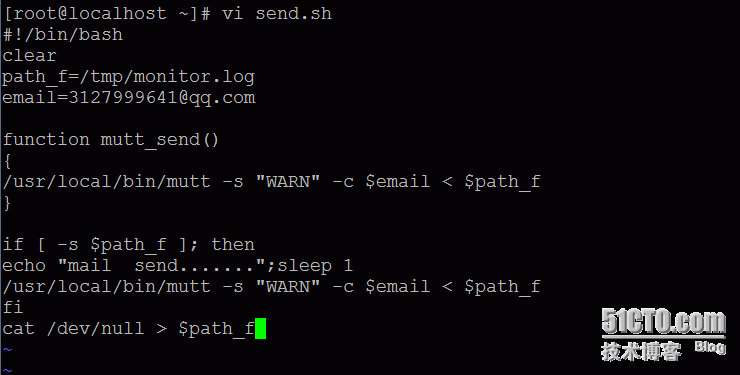
[root@localhost ~]# vi send.sh #!/bin/bash clear path_f=/tmp/monitor.log email=31279641@qq.com
function mutt_send() { /usr/local/mutt/bin/mutt -s "WARN" -c 312779641@qq.com</tmp/monitor.log } if [ -s $path_f ]; then echo "mail send.......";sleep 1 /usr/local/mutt/bin/mutt -s "WARN" -c 312779641@qq.com</tmp/monitor.log fi cat /dev/null > $path_f
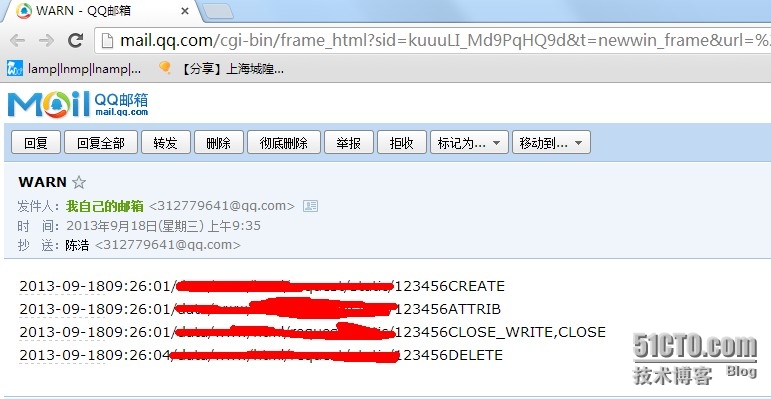
[root@localhost ~]# ll 总用量 388 -rw-r--r-- 1 root root 380 9月 17 18:13 2.sh drwxrwxrwx 6 1000 1000 4096 9月 18 09:23 inotify-tools-3.14 -rw-r--r-- 1 root root 358772 3月 14 2010 inotify-tools-3.14.tar.gz -rw-r--r-- 1 root root 221 9月 18 09:24 mon.sh drwxr-xr-x 7 1000 1000 4096 9月 17 15:23 msmtp-1.4.31 drwxr-xr-x 9 3121 3121 12288 9月 17 15:25 mutt-1.4.2.3 -rw------- 1 root root 114 9月 18 09:11 nohup.out -rw-r--r-- 1 root root 323 9月 18 09:37 send.sh 后台运行监控脚本 nohup /bin/bash /root/monitor.sh & crontab –e */5****/bin/bash/root/sendmail.sh 保存退出并重启服务 /etc/init.d/crond restart 测试: [root@localhost ~]# cd 目录 [root@localhost ]# touch 123456 [root@localhost ]# rm -rf * [root@localhost ]# cd /root/
[root@localhost ~]# sh send.sh mail send....... [root@localhost ~]#
|

