|
环境清单:
Centos 6.4 X64
Squid 3.1.23
Squid依然是当下流行的web代理服务器软件,它的发展历史由来已久,当然,除了老牌之外,它其功能相当完善且几乎完跨平台……今心血来潮,探索它auth 模块中的Digest认证(squid支持的认证模块有好多,比如NCSA、LDAP、NTLM、PAM、SASL、Mysql、SMB、YP等,在此只研究Digest,其它后续)

一、 平台就绪
1、 系统安装
2、 关闭iptables、Selinux
3、 添加 gcc、make、wget、perl等包
4、 [root@vqiu] #useradd -M squid -s /sbin/nologin -c "Squid user" //添加squid用户
二、 安装squid
[root@vqiu] # wget http://sourceforge.jp/projects/sfnet_brazilfw/downloads/3.x/source/pool/squid-3.1.23.tar.bz2
[root@vqiu] # tar xjf squid-3.1.23.tar.bz2
[root@vqiu]) # cd squid-3.1.23
[root@vqiu] # ./configure --prefix=/usr/local/squid \
--enable-async-io \
--enable-removal-policies=heap,lru \
--enable-default-err-languages="Simplify_Chinese"\
--enable-err-languages="Simplify_Chinese English"\
--enable-epoll \
--disable-http-violations \
--with-large-files \
--enable-auth="digest" \
--enable-digest-auth-helpers="password" \
--with-default-user=squid
[root@vqiu] # Make &&make install //中途没有提示Error的话,说明已经安装完成
三、 配置squid
[root@vqiu] # chown squid/usr/local/squid –R
[root@vqiu] # Vi /usr/localhost/squid/etc/squid.conf //加入以下信息:
//指定认证类型,-c选项将密码进行加密存储到指定文件(/usr/local/squid/digest.passwd),不加选项则使用明文
auth_param digest program /usr/local/squid/libexec/digest_pw_auth -c /usr/local/squid/digest.passwd
//辅助进程数量,默认为5
auth_param digest children 8
//认证域名称
auth_param digest realm vqiu
//多久清空nonce 缓存,默认5分钟
auth_param digest nonce_garbage_interval 5 minutes
//客户端与squid保持nonce连接最长时效,超过后重新验证
auth_param digest nonce_max_duration 30 minutes
//对nonce 可使用50个请求
auth_param digest nonce_max_count 50
//定义一账号多少个ip使用
acl FOO max_user_ip 1
//定义已认证的客户端
acl know_cli proxy_auth REQUIRED
//放行max_user_ip
http_access allow FOO
//放行认证客户端
http_access allow know_cli
//定义主机名称,名称可随意
visible_hostname squid_server
四、 添加账号
新建脚本,内容如下:
#!/bin/bash
user=$1
pass=$2
realm=$3 //此选项必须与conf文件中的 auth_param digest realm XXX 一致
if [ -z"$1" -o -z "$2" -o -z "$3" ] ; then
echo "Usage: $0 user password'realm'";
exit 1
fi
ha1=$(echo-n "$user:$realm:$pass"|md5sum |cut -f1 -d' ')
echo"$user:$realm:$ha1" >>/usr/local/squid/digest.passwd
新建用户格式:sh shell_script username password realm(本例为vqiu)
例:添加一个用户名与密码为test的用户--- sh script_name vqiu vqiu
五、 启动squid 服务
将/usr/local/squid/bin与sbin 这两目录加入PATH变量中
[root@vqiu] # squid –k check或 squid –k parse //排错squid配置文件
[root@vqiu] # Squid –zX //初始化squid
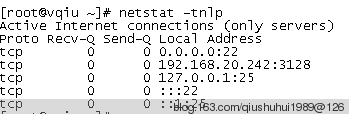
[root@vqiu] # squid –s //后台启动服务
服务启动成功
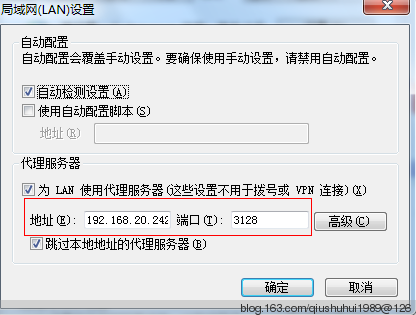
六、 配置客户端
进入internet explorer 选项,设置 proxy。
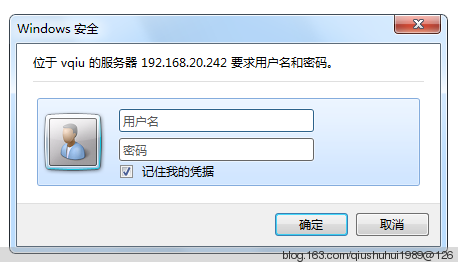
输入网址,将弹出以下窗口,把已添加的用户填上。
(责任编辑:IT) |