|
环境:Centos 5.5
服务器:192.168.220.5 客户机:192.168.220.11
一:服务器端的设置;
A;在服务器上安装所需软件(yum -y install yp-tools ypbind ypserv portmap);
yp-tools:提供nis相关的查询命令功能
ypbind:提供nis client端的设置软件
ypserv;提供nis server端的设置软件
portmap:这是rpc必须的软件
B;设置nis的域名
1,直接命令行下设置nis域名,临时生效
[root@master ~]#nisdomainname budong
2,每次开机时都需要启动这个nis域名的话,直接把它写入/etc/rc.d/rc.local中
[root@master ~]#echo "/bin/nisdomainname" >> /etc/rc.d/rc.local
3,启动nis时就自动设置好nis域,可以设置/etc/sysconfig/network这个文件
[root@master ~]#echo "NISDOMAIN=budong" >> /etc/sysconfig/network
C;主要配置文件/etc/ypserv.conf,根据实际情况在最后添加三行,我的如下

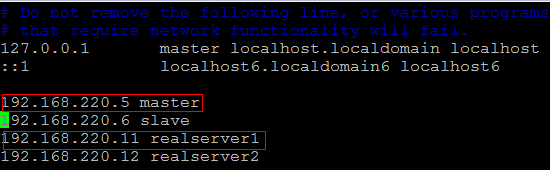
D:设置主机名称(/etc/hosts)与建立信任群组(/etc/netgroup)
1,[root@master ~]#vim /etc/hosts如下
2,[root@master ~]#touch /etc/netgroup
E;启动所有相关的服务
[root@master ~]#/etc/init.d/portmap start
[root@master ~]#/etc/init.d/ypserv start
[root@master ~]#/etc/init.d/ypasswd start
F;建立数据库
[root@master ~]#/usr/lib/yp/ypinit -m
建立数据库后,必须要通知ypserv与yppasswdd这两个服务
[root@master ~]#/etc/init.d/ypserv restart
[root@master ~]#/etc/init.d/yppasswdd restart
二:客户端的设置
A;安装所需的软件
[root@realserver1 ~]#yum -y install ypbind yp-tools
B;修改必要的配置文件
1,
设置nis的域名
1,直接命令行下设置nis域名,临时生效
[root@realserver1 ~]#nisdomainname budong
2,每次开机时都需要启动这个nis域名的话,直接把它写入/etc/rc.d/rc.local中
[root@realserver1 ~]#echo "/bin/nisdomainname" >> /etc/rc.d/rc.local
3,启动nis时就自动设置好nis域,可以设置/etc/sysconfig/network这个文件
[root@realserver1 ~]#echo "NISDOMAIN=budong" >> /etc/sysconfig/network
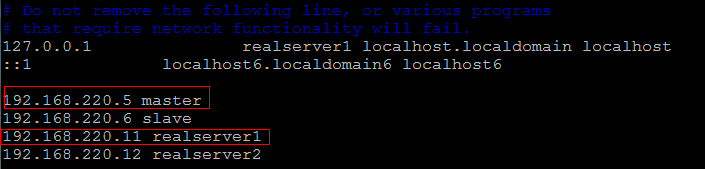
[root@realserver1 ~]#vim /etc/hosts
 (责任编辑:IT) |