|
1、下载hadhoop安装包http://hadoop.apache.org/releases.html,我下的是hadoop-2.7.0-src.tar.gz,解压。
-
gzip -d hadoop-2.7.0-src.tar.gz
-
tar -xvf hadoop-2.7.0-src.tar
此后的操作都需要在root下进行。
2、安装ssh
先查看是否已经装了ssh
rpm -qa | grep ssh
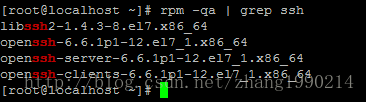
如果没有安装,则用
yum install ssh
最好再开启一次ssh服务
-
service sshd restart
-
ssh-keygen -t dsa -P '' -f ~/.ssh/id_dsa
切换到根目录下查看有没有.ssh文件。
进入.ssh目录
cat id_dsa.pub > authorized_keys
紧接着测试,确认能否不输入口令就用ssh登录localhost,也就是是说输入下面命令后不会出现输入密码的提示

至此ssh就配置完成了。
3、安装jdk,设置JAVA_HOM
除了配置/etc/profile外,还需在httpfs-env.sh中export JAVA_HOME
4、配置hadhoop
进入hadoop-2.7.0/etc/hadoop
a.配置core-site.xml如下:
-
<?xml version="1.0" encoding="UTF-8"?>
-
<?xml-stylesheet type="text/xsl" href="configuration.xsl"?>
-
-
-
-
<configuration>
-
<property>
-
-
<name>fs.default.name</name>
-
<value>hdfs://localhost:9000</value>
-
-
</property>
-
</configuration>
b.配置hdfs-site.xml 如下:
-
<?xml version="1.0" encoding="UTF-8"?>
-
<?xml-stylesheet type="text/xsl" href="configuration.xsl"?>
-
-
-
-
<configuration>
-
-
<property>
-
<name>dfs.replication</name>
-
<value>1</value>
-
</property>
-
-
</configuration>
-
~
c.配置mapred-site.xml
目录下只有mapred-site.xml.template 而没有mapred-site.xml,所以复制一份。
-
cp mapred-site.xml.template mapred-site.xml
配置如下:
-
<?xml-stylesheet type="text/xsl" href="configuration.xsl"?>
-
-
-
-
<configuration>
-
-
<property>
-
<name>mapred.job.tracker</name>
-
<value>localhost:9001</value>
-
</property>
-
-
</configuration>
至此,hadoop配置基本完成。
4、启动hadoop
进入hadoop的sbin目录,执行hadoop namenode -format
接着执行 start-all.sh
5、用jps查看相关信息
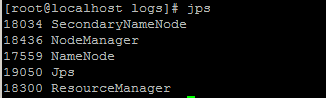
注:新的hadoop架构中取消了JobTracker,参考http://hadoop.apache.org/docs/current/hadoop-yarn/hadoop-yarn-site/YARN.html
bin/hadoop namenode
–
format
(责任编辑:IT) |