当前位置: > CentOS > CentOS服务器 > 环境配置 >

CentOS部署Gitlab代码管理平台

时间:2015-12-12 13:44来源:linux.it.net.cn 作者:IT

部署环境准备

Gitlab需要以下系统与软件环境:

Ruby (MRI) 2.1

Git 1.7.10+

Redis 2.4+

MySQL

由于系统的git,ruby环境一般版本比较低,因此需考虑升级。

1.升级git。

删除原系统的git:

 
#rpm -eperl-Git-1.7.1-3.el6_4.1.noarch git-1.7.1-3.el6_4.1.x86_64


  源码包编译安装git:

#tar -zxvf git-2.6.3.tar.gz
#cd git-2.6.3
#autoconf
#./configure
#make && make install


  2.升级ruby。

  删除原系统的ruby:

1
#rpm -e ruby-1.8.7.374-4.el6_6.x86_64ruby-libs-1.8.7.374-4.el6_6.x86_64


  源码包编译安装ruby:

#tar -zxvf ruby-2.1.7.tar.gz
#cd ruby-2.1.7
#./configure
#make && make install


  3.安装,启动redis:

#tar zxvf redis-3.0.5.tar.gz
#cd redis-3.0.5
#make install
#mkdir  -p /opt/apps/redis/bin
#mkdir  -p /opt/apps/redis/var
#mkdir  -p/opt/apps/redis/data
#mkdir  -p /opt/conf/redis
#cp  redis.conf  /opt/conf/redis
#cp /opt/src/redis-3.0.5/src/redis-* /opt/apps/redis/bin

修改配置文件,如下:

#grep -v ^# /opt/conf/redis/redis.conf | grep -v ^$
daemonize yes
pidfile /opt/apps/redis/var/redis.pid
port 6379
tcp-backlog 511
bind 192.168.1.236
unixsocket /opt/apps/redis/var/redis.sock
unixsocketperm 777
timeout 0
tcp-keepalive 0
loglevel notice
logfile "/opt/logs/redis/redis.log"
databases 16
stop-writes-on-bgsave-error yes
rdbcompression yes
rdbchecksum yes
dbfilename dump.rdb
dir /opt/apps/redis/var
slave-serve-stale-data yes
slave-read-only yes
repl-diskless-sync no
repl-diskless-sync-delay 5
repl-disable-tcp-nodelay no
slave-priority 100
appendonly no
appendfilename "appendonly.aof"
appendfsync everysec
no-appendfsync-on-rewrite no
auto-aof-rewrite-percentage 100
auto-aof-rewrite-min-size 64mb
aof-load-truncated yes
lua-time-limit 5000
slowlog-log-slower-than 10000
slowlog-max-len 128
latency-monitor-threshold 0
notify-keyspace-events ""
hash-max-ziplist-entries 512
hash-max-ziplist-value 64
list-max-ziplist-entries 512
list-max-ziplist-value 64
set-max-intset-entries 512
zset-max-ziplist-entries 128
zset-max-ziplist-value 64
hll-sparse-max-bytes 3000
activerehashing yes
client-output-buffer-limit normal 0 0 0
client-output-buffer-limit slave 256mb 64mb 60
client-output-buffer-limit pubsub 32mb 8mb 60
hz 10
aof-rewrite-incremental-fsync yes


  启动redis:

 
/opt/apps/redis/bin/redis-server /opt/conf/redis/redis.conf

  4.安装,配置mysql(不详解)

  登录mysql,创建gitlab用户与库:

sql>create user 'gitlab'@'localhost' identified by '123456';
sql>create database gitlabhq_production;
sql>grant all privileges on gitlabhq_production.* to'gitlab'@'%';
sql>flush privileges;


  5.安装bundler:

  修改gem源:(速度更快)


gem sources --remove https://rubygems.org/
gem sources -a https://ruby.taobao.org/
gem install bundler --no-ri --no-rdoc


安装与配置gitlab

  安装相关依赖包:

 
#yum -y install readline readline-develncurses-devel gdbm-devel glibc-devel tcl-devel openssl-devel curl-develexpat-devel db4-devel byacc sqlite-devel libyaml libyaml-devel libffilibffi-devel libxml2 libxml2-devel libxslt libxslt-devel libicu libicu-develsystem-config-firewall-tui redis sudo wget crontabs logwatch logrotateperl-Time-HiRes git cmake libcom_err-devel libcom_err-devel


  创建git用户:

#adduser --system --shell /bin/bash--comment 'Gitlab' --create-home --home-dir /home/git/ git
#chmod 775 /home/git

  上传gitlab项目源码包至/home/git,解压:

#su - git
$tar -zxvf gitlabhq-7.12.2.tar.gz
$mv  gitlabhq-7.12.2 gitlab


  安装gitlab所需的组件:

$cd gitlab
$bundle install --deployment --without development test postgres awsKerberos


  创建gitlab配置文件,并修改如下配置:

$cp config/gitlab.yml.example config/gitlab.yml
$vi config/gitlabyml
gitlab:
host: 192.168.1.236
port: 443
https: true
backup:
    path: "/opt/backups/gitlab"

  数据库连接配置:

$cp config/database.yml.mysql config/database.yml
$vi config/database.yml
production:
  adapter: mysql2
  encoding: utf8
  collation: utf8_general_ci
  reconnect: false
  database:gitlabhq_production
  pool: 10
  username: gitlab
  password: "123456"
  host: localhost
  socket: /tmp/mysql.sock


  redis连接配置:

$cp config/resque.yml.example config/resque.yml
$vi config/resque.yml
production: unix:/opt/apps/redis/var/redis.sock

  其他文件:

$cp config/unicorn.rb.example config/unicorn.rb
$cp config/initializers/rack_attack.rb.example config/initializers/rack_attack.rb
$cp config/initializers/smtp_settings.rb.sample config/initializers/smtp_settings.rb


  配置相关文件权限:

$chmod -R u+rwX,go-w log/
$chmod -R u+rwX tmp/
$chmod -R u+rwX tmp/pids/
$chmod -R u+rwX tmp/sockets/
$mkdir public/uploads
$chmod -R u+rwX public/uploads
$chmod -R u+rwX builds/
$chmod -R u+rwX shared/artifacts/


安装gitlab相关组件

  安装Gitlab-shell:

$bundle exec rake gitlab:shell:installREDIS_URL=unix:/var/run/redis/redis.sock RAILS_ENV=production
$cd /home/git/gitlab-shell
$vi config.yml
---
user: git
gitlab_url: https://192.168.1.236/
http_settings:
  self_signed_cert:true
repos_path:"/home/git/repositories/"
auth_file:"/home/git/.ssh/authorized_keys"
redis:
  bin: "/opt/apps/redis//bin/redis-cli"
  namespace: resque:gitlab
  socket: "/opt/apps/redis/var/redis.sock"
log_level:INFO
audit_usernames:false

  创建gitlab-satellites:

 
$mkdir -p /home/git/gitlab-satellites


初始化gitlab


  初始化gitlab,创建mysql库表与仓库目录:

 
$bundle exec rake gitlab:setup RAILS_ENV=production

  若运行没有报错,则会生成初始root用户如下:

  login.........root

  password......5iveL!fe


配置系统服务

  配置gitlab系统服务:(root用户下)

#cd /home/git/gitlab   
#cp lib/support/init.d/gitlab /etc/init.d/   
#chmod +x /etc/init.d/gitlab
#chkconfig --add gitlab


  配置lograte:

 
cp lib/support/logrotate/gitlab /etc/logrotate.d/gitlab


安装nginx web服务

 安装nginx:

#yum -y install yum -y install pcre*
#tar -zxvfnginx-1.8.0.tar.gz
#cd nginx-1.8.0
#./configure--prefix=/opt/apps/nginx --conf-path=/opt/conf/nginx/nginx.conf--error-log-path=/opt/logs/nginx/error.log--http-log-path=/opt/logs/nginx/access.log --with-http_stub_status_module--with-http_gzip_static_module --with-http_flv_module --with-http_ssl_module--with-http_realip_module--http-client-body-temp-path=/opt/apps/nginx/client_body_temp--http-fastcgi-temp-path=/opt/apps/nginx/fastcgi_temp--http-proxy-temp-path=/opt/apps/nginx/proxy_temp--http-uwsgi-temp-path=/opt/apps/nginx/uwsgi_temp--http-scgi-temp-path=/opt/apps/nginx/scgi_temp
#make&& make install


  配置gitlab web服务(https模式),修改如下配置:

#vi /opt/conf/nginx/nginx.conf
includevhost/*.conf;
#cp /home/git/gitlab/lib/support/nginx/gitlab-ssl/opt/conf/nginx/vhost/gitlab.conf
#vi /opt/conf/nginx/vhost/gitlab.conf(修改相关端口的servername)
server_name 192.168.1.236;


开启服务与测试

  开启nginx和gitlab服务:

#/opt/apps/nginx/sbin/nginx -c /opt/conf/nginx/nginx.conf
#servicegitlab start

  使用命令检测gitlab的项目:

#su - git
$cd gitlab
$bundle exec rake gitlab:checkRAILS_ENV=production


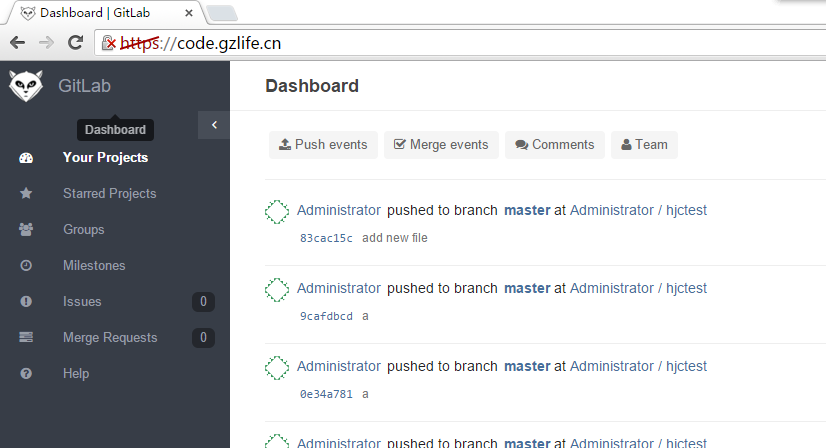
  检测通过后就可以用浏览器访问gitlab了:


Gitlab的备份与恢复


  备份:bundle exec rakegitlab:backup:create RAILS_ENV=production

  恢复:bundle exec rakegitlab:backup:restore RAILS_ENV=production

  以上是gitlab自带的备份工具命令,可备份mysql库表,gitlab仓库,ssh验证文件等一系列gitlab所需的文件。

  这里提供备份脚本给大家参考:

#!/bin/bash
# Author: chenminghui
# Email: chenminghui@qq.com
# Date: 2015-12-09
###set ENV###
GITLAB_HOME=/home/git/gitlab
BAK_DIR=/opt/backups/gitlab
RAILS_ENV=production
 
backup_gitlab ()
{
su - git -c "cd${GITLAB_HOME} && bundle exec rake gitlab:backup:createRAILS_ENV=${RAILS_ENV}"
sleep 3
RETVAL=$?
if [ $RETVAL == 0 ];then
        echo "The GitLab backupedsuccess.."
else
        echo "Backuk failure!!"
fi
}
 
backup_gitlab
 
#Delete backup files beforesysdate-30 days.
find ${BAK_DIR} -type f-mtime +30 -exec rm -rf {} \;
 
##restore command if youneed..
##bundle exec rakegitlab:backup:restore RAILS_ENV=production BACKUP=timestamp_of_backup
 

(责任编辑:IT)
------分隔线----------------------------