|
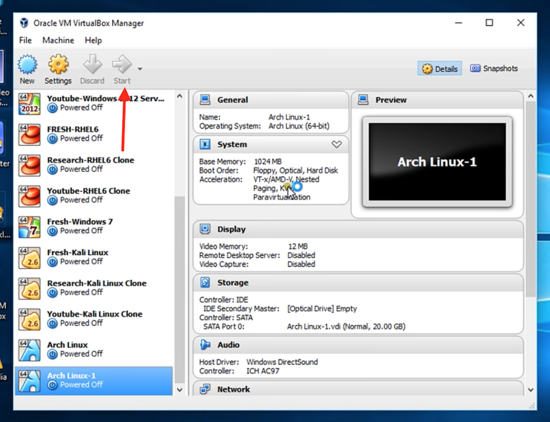
现在你可以看到 Arch Linux 系统已创建完成了。点击开始按钮。
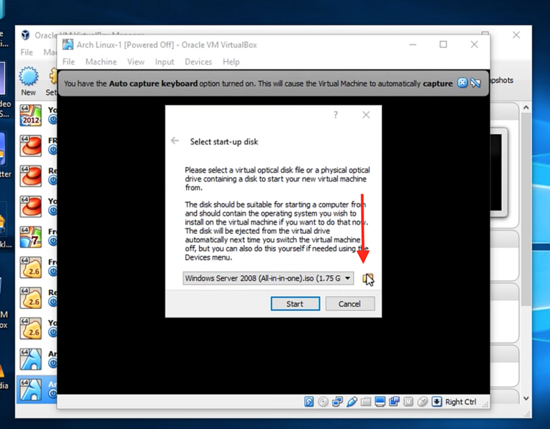
Start the Virtual Machine 单击浏览然后选择你从官网下载的启动磁盘。
Choose Arch Linux Disk image
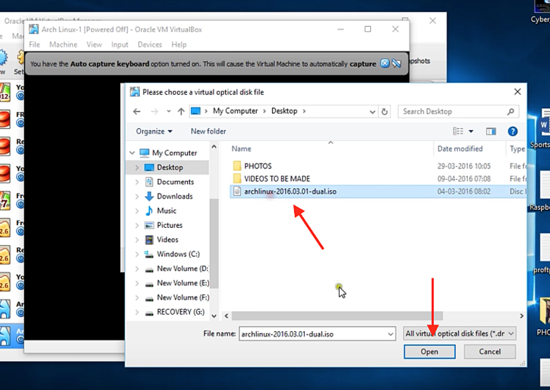
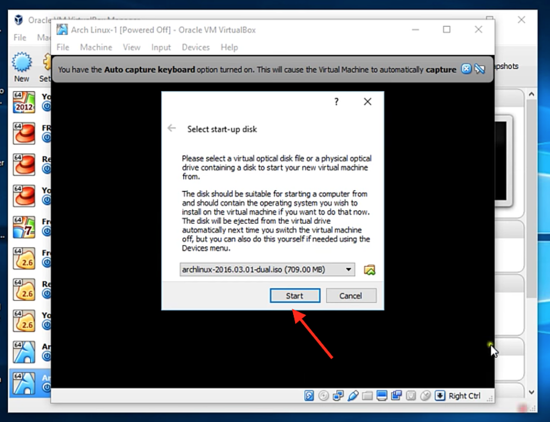
Browse for disk image file 点击启动,然后打开全屏模式。
Open the full-screen view
Start the Arch Linux VM 在 VirtualBox 中启动并安装 Arch Linux 系统你将会看到 Arch Linux 系统第一个打开界面。单击 “Boot Arch Linux (x86_64)”, 它用于 64 位系统,或者单击 “Boot Arch Linux (i686)”,用于 32 位系统。
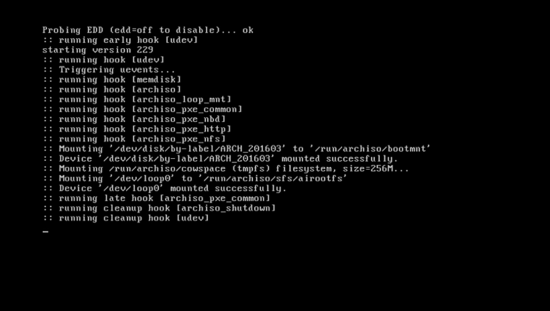
Choose to boot Arch Linux 当你单击第一个选项后,系统将开始启动。实际上只是进入到一个临时启动状态,即进入到 Arch Linux 的 Live 系统,并以 root 帐号登录了。
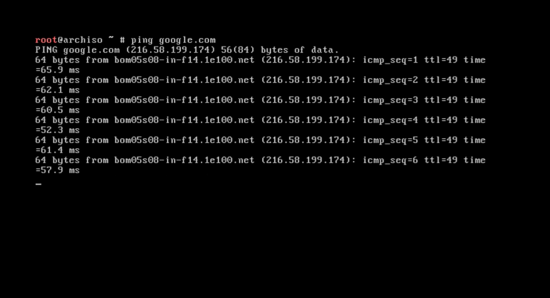
Booting into Arch Linux live version 输入下面的命令来检查网络连接。
这个单词 ping 表示网路封包搜寻。你将会看到下面的返回信息,表明 Arch Linux 已经连接到外网了。这是执行安装过程中的很关键的一点。(LCTT 译注:或许你 ping 不到那个不存在的网站,你选个存在的吧。)
Test internet connectivity with ping 输入如下命令清屏:
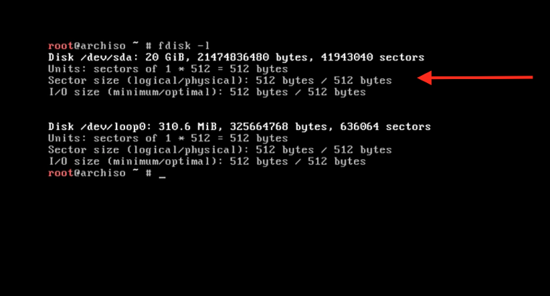
在开始安装之前,你得先为硬盘分区。输入 fdisk -l ,你将会看到当前系统的磁盘分区情况。注意一开始你给 Arch Linux 系统分配的 20 GB 存储空间。
Partition the harddisk 硬盘分区我们打算把这个 20 GB 的磁盘分成三个分区。第一个主分区为 root 分区,大小为 10 GB 。第二个分区为 swap 分区,大小为内存的两倍,为 2048 MB 。第三个是逻辑分区,大小为 8 GB 。
Create 3 disk partitions 输入下面的命令:
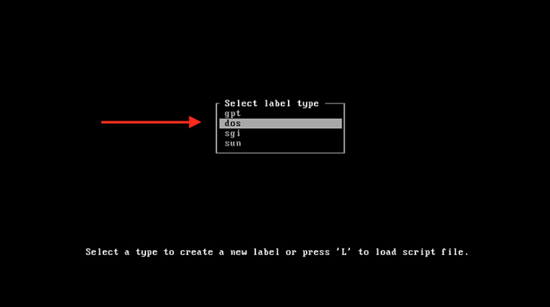
你将看到 gpt、dos、sgi 和 sun 类型,选择 dos 选项,然后按回车。
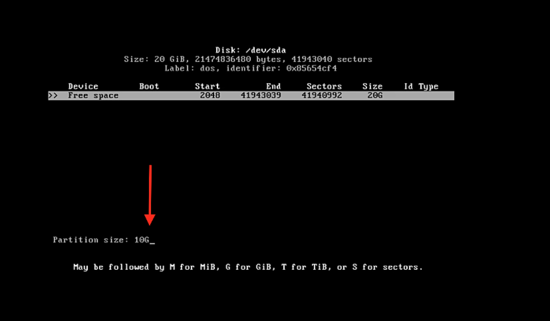
Create a partition of type DOS 这里你将看到主磁盘空间,大小为 20 GB 。在剩余空间按回车来修改分区大小,输入 10 GB 。
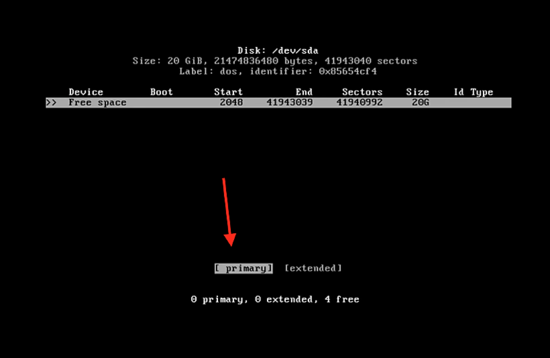
Choose 10GB partition size 按回车并单击主分区 。
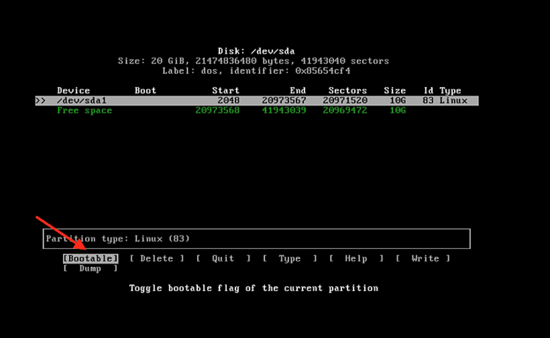
Select primary 在可引导选项按回车选择可引导类型。
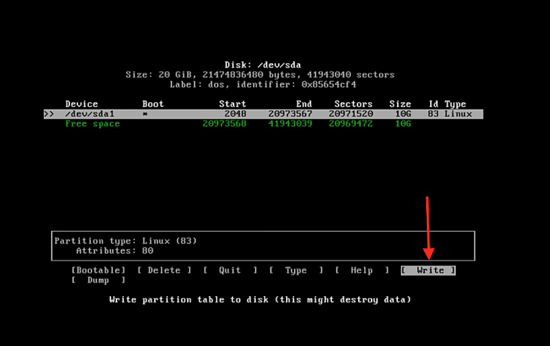
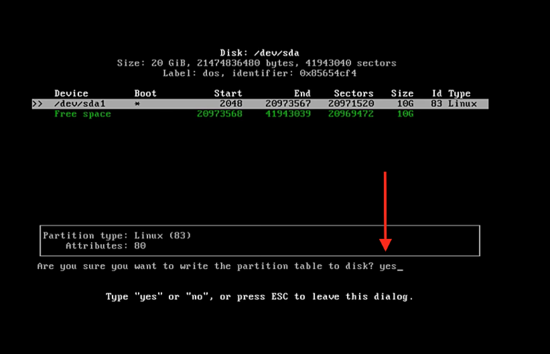
Make partition bootable. 在写入选项按回车键将分区信息写入磁盘。
Write partition to disk 之后输入 yes 来应用更改。
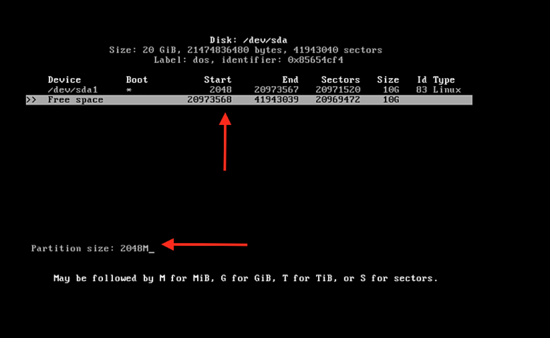
Confirm changes 现在已经创建完成 10 GB 分区。单击剩余空间,输入分区大小 2048 M 。
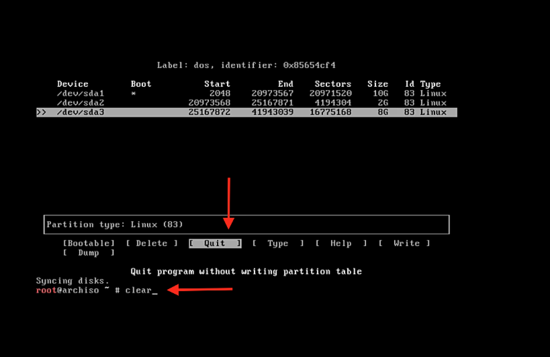
Create the 2GB swap partition 以同样的方式创建逻辑分区。在退出选项按回车键,然后输入下面的命令来清屏:
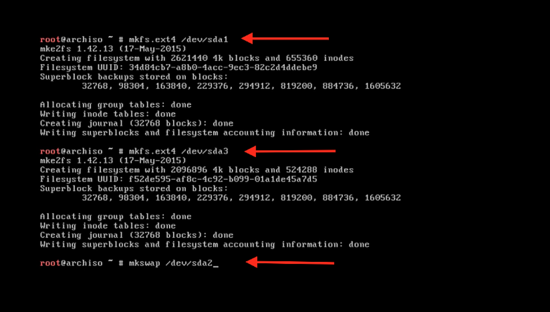
quit cfdisk 输入下面的命令来格式化新建的分区:
这里的 sda1 是分区名。使用同样的命令来格式化第二个分区 sda3 :
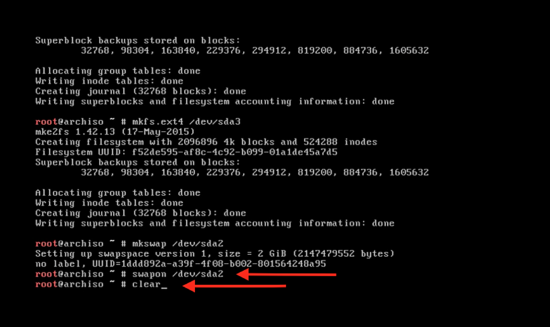
格式化 swap 分区:
Format the swap partition with mkswap 使用下面的命令来激活 swap 分区:
输入 clear 命令清屏:
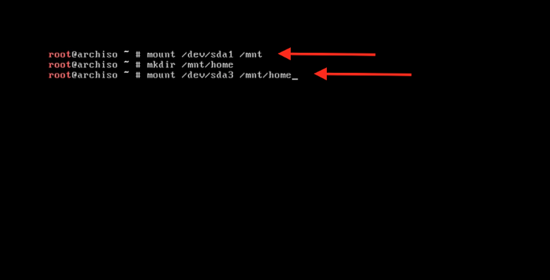
Enable swap 输入下面的命令来挂载主分区以开始系统安装:
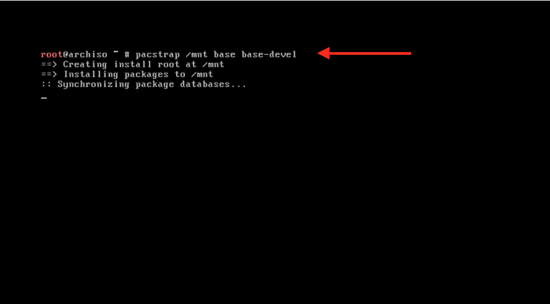
Mount the partitions 引导 Arch Linux 启动输入下面的命令来引导系统启动:
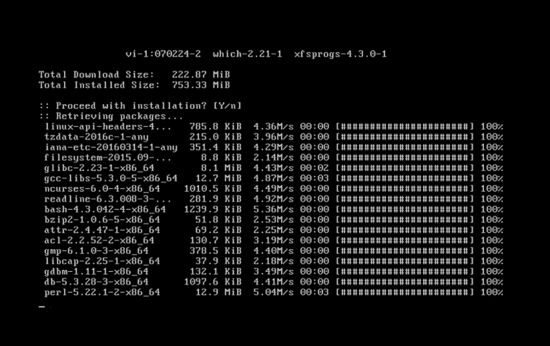
可以看到系统正在同步数据包。
Bootstrap Arch Linux 安装将会开始,需要几分钟。
Arch Linux installation has been started 系统基本软件安装完成后,输入下面的命令来创建 fstab 文件:
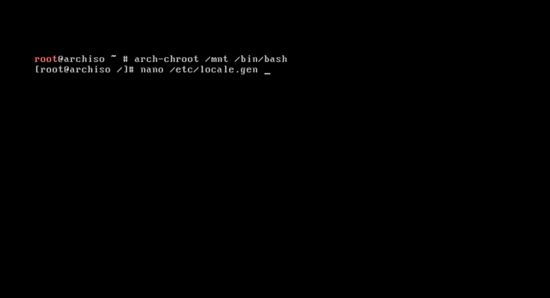
Generating /etc/fstab 配置区域、时间和 root 帐号密码。 输入下面的命令来更改系统的根目录为 Arch Linux 的安装目录:
现在来更改语言配置:
Set language in Arch Linux |