|
Oracel 12cR1install for Oracle Linux 6.5 一、安装前准备1. 软件下载:Database software: db12102_V46095-01_1of2.zip db12102_V46095-01_2of2.zip
下载地址: http://www.oracle.com/technetwork/database/enterprise-edition/downloads/index.html 或是:http://edelivery.oracle.com/
gi12012_V46096-01_1of2.zip gi12012_V46096-01_1of2.zip
下载地址:
2. 系统空间需求:硬盘空间最低要求:6.5G以上 内存空间最低要求:2G以上 SWAP空间分配 :
3. /etc/hosts文件修改/etc/hosts文件,必需包含一个全限定名 <IP-address> <fully-qualified-machine-name> <machine-name>
例如: 127.0.0.1 localhost.localdomain localhost 192.168.0.210 ol6-121.localdomain ol6-121
4. 操作系统配置在Oracle 12c可以自动或手动完成一些系统的基本配置
自动配置可以使用 "oracle-rdbms-server-12cR1-preinstall"包执行所有预安装步骤,通过下面的命令: # yum install oracle-rdbms-server-12cR1-preinstall -y
注意:如果没有安装yum库,要首先安装yum库,通过下面的方法 # cd /etc/yum.repos.d # wget https://public-yum.oracle.com/public-yum-ol6.repo
也可在安装之前最后做一次完全的包更新(非必需)
# yum update
# yum install oracle-rdbms-server-12cR1-preinstall -y
手动配置如果不使用"oracle-rdbms-server-12cR1-preinstall"包执行预安装操作,你需要手动执行下面的安装步骤:
◆添加或修改/etc/sysctl.conf文件 fs.file-max = 6815744 kernel.sem = 250 32000 100 128 kernel.shmmni = 4096 kernel.shmall = 1073741824 kernel.shmmax = 4398046511104 net.core.rmem_default = 262144 net.core.rmem_max = 4194304 net.core.wmem_default = 262144 net.core.wmem_max = 1048576 fs.aio-max-nr = 1048576 net.ipv4.ip_local_port_range = 9000 65500
执行生效 /sbin/sysctl -p
◆修改/etc/security/limits.conf文件 oracle soft nofile 1024 oracle hard nofile 65536 oracle soft nproc 16384 oracle hard nproc 16384 oracle soft stack 10240 oracle hard stack 32768
◆安装必需系统rpm包 # From Public Yum or ULN yum install binutils -y yum install compat-libcap1 -y yum install compat-libstdc++-33 -y yum install compat-libstdc++-33.i686 -y yum install gcc -y yum install gcc-c++ -y yum install glibc -y yum install glibc.i686 -y yum install glibc-devel -y yum install glibc-devel.i686 -y yum install ksh -y yum install libgcc -y yum install libgcc.i686 -y yum install libstdc++ -y yum install libstdc++.i686 -y yum install libstdc++-devel -y yum install libstdc++-devel.i686 -y yum install libaio -y yum install libaio.i686 -y yum install libaio-devel -y yum install libaio-devel.i686 -y yum install libXext -y yum install libXext.i686 -y yum install libXtst -y yum install libXtst.i686 -y yum install libX11 -y yum install libX11.i686 -y yum install libXau -y yum install libXau.i686 -y yum install libxcb -y yum install libxcb.i686 -y yum install libXi -y yum install libXi.i686 -y yum install make -y yum install sysstat -y yum install unixODBC -y yum install unixODBC-devel -y
通过下面的命令检查包的完整性:
# rpm -q --qf '%{NAME}-%{VERSION}-%{RELEASE} (%{ARCH})\n' \binutils compat-libcap1 compat-libstdc++-33 gcc gcc-c++ glibc glibc-devel ksh libgcc libstdc++ libstdc++-devel libaio libaio-devel libXext libXtst libX11 libXau libxcb libXi make sysstat unixODBC unixODBC-devel
◆创建用户组和用户 groupadd oinstall默认已经有 groupadd dba默认已经有 groupadd oper groupadd asmadmin userdel oracle cd /home rm -rf oracle useradd -g oinstall -G dba,oper,asmadmin oracle passwd oracle
5. 其它必要系统配置
设置oracle用户密码passwd oracle
修改90-nproc.conf文件在文件“/etc/security/limits.d/90-nproc.conf”添加下面的内容
$ vi /etc/security/limits.d/90-nproc.conf # Change this * soft nproc 1024 # To this * - nproc 16384
修改"/etc/selinux/config"文件 SELINUX=permissive #或是enforcing
执行下面的命令使生效或重启服务器 # setenforce Permissive
关闭防火墙# service iptables stop # chkconfig iptables off
创建软件安装目录mkdir -p /u01/app/oracle/product/12.1.0.2/db_1 chown -R oracle:oinstall /u01 chmod -R 775 /u01
设置环境变量su - oracle vi .bash_profile # Oracle Settings export TMP=/tmp export TMPDIR=$TMP export ORACLE_TERM=xterm export ORACLE_BASE=/u01/app/oracle export ORACLE_HOME=$ORACLE_BASE/product/12.1.0.2/db_1 export ORACLE_GRID=$ORACLE_BASE/product/12.1.0.2/grid export ORACLE_SID=ocbi export PATH=/usr/sbin:$PATH export PATH=$ORACLE_HOME/bin:$ORACLE_GRID/bin:$PATH export LD_LIBRARY_PATH=$ORACLE_HOME/lib:/lib64:/usr/lib64:/usr/local/lib64:/usr/X11R6/lib64 export CLASSPATH=$ORACLE_HOME/JRE:$ORACLE_HOME/jlib:$ORACLE_HOME/rdbms/jlib export NLS_LANG="SIMPLIFIED CHINESE_CHINA.ZHS16GBK" export ALERT=$ORACLE_BASE/diag/rdbms/$ORACLE_SID/$ORACLE_SID/trace stty erase ^H umask 022 if [ $USER = "oracle" ]; then if [ $SHELL = "/bin/ksh" ]; then ulimit -p 16384 ulimit -n 65536 else ulimit -u 16384 -n 65536 fi fi
创建ASM分区(grid use)fdisk -l [root@racdb ~]# fdisk -l
Disk /dev/sda: 107.4 GB, 107374182400 bytes 255 heads, 63 sectors/track, 13054cylinders Units = cylinders of 16065 * 512 = 8225280bytes Sector size (logical/physical): 512 bytes /512 bytes I/O size (minimum/optimal): 512 bytes / 512bytes Disk identifier: 0x0008977b
Device Boot Start End Blocks Id System /dev/sda1 * 1 26 204800 83 Linux Partition 1 does not end on cylinderboundary. /dev/sda2 26 11971 95947776 83 Linux /dev/sda3 11971 13055 8704000 82 Linux swap / Solaris
Disk /dev/sdb: 53.7 GB, 53687091200 bytes 64 heads, 32 sectors/track, 51200 cylinders Units = cylinders of 2048 * 512 = 1048576bytes Sector size (logical/physical): 512 bytes /512 bytes I/O size (minimum/optimal): 512 bytes / 512bytes Disk identifier: 0x00000000
Disk /dev/sdc: 21.5 GB, 21474836480 bytes 64 heads, 32 sectors/track, 20480 cylinders Units = cylinders of 2048 * 512 = 1048576bytes Sector size (logical/physical): 512 bytes /512 bytes I/O size (minimum/optimal): 512 bytes / 512bytes Disk identifier: 0x00000000
[root@racdb ~]# fdisk /dev/sdb n p 1 w
[root@racdb soft]# rpm -qa oracleasm* oracleasm-support-2.1.8-1.el6.x86_64
rpm -vih asmlib
[root@racdb ~]# /etc/init.d/oracleasmconfigure Configuring the Oracle ASM library driver.
This will configure the on-boot propertiesof the Oracle ASM library driver. The following questions will determine whether the driver is loaded on boot and what permissions it willhave. The current values will be shown in brackets ('[]'). Hitting <ENTER> without typing an answer will keep that current value. Ctrl-C will abort.
Default user to own the driver interface[]: oracle Default group to own the driver interface[]: asmadmin Start Oracle ASM library driver on boot(y/n) [n]: y Scan for Oracle ASM disks on boot (y/n)[y]: y Writing Oracle ASM library driverconfiguration: done Initializing the Oracle ASMLib driver:[ OK ] Scanning the system for Oracle ASMLibdisks: [ OK ]
[root@racdb ~]# /etc/init.d/oracleasmcreatedisk v1 /dev/sdb1 Marking disk "v1" as an ASM disk:[ OK ] [root@racdb ~]# /etc/init.d/oracleasmcreatedisk v2 /dev/sdc1 Marking disk "v2" as an ASM disk:[ OK ]
[root@racdb ~]# /etc/init.d/oracleasmlistdisks V1 V2
二、Database软件安装1. 解压缩安装包unzip db12102_V46095-01_1of2.zip unzip db12102_V46095-01_2of2.zip
2. 设置图形环境变量启动Xmanage [root@racdb ~]# su - oracle [oracle@racdb ~]$ cd /soft [oracle@racdb soft]$ ll 总用量 4963016 drwxr-xr-x. 7 oracleoinstall 4096 7月 7 2014 database -rw-r--r--. 1 oracle oinstall 16735447241月 5 14:28db12102_V46095-01_1of2.zip -rw-r--r--. 1 oracle oinstall1014530602 1月 5 14:26db12102_V46095-01_2of2.zip -rw-r--r--. 1 oracle oinstall1747043545 1月 5 15:31gi12012_V46096-01_1of2.zip -rw-r--r--. 1 oracleoinstall 646972897 1月 5 15:23 gi12012_V46096-01_2of2.zip drwxr-xr-x. 7 oracleoinstall 4096 7月 7 2014 grid [oracle@racdb ~]$ exportDISPLAY=10.1.5.240:0.0 [oracle@racdb soft]$ cddatabase/
3. 安装DB产品
[oracle@racdb database]$ ./runInstaller ◆Step1:配置安全更新
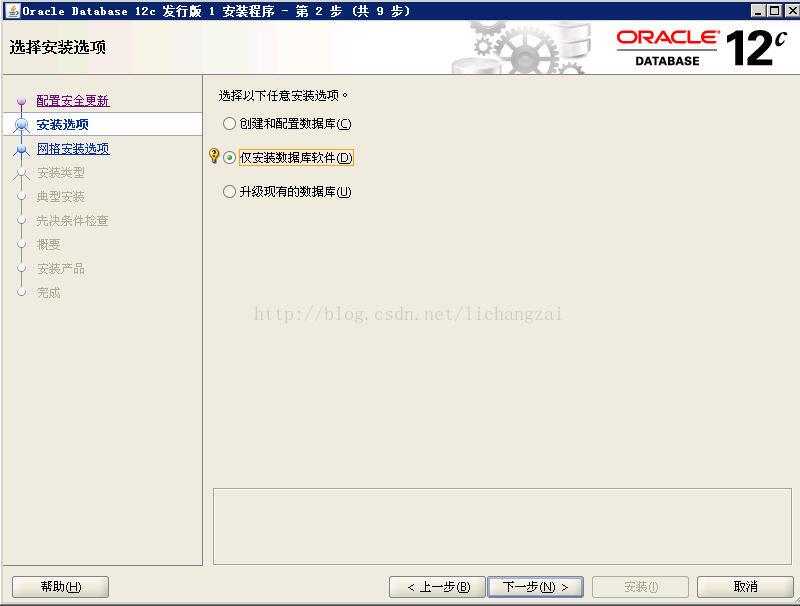
◆Step2:安装选项
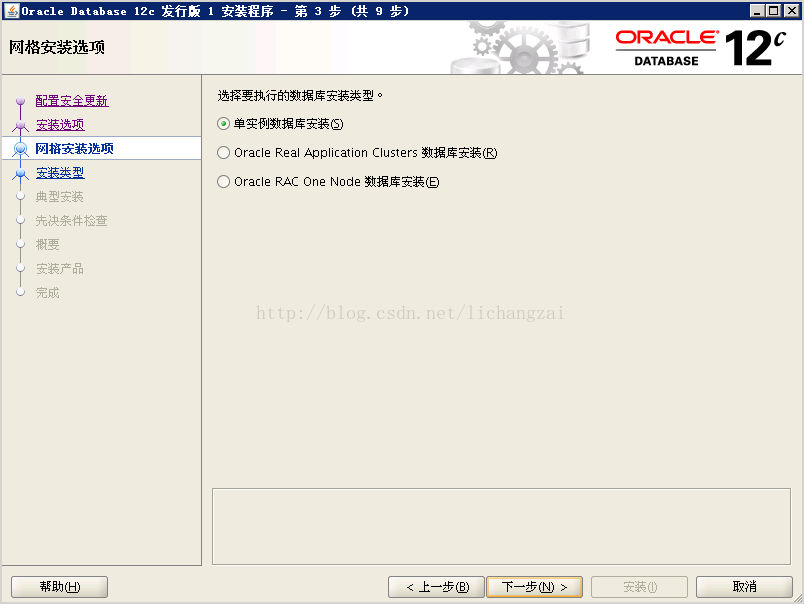
◆Step3:网格安装类型
◆Step4:选择语言
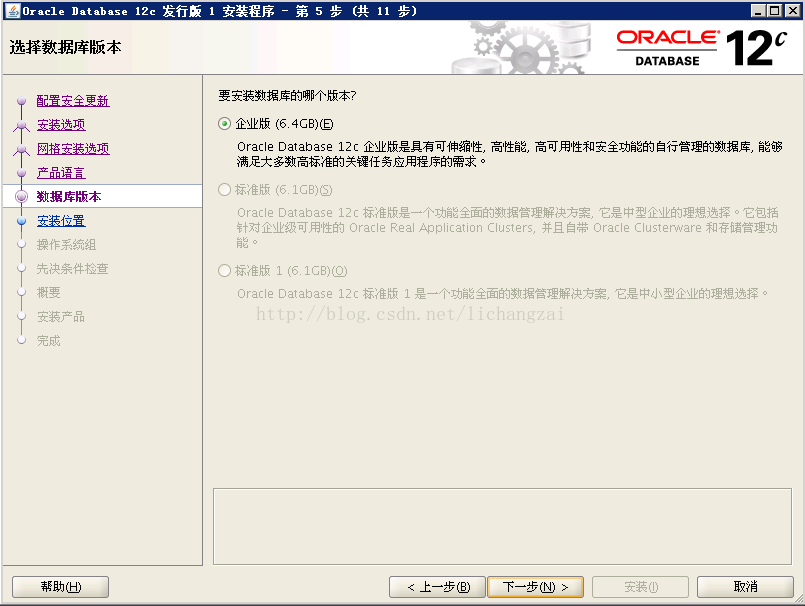
◆Step5:选择数据库版本
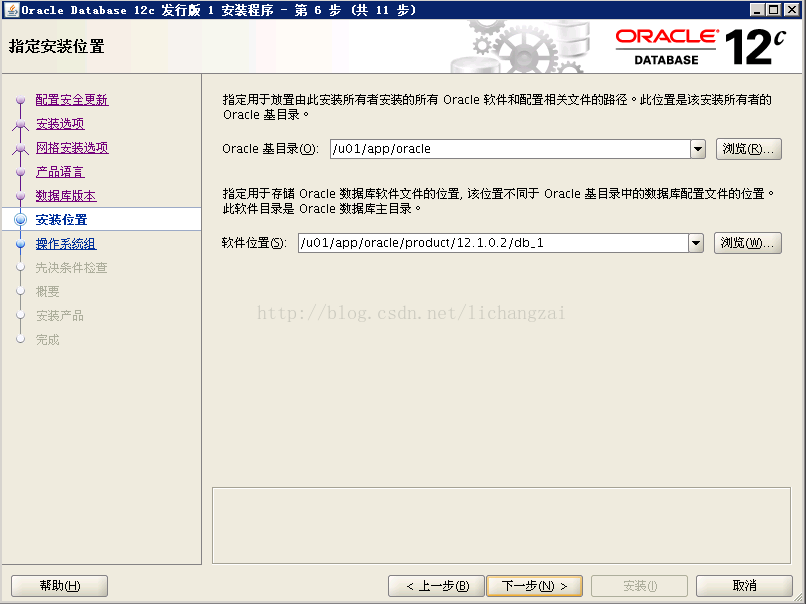
◆Step6:安装位置
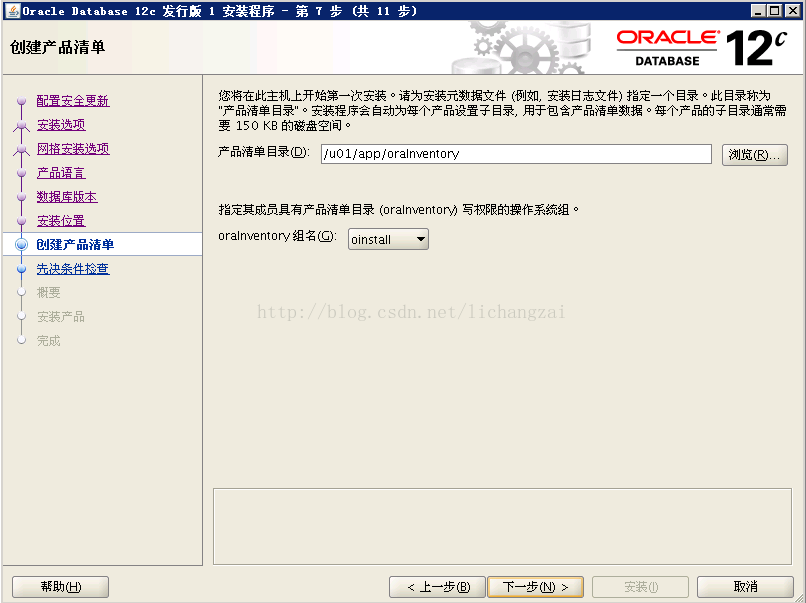
◆Step7:创建产品清单
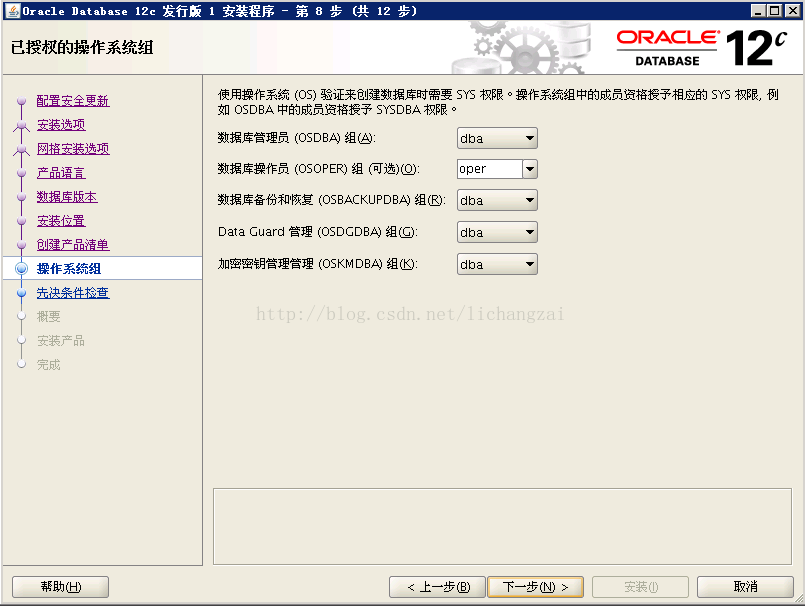
◆Step8:操作系统组
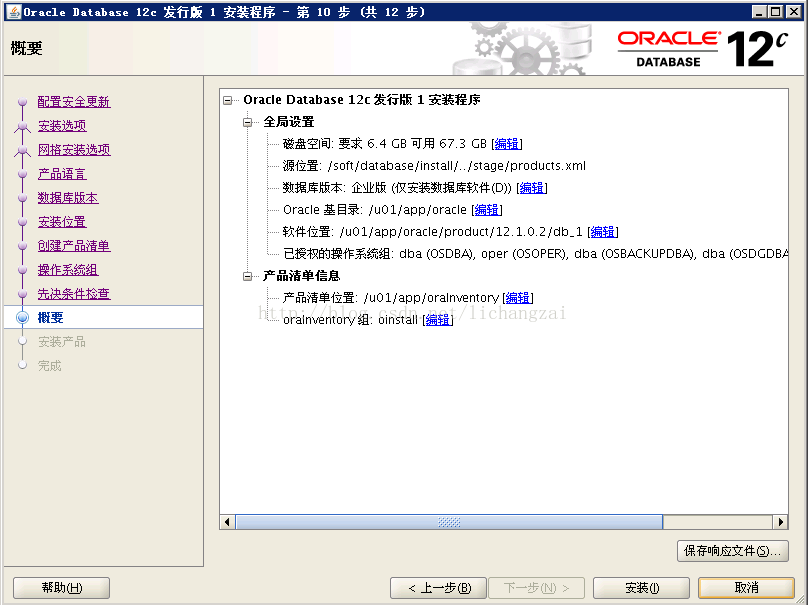
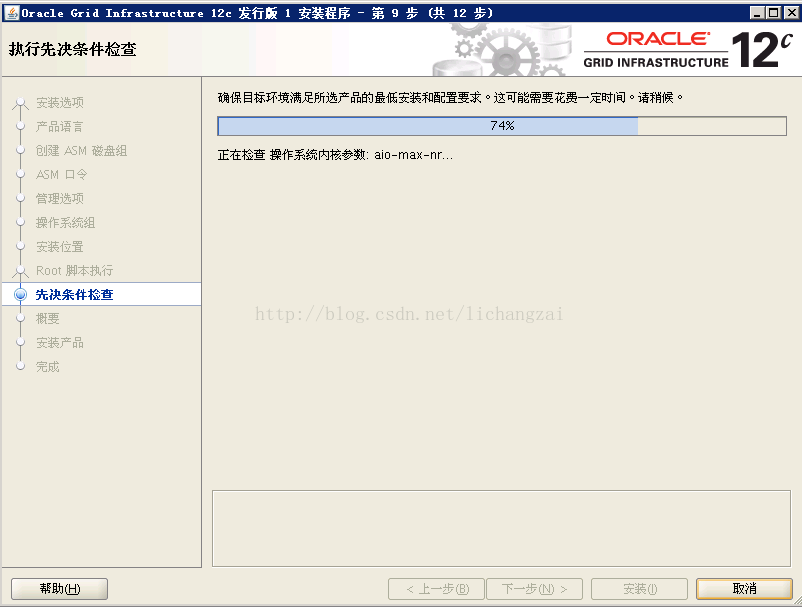
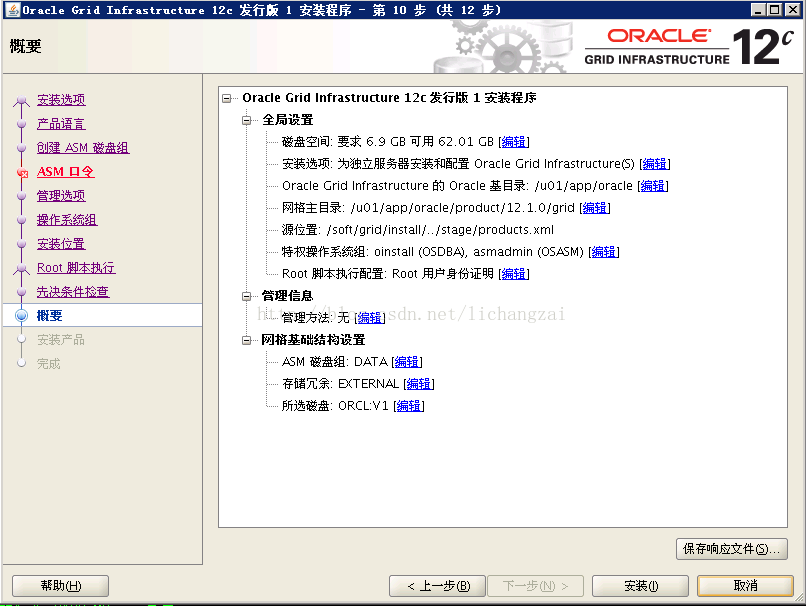
◆Step9:先决条件检查及概要
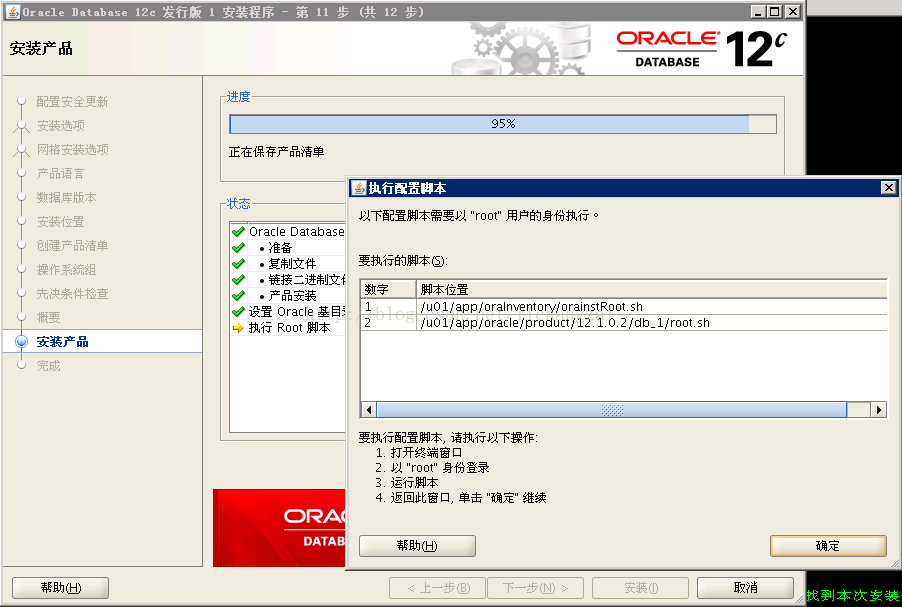
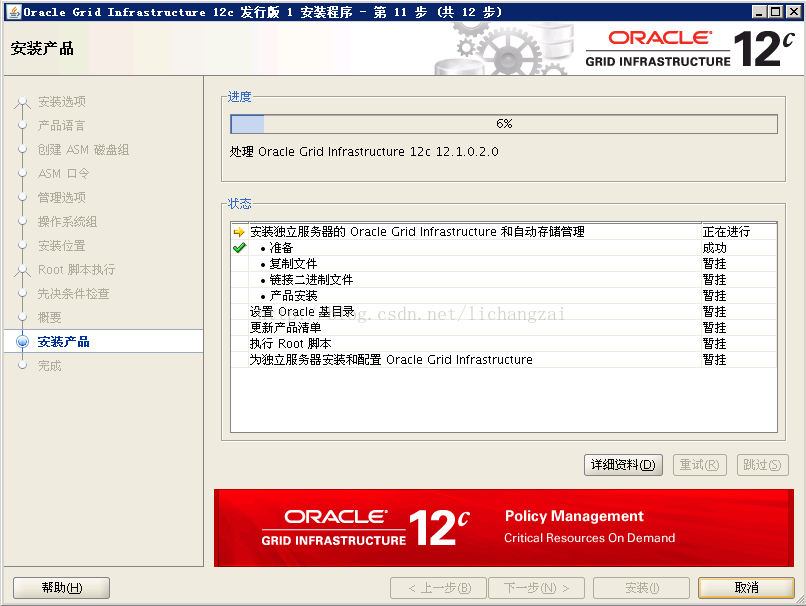
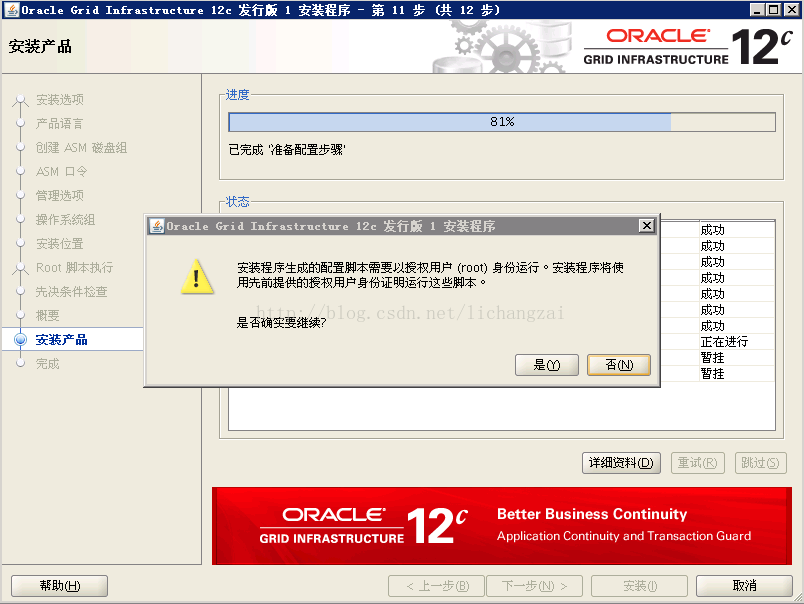
◆Step10:安装产品
◆Step11:执行root脚本
在ssh会话端,root登录,执行root脚本: [root@racdb ~]#/u01/app/oraInventory/orainstRoot.sh 更改权限/u01/app/oraInventory. 添加组的读取和写入权限。 删除全局的读取, 写入和执行权限。
更改组名/u01/app/oraInventory 到 oinstall. 脚本的执行已完成。 [root@racdb ~]#/u01/app/oracle/product/12.1.0.2/db_1/root.sh Performing root user operation.
The following environment variables are setas: ORACLE_OWNER= oracle ORACLE_HOME= /u01/app/oracle/product/12.1.0.2/db_1
Enter the full pathname of the local bindirectory: [/usr/local/bin]: Copying dbhome to /usr/local/bin ... Copying oraenv to /usr/local/bin ... Copying coraenv to /usr/local/bin ...
Creating /etc/oratab file... Entries will be added to the /etc/oratabfile as needed by Database Configuration Assistant when adatabase is created Finished running generic part of rootscript. Now product-specific root actions will beperformed.
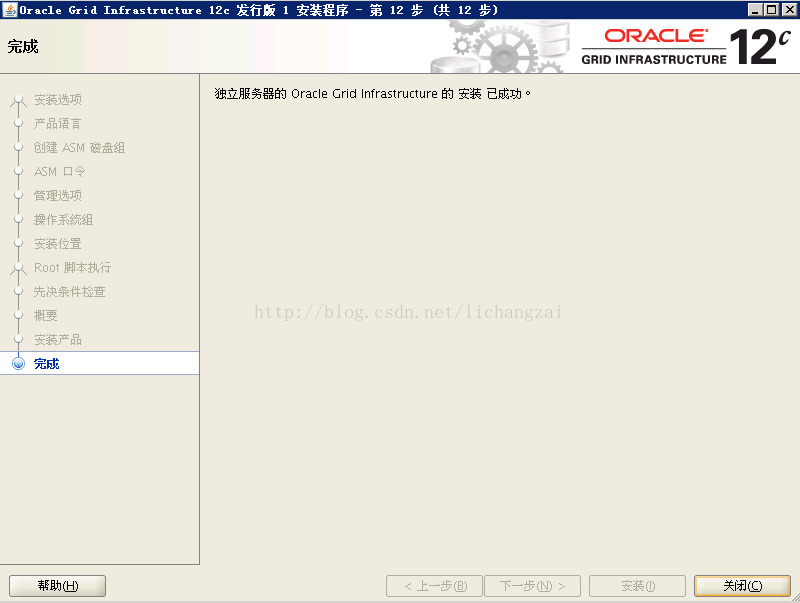
◆Step12:安装完成 执行完两root脚本后,返回上面界面点”确定”
点”关闭”完成安装
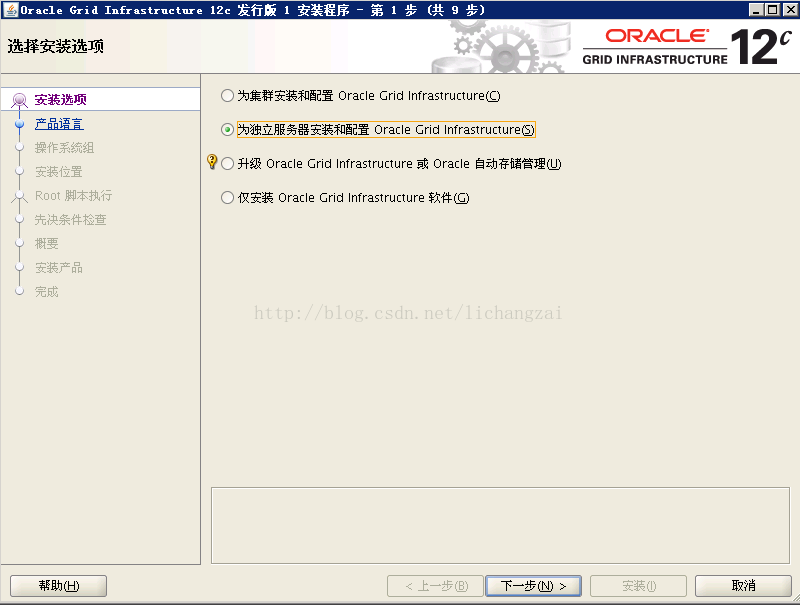
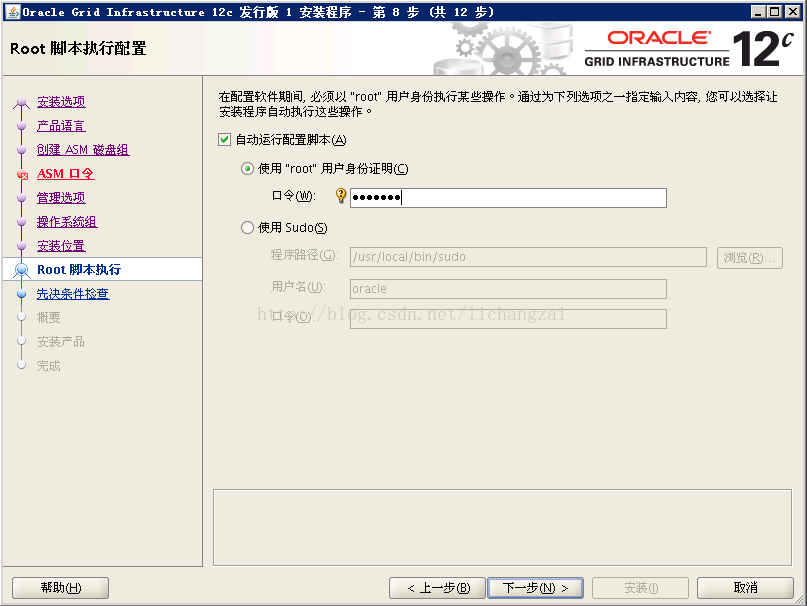
总结: 通过安装步骤可以看到oracle12c和oracle11g没有太大的区别,除了在系统用户组步骤中多出几个可选的系统管理用户组,其它步骤基本一致. 三、Grid Infrastructure安装1. 安装GI产品./runInstaller
点”是”,自动运行root脚本,之后继续安装
完成安装
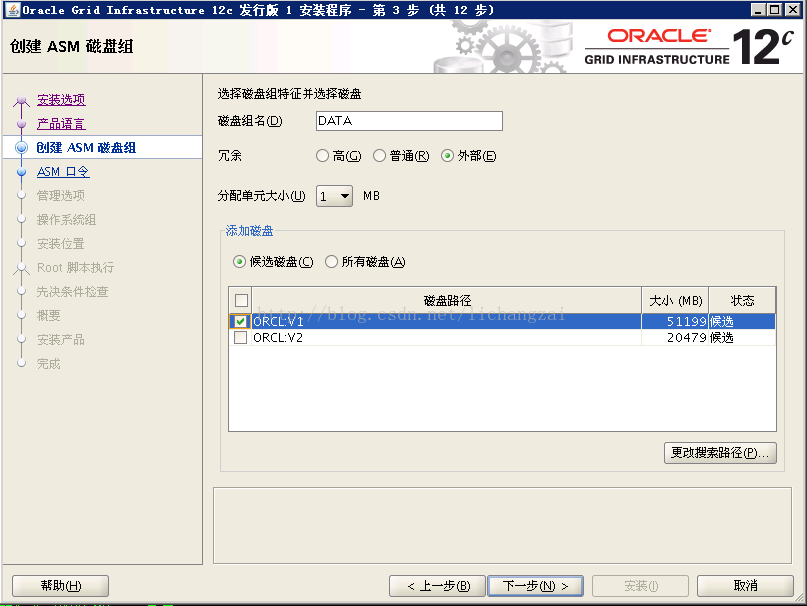
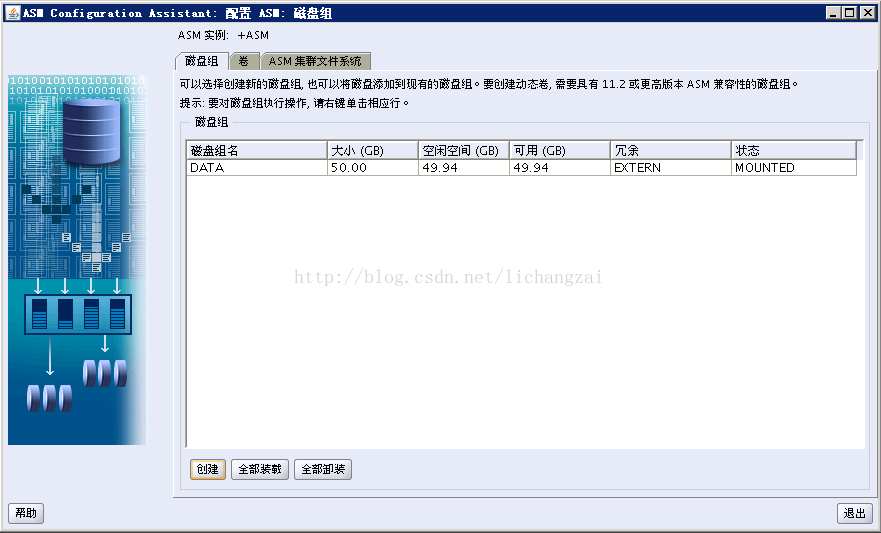
2. 创建ASM磁盘./asmca
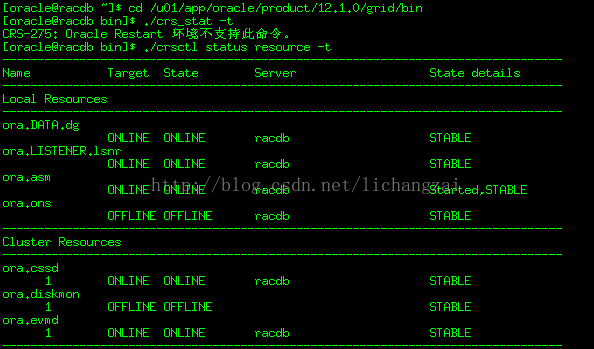
3. 测试安装查看服务状态:
查看监听状态: [oracle@racdb bin]$ lsnrctlstatus
LSNRCTL for Linux: Version12.1.0.2.0 - Production on 08-1月 -2015 15:03:55
Copyright (c) 1991, 2014,Oracle. All rights reserved.
正在连接到 (ADDRESS=(PROTOCOL=tcp)(HOST=)(PORT=1521)) LISTENER 的 STATUS ------------------------ 别名 LISTENER 版本 TNSLSNRfor Linux: Version 12.1.0.2.0 - Production 启动日期 08-1月 -201514:48:46 正常运行时间 0 天 0 小时 15 分 10 秒 跟踪级别 off 安全性 ON: LocalOS Authentication SNMP OFF 监听程序参数文件 /u01/app/oracle/product/12.1.0/grid/network/admin/listener.ora 监听程序日志文件 /u01/app/oracle/diag/tnslsnr/racdb/listener/alert/log.xml 监听端点概要... (DESCRIPTION=(ADDRESS=(PROTOCOL=tcp)(HOST=racdb.localdomain)(PORT=1521))) (DESCRIPTION=(ADDRESS=(PROTOCOL=ipc)(KEY=EXTPROC1521))) 服务摘要.. 服务 "+ASM" 包含 1 个实例。 实例 "+ASM", 状态 READY, 包含此服务的 1 个处理程序... 命令执行成功
总结: 通过GI安装步骤可以看到oracle12c和oracle11g也有没有太大的区别,但增加了在管理选项中注册Cloud Control 的功能;另外,增加了自动执行root脚本的功能。 在命令上,oracle12彻底去掉了oracle10g中的一些旧的命令,如crs_stat,crs_start等命令。
dbca命令创建数据库 $ dbca Step1:启动创建
Step2:简单默认模式安装
Oracle2015
上面选择了非高级模式,参数都为默认。
Setp2:高级模式安装如果选“高级模式”,安装步骤如下:
Step3:数据库模板类型
Step4:数据库标识(Container & Pluggable)指定全局数据库名(容器数据库)和可插拔的数据库名
Step5:管理选项(EM)指定是用EM管理或是Cloud Control EM管理
Step6:数据库身份证明(密码)
Step7:网络配置(选择监听)
Step8:存储位置(ASM)
Step9:数据库选项(DB Vault) Step10:初始化参数
Step11:创建数据库
Step12:先决条件检查及概要
Stetp13:进行安装
Step14:安装完成
查看监听
五、后续步骤
Express 12c监控界面在Oracle 12c的版本中,引入了简化的EM版本,这一版本被称为:EM Database Express 12c。 Express版本的EM对之前的EM做出了大量的简化,使之更加轻量级(整个部署的空间需求在50M ~ 100M左右),更加适合用于轻量级的数据库监控和性能管理。 Express版本的EM对于企业环境的简单数据库管理和监控是非常实用和快捷的,这是12c对于用户反馈的一个功能简化和改进。
EM Express配置非常简单,底层需要XML DB的支持,在Oracle12c中,XDB是强制安装的,所以在数据库安装完成之后,只需要确认基本的XDB配置,设置端口即可启用EM Express,以下配置8080端口作为EM Express的监听端口: SQL> show parameterdispatchers
NAME TYPE VALUE ----------------------------------------------- ------------------------------ dispatchers string (PROTOCOL=TCP) (SERVICE=RC12CXDB) max_dispatchers integer
SQL> execDBMS_XDB_CONFIG.setHTTPPort(5500); --默认端口
PL/SQL procedure successfullycompleted.
[oracle@racdb bin]$ lsnrctlstatus
LSNRCTL for Linux: Version12.1.0.2.0 - Production on 09-1月 -2015 17:01:00
Copyright (c) 1991, 2014,Oracle. All rights reserved.
正在连接到 (ADDRESS=(PROTOCOL=tcp)(HOST=)(PORT=1521)) LISTENER 的 STATUS ------------------------ 别名 LISTENER 版本 TNSLSNRfor Linux: Version 12.1.0.2.0 - Production 启动日期 08-1月 -201514:48:46 正常运行时间 1 天 2 小时 12 分 14 秒 跟踪级别 off 安全性 ON: LocalOS Authentication SNMP OFF 监听程序参数文件 /u01/app/oracle/product/12.1.0/grid/network/admin/listener.ora 监听程序日志文件 /u01/app/oracle/diag/tnslsnr/racdb/listener/alert/log.xml 监听端点概要... (DESCRIPTION=(ADDRESS=(PROTOCOL=tcp)(HOST=racdb.localdomain)(PORT=1521))) (DESCRIPTION=(ADDRESS=(PROTOCOL=ipc)(KEY=EXTPROC1521))) (DESCRIPTION=(ADDRESS=(PROTOCOL=tcps)(HOST=racdb.localdomain)(PORT=5500))(Security=(my_wallet_directory=/u01/app/oracle/admin/RC12C/xdb_wallet))(Presentation=HTTP)(Session=RAW)) 服务摘要.. 服务 "+ASM" 包含 1 个实例。 实例 "+ASM", 状态 READY, 包含此服务的 1 个处理程序... 服务 "RC12C" 包含 1 个实例。 实例 "RC12C",状态 READY, 包含此服务的 1 个处理程序... 服务 "RC12CXDB" 包含 1 个实例。 实例 "RC12C",状态 READY, 包含此服务的 1 个处理程序... 服务 "ocbi1" 包含 1 个实例。 实例 "RC12C",状态 READY, 包含此服务的 1 个处理程序... 服务 "ocbi2" 包含 1 个实例。 实例 "RC12C",状态 READY, 包含此服务的 1 个处理程序... 命令执行成功
打开Oracle Enterprise Manager DatabaseExpress 12c监控界面 https://racdb.localdomain:5500/em/
登录之后的页面非常简洁,解决了之前EM对于简单应用的臃肿冗余问题:
在性能监控上,EM Express也提供了非常直观和简洁的纬度展现:
对于CDB来说,EM Express在CDB$ROOT中执行,缺省显示的是ROOT中的信息,由于PDB的AWR信息也存储在ROOT容器中,所以优化和性能信息在全局可见。
修改/etc/oratab文件Edit the "/etc/oratab" file setting therestart flag for each instance to 'Y'. +ASM:/u01/app/oracle/product/12.1.0/grid:Y # line added by Agent RC12C:/u01/app/oracle/product/12.1.0.2/db_1:Y # line added by Agent
添加 CC Agent12c在EM Cloud Control 12c上,推送安装目标服务器的agent12c(另见agent12c安装文档)
安装完成后,添加目标数据库
这样,就可以通过EM Cloud Control 12c对目标数据库和服务器进行监控和管理了。
Express 12c问题If Database Express 12c is not working, check theXMLDB HTTP port. If it is 0, set it to the port you want to use. SQL> SELECTdbms_xdb_config.gethttpsport FROM dual;
GETHTTPSPORT ------------ 5500
SQL> EXECdbms_xdb_config.sethttpsport(5500);
PL/SQL procedure successfullycompleted.
SQL>
六、Oracle 12c新特性1. Pluggable Database在Oracle Database 12c中,可组装式数据库 - Pluggable Database为云计算而生。在12c以前,Oracle数据库是通过Schema来进行用户模式隔离的,现在,可组装式数据库可以让此前意义上的多个数据库一起共存。 Pluggable Database 其体系结构的核心是: 由一个容器数据库(CDB)和多个可组装式数据库(PDB)构成,PDB包含独立的系统表空间和SYSAUX表空间等,但是所有PDB共享CDB的控制文件、日志文件和UNDO表空间。各个PDB之间互访需要通过DB Link进行,就仿佛是多个数据库一样。 在2012 OOW上,Larry重点介绍了Oracle Database 12c 的这个新特性,并将其归结为:多租户数据库。也就是说,在云平台上,不同租户可以在一个大的CDB数据库中运行,而彼此数据(PDB)与应用又完全隔离。显然这个特性对Oracle推出的数据库云平台必不可少。 当然,这个特性面临的最大问题仍然是安全问题,如果某个PDB的用户获得了意外的权限提升,则所有用户的数据都可能被暴露。
下图是Pluggable Database的体系结构示意图1:
Pluggable Database的体系结构图:
参考资料: http://www.otnblogs.com/installing-oracle-database-12c-linux-6/ http://oracle-base.com/articles/12c/oracle-db-12cr1-installation-on-oracle-linux-6.php http://blog.csdn.net/linghe301/article/details/9221665 https://docs.oracle.com/database/121/LTDQI/toc.htm http://www.eygle.com/archives/2013/07/oracle_database_12c_em_express.html (责任编辑:IT) |