|
cobbler的相关优势:
Cobbler支持命令行管理,web界面管理,还提供了API接口,可以方便二次开发使用。
cobbler不会因为在局域网中启动了dhcp而导致有些机器因为默认从pxe启动在重启服务器后加载tftp内容导致启动终止。
Cobbler作为一个预备工具,使部署RedHat/Centos/Fedora系统更容易,同时也支持Suse和Debian系统的部署
服务集成:
PXE服务支持
DHCP服务管理
DNS服务管理
Kickstart服务支持
yum仓库管理
Cobbler客户端Koan支持虚拟机安装和操作系统重新安装
Cobbler web界面 可以更好得管理用户操作界面
安装过程引导:
yum源的准备:
repo包的安装。
# wget http://mirrors.ustc.edu.cn/fedora/epel/6/x86_64/epel-release-6-8.noarch.rpm
## rpm -ivh epel-release-6-8.noarch.rpm
cobbler网络安装:
# yum install cobbler cobbler-web httpd xinetd tftp-server rsync koan dhcpd debmirror(debian的镜像包) pykickstart cman fence-agent -y
cobbler的相关目录信息:
/var/lib/cobbler 存储导入的镜像的配置信息,kickstarts目录存放kickstarts脚本(多个.ks安装模板),snippets目录存放在kickstat 配置文件中可以执行的脚本,config目录提供配置信息(比如distros和profile相关信息),还有其他目录基本上无需配置。
/var/www/cobbler 是导入发行版的操作系统的数据目录,ks_mirror里面是导入的发行版系统,images里面是所有发行版的kernel(vmlinuz)和initrd(initrd.img),用于远程网络启动
/var/log/cobbler 是日志目录
/etc/cobbler 是cobbler的配置文件目录,settings是主配置文件,里面还有一些相关配置模版,users.conf是用户,users.digest是用户及密码
cobbler相关命令:
#cobbler list 列出相关cobber元素(distros和profile)
#cobbler check 检查cobbler配置(一般会提示需要进行怎样的配置)
#cobbler report 列出cobbler的详细信息
#cobbler distro 查看导入的相关系统发行版信息
#cobbler profile 查看cobbler创建的相关pofile信息
#cobbler sync 同步cobbler相关配置(最好每次执行完配置后都进行修改)
#cobbler reposync 同步repo源
配置前首先进行配置检测
# cobbler check
The following are potential configuration items that you may want to fix:
1 : The ‘server’ field in /etc/cobbler/settings must be set to something other than localhost, or kickstarting features will not work. This should be a resolvable hostname or IP for the boot server as reachable by all machines that will use it.
2 : For PXE to be functional, the ‘next_server’ field in /etc/cobbler/settings must be set to something other than 127.0.0.1, and should match the IP of the boot server on the PXE network.
3 : some network boot-loaders are missing from /var/lib/cobbler/loaders, you may run ‘cobbler get-loaders’ to download them, or, if you only want to handle x86/x86_64 netbooting, you may ensure that you have installed a *recent* version of the syslinux package installed and can ignore this message entirely. Files in this directory, should you want to support all architectures, should include pxelinux.0, menu.c32, elilo.efi, and yaboot. The ‘cobbler get-loaders’ command is the easiest way to resolve these requirements.
4 : change ‘disable’ to ‘no’ in /etc/xinetd.d/rsync
5 : since iptables may be running, ensure 69, 80/443, and 25151 are unblocked
6 : debmirror package is not installed, it will be required to manage debian deployments and repositories
7 : ksvalidator was not found, install pykickstart
8 : The default password used by the sample templates for newly installed machines (default_password_crypted in /etc/cobbler/settings) is still set to ‘cobbler’ and should be changed, try: “openssl passwd -1 -salt ‘random-phrase-here’ ‘your-password-here’” to generate new one
9 : fencing tools were not found, and are required to use the (optional) power management features. install cman or fence-agents to use them
Restart cobblerd and then run ‘cobbler sync’ to apply changes.
1.提示需要在/etc/cobbler/settings中进行配置server选项。指定ip或者主机名
2.在主配置文件中修改next_server选项,以便使用pxe功能
3.缺少网络启动的boot-loader,可以执行"cobbler get-loaders"进行下载
4.开启rsync功能(在/etc/xinetd.d/rsync中选择启用)
5.让iptables可以允许69,80,443等端口访问(可以直接使用iptables -F关闭)
6.debmirror包没有安装(这个是用来管理debian系统的配置和repo)
7.提示安装pykickstart
8.在主配置文件中的default_password_crypted需要进行设置(使用'openssl passwd -1 -salt "任意字符" "密码"')注意,此密码会被默认用来做系统的root密码
9.fence工具没装,需要被用来管理电源。可以安装cman或者fence-agents
注意:执行完相关操作之后,请进行重启cobbler服务,并进行'cobbler sync'操作。
重启cobbler,重启httpd,执行cobbler check执行检测。
# openssl passwd -1 新建cobbler密码
(# openssl passwd -1 -salt 'wyadmin' 'wyadmin' 密码为wyadmin,生成一个加密字符
$1$wyadmin$eC7GvOUyR0IKHPqo5.FLg0)
注意:(这块就是root密码)
详情可以观察/var/lib/cobbler/kickstart/sample.ks中的密码文件($default_password_crypted)而这个就是使用openssl生成的密码(在/etc/cobbler/settings中配置过)
主配置文件详情:
# vim /etc/cobbler/settings
server: 10.45.249.101
next_server: 10.45.249.101
default_password_crypted: "$1$wyadmin$eC7GvOUyR0IKHPqo5.FLg0"
manage_dhcp: 1 启用dhcp(让cobbler进行控制dhcp)
default_kickstart: /var/lib/cobbler/kickstarts/default.ks当在使用kickstart新建操作系统(其实这个文件是空的,默认可用的是sample.ks)
启用tftp(disabled = no)
启用rsync
启动cobbler,dhcpd,httpd.关闭selinux(setenforce 0暂时关闭)
# cobbler get-loaders 会去pxe启动需要的loader(boot-loader),执行此命令会进行下载boot-loader
# cobbler check 再次检测cobbler所需要的配置
重启cobbler并且执行cobbler sync
配置DHCP:
修改dhcp代理文件(简单的dhcp修改)
# vim /etc/cobbler/dhcp.template 需要修改的地方(子网,网管以及范围的设置)
subnet 10.45.249.0 netmask 255.255.255.0 {
option routers 10.45.249.102;
option domain-name-servers 10.45.249.102;
option subnet-mask 255.255.255.0;
range dynamic-bootp 10.45.249.10 10.45.249.0;
default-lease-time 21600;
max-lease-time 43200;
next-server $next_server; 这里使用的是一个变量
# vim /etc/dhcp/dhcpd.conf 可用进行简单的配置,将所有服务重启后会发现这个文件和上面那个文件同步了
然而,刚开始配置好dhcp后很多情况下dhcp是无法启动的。
# cat /etc/sysconfig/dhcpd
DHCPDARGS=eth1
同步cobbler配置:
/etc/init.d/cobblerd restart 再次重启后发现dhcp启动了
/etc/init.d/xinetd restart
/etc/init.d/dhcpd restart
/etc/init.d/httpd restart
###cobbler sync 在执行sync命令后会显示相关的服务启动
注意,每次修改完dhcp配置后,执行cobbler sync同步
注意:有时候dhcp服务不能起来,需要进行cobbler sync后才能启动
#mount /dev/cdrom /mnt 挂载镜像文件
# cobbler import --path=/mnt --name=rhel6.6_x86-64 导入系统介质(对distros起名)默认就导入/var/www/cobbler/ksmirror目录
task started: 2015-03-25_040449_import
task started (id=Media import, time=Wed Mar 25 04:04:49 2015)
Found a candidate signature: breed=redhat, version=rhel6
Found a matching signature: breed=redhat, version=rhel6
Adding distros from path /var/www/cobbler/ks_mirror/rhel6.6_x86-64:
creating new distro: rhel6.6-64-x86_64
trying symlink: /var/www/cobbler/ks_mirror/rhel6.6_x86-64 -> /var/www/cobbler/links/rhel6.6-64-x86_64
creating new profile: rhel6.6-64-x86_64
associating repos
checking for rsync repo(s)
checking for rhn repo(s)
checking for yum repo(s)
starting descent into /var/www/cobbler/ks_mirror/rhel6.6_x86-64 for rhel6.6-64-x86_64
processing repo at : /var/www/cobbler/ks_mirror/rhel6.6_x86-64
directory /var/www/cobbler/ks_mirror/rhel6.6_x86-64 is missing xml comps file, skipping
*** TASK COMPLETE ***
重启以下服务:
xinted cobblerd httpd dhcpd
# cobbler list 查看cobbler属性
distros: 可用的发行版
rhel6.6-64-x86_64
profiles: 对应的配置文件(其实就是系统启动模板)
rhel6.6-64-x86_64
systems: 系统的设置,针对系统对应的主机名.ip.MAC进行系统安装
repos: 软件仓库
images:
mgmtclasses:
packages:
files:
定义kickstart文件:
设置profile,关联镜像和kickstart文件,profile可以理解为按角色进行分类
用cobbler安装操作系统时,cobbler真正执行的kickstart文件其实不是 /var/lib/cobbler/kickstarts/default.ks,
而是 /var/lib/cobbler/kickstarts/sample.ks,可在配置文件/etc/cobbler/settings中看到。
在这块其实可以定义多个ks的文件,进行关联多个profile模板.
配置profile和system,使用某个kickstart文件:
1.添加profile(在装机启动的时候其实就会看见RHEL6.6.X86和rhel6.6-64-x86_64选项)
# cobbler profile add --name=RHEL6.6.X86 --distro=rhel6.6-64-x86_64 --kickstart=/var/lib/cobbler/kickstarts/esxi4-ks.cfg
(从rhel6.6-64-x86_64镜像中,按照ks.cfg文件生成一个安装模板)
将distro设定为自己的镜像(cobbler list)
(注意,这个其实就是相当于修改一个装机模板,用来在装机选择新加的esxi4-ks.cfg)
2.变更profile配置名称
# cobbler profile rename --name=centos6.6 --newname=rhel6.6-x86_64
(cobbler list的时候可以查看到两个profile)
3.删除profile配置
# cobbler profile remove --name=rhel6.6-x86_64
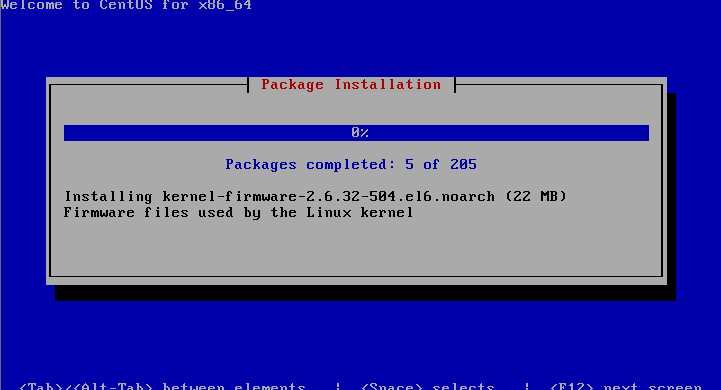
测试安装,类似于PXE,直接安装就可。
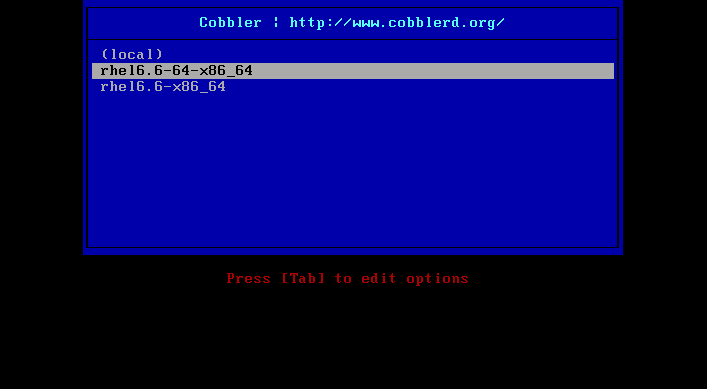
可以看到两个安装选项,这个就是之前创建的两个profile。安装步骤就不再贴图。
优化:在整个安装中需要手动管理几部分,这块其实可以自定义好ks文件,进行全自动化安装。
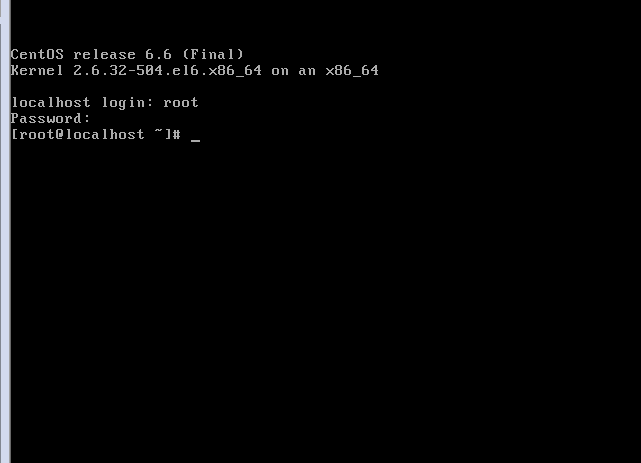
虚拟机创建成功!
注意:如果安装的主机在某一个时间段被黑了,或则系统想统一,那么可以使用cobbler中的koan来重新安装。
重装:
1.在客户端安装koan
#yum install koan -y
2.查看cobbler服务器上可选的安装列表
# koan --list=profiles --server=10.45.249.102
- looking for Cobbler at http://10.45.249.102:80/cobbler_api
rhel6.6-x86_64
rhel6.6-64-x86_64
3.下载重装模板(下载完毕后提示重启)
# koan --replace-self --server=10.45.249.102 --profile=rhel6.6-64-x86_64
4.执行重启安装
#reboot
重启之后主机会进行重新初始化设置,重新安装系统!
(责任编辑:IT) |