CentOS下构建企业级LAMMP环境
时间:2014-07-03 02:00 来源:linux.it.net.cn 作者:IT网
一、LAMMP简介
二、LAMMP项目环境简介
三、Apache的安装与配置
四、FastCGI的安装与配置
五、整合Apache与PHP服务
六、安装Mysql服务器
七、安装Memcache与libevent
八、安装Memcache 基于Web管理平台
一、LAMMP简介
LAMP(Linux- Apache-MySQL-PHP)网站架构是目前国际流行的Web框架,该框架包括:Linux操作系统,Apache网络服务器,MySQL数据 库,Perl、PHP或者Python编程语言,所有组成产品均是开源软件,是国际上成熟的架构框架,很多流行的商业应用都是采取这个架构,和 Java/J2EE架构相比,LAMP具有Web资源丰富、轻量、快速开发等特点,微软的.NET架构相比,LAMP具有通用、跨平台、高性能、低价格的 优势,因此LAMP无论是性能、质量还是价格都是企业搭建网站的首选平台。在此基础上我们增加了Memcache缓冲服务器,解决了应用程序与数据库之间的瓶颈问题,有效提高了访问速度,这就是LAMMP架构。
二、LAMMP项目环境简介
系统环境:Centos6.4x86-64
Apache IP: 172.16.10.1
PHP IP:172.16.10.2
Mysql IP:172.16.10.3
Memcache IP: 172.16.10.4
此LAMMP架构是分别搭建在不同的服务器上面,在生产环境中,更是应该如此,一台服务器提供多种应用,服务器会很消耗资源,提供服务的性能也会降低。
此架构中各服务器的工作
Apache在此架构中,响应回复用户html的请求
FastCGI是把php程序执行的结果响应给Apache
Memcached是根据用户请求的动态网页文件中是否需要Memcached服务器缓存数据,Memcache是把数据存储在内存中的,速度可想而知了。
Mysql是响应用户是否需写入查询数据
用户的请求资源到获取资源的过程
1、当用户只需要请求web服务器的html页面时,Apache直接响应请求,所经过的过程为1--->10
2、当用户需请求一个web服务器的动态的页面时,Apache把用户请求的php执行程序发送给FastCGI服务器执行,FastCGI把执行的结果返回给Apache服务器,服务器把程序生成的的静态页面响应给客户端。所经过的过程1--->2--->3--->8--->9--->10
3、当用户需要请求的web服务器资源中需要数据时,Apache把用户请求的php执行 程序给FastCGI执行,执行过程中需要对数据进行操作时且Memcached中没有缓存时,FastCGI去请求Mysql服务器的资源,mysql服务器把数据响应给FastCGI,如果此数据需要缓存则FastCGI把数据缓存到Memcached服务器上,然后把数据响应给Apache,Apache生成静态的页面响应给客户端。所经过的过程1--->2--->3--->6--->7[--->4]--->8--->9--->10(如果需要缓存则会经过4过程)
4、当用户需要请求的web服务器资源中需要数据时,Apache把用户请求的php执行程序给 FastCGI执行,执行过程中需要对数据进行操作时Memcached中有缓存时,Memcached直接把 数据响应给FastCGI,然后把数据响应给Apache,Apache生成静态的页面响应给客户端。所经过的过程1--->2--->3--->4--->5--->8--->9--->10
为了解决软件包下载的问题,特提供软件包的下载地址:
-
-
-
-
-
-
-
-
-
-
-
-
-
-
-
-
系统的yum源为搜狐源,
三、Apache的安装与配置
-
准备系统环境:
[root@localhost httpd-2.4.6]# yum install pcre-devel openssl-devel -y
-
安装apr
[root@localhost ~]# tar xf apr-1.4.6.tar.bz2
[root@localhost apr-1.4.6]# ./configure --prefix=/usr/local/httpd/apr
[root@localhost apr-1.4.6]# make && make install
-
安装apr-util
[root@localhost ~]# tar xf apr-util-1.5.2.tar.bz2
[root@localhost apr-util-1.5.2]# ./configure --prefix=/usr/local/httpd/apr-util --with-apr=/usr/local/httpd/apr/
[root@localhost apr-util-1.5.2]# make && make install
-
安装Apache
[root@localhost ~]# tar xf httpd-2.4.6.tar.bz2
[root@localhost ~]# cd httpd-2.4.6
[root@localhost httpd-2.4.6]# ./configure --prefix=/usr/local/httpd/apache --sysconfdir=/etc/httpd --enable-so --enable-ssl --enable-cgi --enable-rewrite --with-zlib --with-pcre --with-apr=/usr/local/httpd/apr --with-apr-util=/usr/local/httpd/apr-util --enable-modules=most --enable-mpms-shared=all --with-mpm=event
[root@localhost httpd-2.4.6]# make && make install
-
提供SysV服务脚本/etc/rc.d/init.d/httpd,内容如下
#!/bin/bash
#
# httpd Startup script for the Apache HTTP Server
#
# chkconfig: - 85 15
# description: Apache is a World Wide Web server. It is used to serve \
# HTML files and CGI.
# processname: httpd
# config: /etc/httpd/conf/httpd.conf
# config: /etc/sysconfig/httpd
# pidfile: /var/run/httpd.pid
# Source function library.
. /etc/rc.d/init.d/functions
if [ -f /etc/sysconfig/httpd ]; then
. /etc/sysconfig/httpd
fi
# Start httpd in the C locale by default.
HTTPD_LANG=${HTTPD_LANG-"C"}
# This will prevent initlog from swallowing up a pass-phrase prompt if
# mod_ssl needs a pass-phrase from the user.
INITLOG_ARGS=""
# Set HTTPD=/usr/sbin/httpd.worker in /etc/sysconfig/httpd to use a server
# with the thread-based "worker" MPM; BE WARNED that some modules may not
# work correctly with a thread-based MPM; notably PHP will refuse to start.
# Path to the apachectl script, server binary, and short-form for messages.
apachectl=/usr/local/apache/bin/apachectl
httpd=${HTTPD-/usr/local/httpd/apache/bin/httpd}
prog=httpd
pidfile=${PIDFILE-/usr/local/httpd/apache/logs/httpd.pid}
lockfile=${LOCKFILE-/var/lock/subsys/httpd}
RETVAL=0
start() {
echo -n $"Starting $prog: "
LANG=$HTTPD_LANG daemon --pidfile=${pidfile} $httpd $OPTIONS
RETVAL=$?
echo
[ $RETVAL = 0 ] && touch ${lockfile}
return $RETVAL
}
stop() {
echo -n $"Stopping $prog: "
killproc -p ${pidfile} -d 10 $httpd
RETVAL=$?
echo
[ $RETVAL = 0 ] && rm -f ${lockfile} ${pidfile}
}
reload() {
echo -n $"Reloading $prog: "
if ! LANG=$HTTPD_LANG $httpd $OPTIONS -t >&/dev/null; then
RETVAL=$?
echo $"not reloading due to configuration syntax error"
failure $"not reloading $httpd due to configuration syntax error"
else
killproc -p ${pidfile} $httpd -HUP
RETVAL=$?
fi
echo
}
# See how we were called.
case "$1" in
start)
start
;;
stop)
stop
;;
status)
status -p ${pidfile} $httpd
RETVAL=$?
;;
restart)
stop
start
;;
condrestart)
if [ -f ${pidfile} ] ; then
stop
start
fi
;;
reload)
reload
;;
graceful|help|configtest|fullstatus)
$apachectl $@
RETVAL=$?
;;
*)
echo $"Usage: $prog {start|stop|restart|condrestart|reload|status|fullstatus|graceful|help|configtest}"
exit 1
esac
exit $RETVAL
-
为此脚本赋予执行权限
[root@localhost init.d]# chmod +x /etc/rc.d/init.d/httpd
-
将httpd加入服务列表
[root@localhost init.d]# chkconfig --add httpd
-
启动httpd服务
[root@localhost init.d]# service httpd start
-
客户端访问测试

四、FastCGI的安装与配置
-
系统环境安装
[root@localhost php-5.4.19]# yum install libxml2-devel openssl-devel bzip2-devel libmcrypt-devel -y
-
安装php服务
[root@localhost ~]# tar xf php-5.4.19.tar.bz2
[root@localhost ~]# cd php-5.4.19
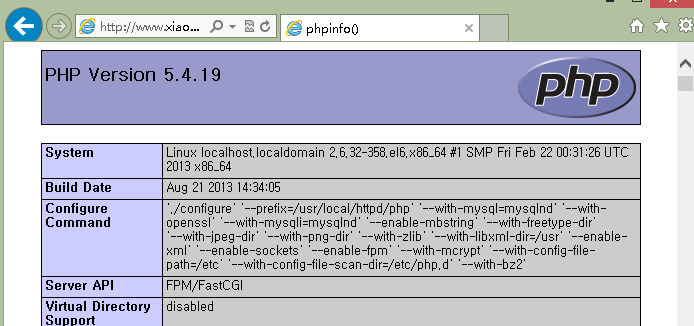
[root@localhost php-5.4.19]# ./configure --prefix=/usr/local/httpd/php --with-mysql=mysqlnd --with-openssl --with-mysqli=mysqlnd --enable-mbstring --with-freetype-dir --with-jpeg-dir --with-png-dir --with-zlib --with-libxml-dir=/usr --enable-xml --enable-sockets --enable-fpm --with-mcrypt --with-config-file-path=/etc --with-config-file-scan-dir=/etc/php.d --with-bz2
[root@localhost php-5.4.19]# make && make install
-
为php提供配置文件
[root@localhost php-5.4.19]# cp php.ini-production /etc/php.ini
-
为php-fpm提供Sysv init脚本,并将其添加至服务列表
[root@localhost php-5.4.19]# cp sapi/fpm/init.d.php-fpm /etc/rc.d/init.d/php-fpm[root@localhost php-5.4.19]# chmod +x /etc/rc.d/init.d/php-fpm
[root@localhost php-5.4.19]# chkconfig --add php-fpm
[root@localhost php-5.4.19]# chkconfig php-fpm on
-
为php-fpm提供配置文件:
1
[root@localhost php-5.4.19]# cp /usr/local/httpd/php/etc/php-fpm.conf.default /usr/local/httpd/php/etc/php-fpm.conf
-
编辑php-fpm配置文件
[root@localhost php-5.4.19]# vim /usr/local/httpd/php/etc/php-fpm.conf
listen = 172.16.10.2:9000 #设置本机IP监听9000端口
pm.max_children = 50 # 设置生成子进程数(设置并发量)
pm.start_servers = 5 #设置开机启动进程数
pm.min_spare_servers = 2 #设置最小空闲进程数
pm.max_spare_servers = 5 #设置最大空闲进程数
pid = /usr/local/httpd/php/var/run/php-fpm.pid #指定pid文件
error_log = log/php-fpm.log #开启日志功能
注释:
第2-6行:更具个人服务器系统性能进行调试
-
启动php-fpm服务
1
[root@localhost php-5.4.19]# service php-fpm start
-
查看服务是否已经启动
五、整合Apache与PHP服务
-
配置Apache服务器
[root@localhost init.d]# vim /etc/httpd/httpd.conf
LoadModule proxy_module modules/mod_proxy.so
LoadModule proxy_fcgi_module modules/mod_proxy_fcgi.so
Include /etc/httpd/extra/httpd-vhosts.conf #支持虚拟主机
AddType application/x-httpd-php .php #添加此行
AddType application/x-httpd-php-source .phps #添加此行
DirectoryIndex index.php index.html # 增加index.php
-
设置虚拟主机
[root@localhost init.d]# vim /etc/httpd/extra/httpd-vhosts.conf
<VirtualHost *:80>
DocumentRoot "/web/htdoc"
ServerName www.xiaodong.com
ServerAlias xiaodong.com
ProxyRequests Off
ProxyPassMatch ^/(.*\.php)$ fcgi://172.16.10.2:9000/web/htdoc/$1
<Directory "/web/htdoc">
Options none
AllowOverride none
Require all granted
</Directory>
</VirtualHost>
-
重新启动httpd服务
[root@localhost htdoc]# service httpd restart
-
创建站点目录(注意在apache服务器和FastcGI服务器都需要创建)
[root@localhost php-5.4.19]# mkdir -pv /web/htdoc
mkdir: created directory `/web'
mkdir: created directory `/web/htdoc'
-
在FastcGI服务器上创建php测试脚本
[root@localhost htdoc]# pwd
/web/htdoc
[root@localhost htdoc]# cat > index.php << EOF
> <?php
> phpinfo();
> ?>
> EOF
[root@localhost htdoc]#
-
客户端测试php是否工作正常
六、安装Mysql服务器
Mysq有三种安装方式
-
rpm包
-
通用二进制包
-
源码包
此处我们采用通用二进制包安装
-
创建Mysql数据的存放路径
1
2
3
[root@localhost ~]# mkdir -pv /mydata/data/
[root@localhost ~]#
[root@localhost ~]#
-
创建Mysql用户并修改权限
1
2
3
[root@localhost ~]#groupadd -r mysql
[root@localhost ~]# useradd -g mysql -r -s /sbin/nologin -M -d /mydata/data mysql
[root@localhost ~]#chown -R mysql:mysql /mydata/data
-
安装并初始化mysql
1
2
3
4
5
6
7
8
9
[root@localhost ~]# tar xf mysql-5.5.33-linux2.6-x86_64.tar.gz
[root@localhost ~]# mv mysql-5.5.33-linux2.6-x86_64 /usr/local/
[root@localhost ~]#cd /usr/local/
[root@localhost local]# ln -sv mysql-5.5.33-linux2.6-x86_64/ mysql
[root@localhost local]#cd mysql
[root@localhost mysql]# chown -R mysql:mysql .
[root@localhost mysql]# scripts/mysql_install_db --user=mysql --datadir=/mydata/data
[root@localhost mysql]# chown -R root .
[root@localhost mysql]#
-
为mysql提供主配置文件
1
2
3
[root@localhost ~]# cd /usr/local/
[root@localhost local]# cd mysql
[root@localhost mysql]# cp support-files/my-large.cnf /etc/my.cnf
-
修改主配置文件
1
2
3
[root@localhost mysql]# vim /etc/my.cnf
thread_concurrency = 8 #设置为cpu个数的2倍
datadir = /mydata/data #指定数据库文件存放路径
-
为mysql提供sysv服务脚本并添加到服务列表
1
2
3
4
[root@localhost mysql]# cp support-files/mysql.server /etc/rc.d/init.d/mysqld
[root@localhost mysql]# chmod +x /etc/rc.d/init.d/mysqld
[root@localhost mysql]# chkconfig --add mysqld
[root@localhost mysql]# chkconfig mysqld on
-
输出mysql的man手册至man命令的查找路径
1
[root@localhost mysql]# echo 'MANPATH /usr/local/mysql/man' >> /etc/man.config
-
输出mysql的头文件至系统头文件路径/usr/include
1
[root@localhost mysql]#ln -sv /usr/local/mysql/include /usr/include/mysql
-
修改完成之后重新载入系统库
1
[root@localhost mysql]#ldconfig
-
修改PATH环境变量,让系统可以直接使用mysql的相关命令。
1
[root@localhost mysql]#echo 'export PATH=/usr/local/mydql/bin:$PATH' > /etc/profile.d/mysql.sh
-
启动mysqld服务
1
[root@localhost mysql]# service mysqld start
-
数据库授权
1
2
3
4
[root@localhost mysql]# mysql
mysql> GRANT ALL ON *.* TO 'root'@'172.16.%.%' IDENTIFIED BY 'mypass';
Query OK, 0 rows affected (0.00 sec)
mysql>
-
apache和FastcGI配置phpMyadmin
1
2
3
4
5
6
[root@localhost ]# unzip phpMyAdmin-4.0.5-all-languages.zip
[root@localhost ]# mv phpMyAdmin-4.0.5-all-languages /web/htdoc/php
[root@localhost ]#cd /web/htdoc/php
[root@localhost php]# cp config.sample.inc.php config.inc.php
[root@localhost php]# vim config.inc.php
$cfg['Servers'][$i]['host'] = '172.16.10.3'; #指定mysql的IP
-
客户端连接测试

七、安装Memcache与libevent
-
安装libevent
memcached依赖于libevent API,因此要事先安装。
1
2
3
4
[root@localhost ~]# tar xf libevent-2.0.21-stable.tar.gz [root@localhost ~]# cd libevent-2.0.21-stable [root@localhost libevent-2.0.21-stable]# ./configure --prefix=/usr/local/libevent [root@localhost libevent-2.0.21-stable]# make && make install
1
2
3
4
[root@localhost ~]# ln -sv /usr/local/libevent/include/ /usr/include/libevent `/usr/include/libevent' -> `/usr/local/libevent/include/'[root@localhost ~]# echo "/usr/local/libevent/lib/" > /etc/ld.so.conf.d/libevent.conf [root@localhost ~]# ldconf
-
安装memcache
1
2
3
4
5
6
7
[root@localhost ~]# tar memcached-1.4.15.tar.gz tar: Old option `g' requires an argument. Try `tar --help' or `tar --usage' for more information. [root@localhost ~]# tar xf memcached-1.4.15.tar.gz [root@localhost ~]# cd memcached-1.4.15[root@localhost memcached-1.4.15]# ./configure --prefix=/usr/local/memcached --with-libevent=/usr/local/libevent [root@localhost memcached-1.4.15]# make && make install
-
为memcached 提供SysV风格的startup脚本代码如下所示
1
2
3
4
5
6
7
8
9
10
11
12
13
14
15
16
17
18
19
20
21
22
23
24
25
26
27
28
29
30
31
32
33
34
35
36
37
38
39
40
41
42
43
44
45
46
47
48
49
50
51
52
53
54
55
56
57
58
59
60
61
62
63
64
65
66
67
68
69
70
71
72
73
74
75
76
77
78
79
[root@localhost bin]# vim /etc/init.d/memcached #!/bin/bash # # Init file for memcached # # chkconfig: - 86 14# description: Distributed memory caching daemon # # processname: memcached # config: /etc/sysconfig/memcached . /etc/rc.d/init.d/functions ## Default variables PORT="11211"USER="nobody"MAXCONN="1024"CACHESIZE="64"OPTIONS=""RETVAL=0prog="/usr/local/memcached/bin/memcached"desc="Distributed memory caching"lockfile="/var/lock/subsys/memcached"start() { echo -n $"Starting $desc (memcached): " daemon $prog -d -p $PORT -u $USER -c $MAXCONN -m $CACHESIZE RETVAL=$? [ $RETVAL -eq 0 ] && success && touch $lockfile || failure echo return $RETVAL } stop() { echo -n $"Shutting down $desc (memcached): " killproc $prog RETVAL=$? [ $RETVAL -eq 0 ] && success && rm -f $lockfile || failure echo return $RETVAL } restart() { stop start } reload() { echo -n $"Reloading $desc ($prog): " killproc $prog -HUP RETVAL=$? [ $RETVAL -eq 0 ] && success || failure echo return $RETVAL } case "$1" in start) start ;; stop) stop ;; restart) restart ;; condrestart) [ -e $lockfile ] && restart RETVAL=$? ;; reload) reload ;; status) status $prog RETVAL=$? ;; *) echo $"Usage: $0 {start|stop|restart|condrestart|status}" RETVAL=1esac exit $RETVAL [root@localhost bin]# chmod +x /etc/init.d/memcached [root@localhost bin]# service memcached start Starting Distributed memory caching (memcached): [ OK ] [root@localhost bin]#
-
查看memcached监听端口

-
安装Memcache的PHP扩展(php的驱动)
1
2
3
4
5
6
7
8
9
10
11
12
13
[root@localhost ~]# tar xf memcache-2.2.7.tgz [root@localhost ~]# cd memcache-2.2.7 [root@localhost memcache-2.2.7]# /usr/local/httpd/php/bin/phpize Configuring for: PHP Api Version: 20100412 Zend Module Api No: 20100525 Zend Extension Api No: 220100525 [root@localhost memcache-2.2.7]# ./configure --with-php-config=/usr/local/httpd/php/bin/php-config --enable-memcache [root@localhost memcache-2.2.7]# make && make install Build complete. Don't forget to run 'make test'. Installing shared extensions: /usr/local/httpd/php/lib/php/extensions/no-debug-non-zts-20100525/ #安装之后生成模块的路径 [root@localhost memcache-2.2.7]#
-
修改php配置文件加载memcached模块
1
2
3
4
[root@localhost memcache-2.2.7]# vim /etc/php.ini ;extension=php_pspell.dll ;extension=php_shmop.dll extension=/usr/local/httpd/php/lib/php/extensions/no-debug-non-zts-20100525/memcache.so #添加此行,添加模块
-
重新启动此服务php-fpm
1
2
3
4
[root@localhost htdoc]# service php-fpm restart Gracefully shutting down php-fpm . done Starting php-fpm done [root@localhost htdoc]#
-
此时在客户端测试php与memcache是否连接成功
-
测试memcached与php是否工作正常
1
2
3
4
5
6
7
8
9
10
11
12
13
[root@localhost htdoc]# pwd /web/htdoc [root@localhost htdoc]# cat test.php <?php $mem = new Memcache; $mem->connect("172.16.10.4", 11211) or die("Could not connect"); $version = $mem->getVersion(); echo "Server's version: ".$version."<br/>\n"; $mem->set('hellokey', 'Hello World', 0, 600) or die("Failed to save data at the memcached server"); echo "Store data in the cache (data will expire in 600 seconds)<br/>\n"; $get_result = $mem->get('hellokey'); echo "$get_result is from memcached server."; ?>
-
客户端再次访问测试
八、安装Memcache 基于Web管理平台
-
创建memcache站点目录(注意在apache服务器和FastcGI服务器都需要创建)
1
2
3
4
5
6
7
[root@localhost ~]# mkdir -pv /web/htdoc/mem [root@localhost ~]# unzip memadmin-master.zip [root@localhost ~]# cd memadmin-master [root@localhost memadmin-master]# ls apps images index.php LICENSE.txt views config.php include langs README.txt [root@localhost memadmin-master]# mv * /web/htdoc/mem
-
客户端访问测试
注意要想使用memcache功能,首先需要确定程序是支持memcache的,否则此时的memcache没有任何意义。。。
至此LAMMP环境搭建完成。。。
(责任编辑:IT)
一、LAMMP简介 二、LAMMP项目环境简介 三、Apache的安装与配置 四、FastCGI的安装与配置 五、整合Apache与PHP服务 六、安装Mysql服务器 七、安装Memcache与libevent 八、安装Memcache 基于Web管理平台
一、LAMMP简介 LAMP(Linux- Apache-MySQL-PHP)网站架构是目前国际流行的Web框架,该框架包括:Linux操作系统,Apache网络服务器,MySQL数据 库,Perl、PHP或者Python编程语言,所有组成产品均是开源软件,是国际上成熟的架构框架,很多流行的商业应用都是采取这个架构,和 Java/J2EE架构相比,LAMP具有Web资源丰富、轻量、快速开发等特点,微软的.NET架构相比,LAMP具有通用、跨平台、高性能、低价格的 优势,因此LAMP无论是性能、质量还是价格都是企业搭建网站的首选平台。在此基础上我们增加了Memcache缓冲服务器,解决了应用程序与数据库之间的瓶颈问题,有效提高了访问速度,这就是LAMMP架构。
二、LAMMP项目环境简介 系统环境:Centos6.4x86-64 Apache IP: 172.16.10.1 PHP IP:172.16.10.2 Mysql IP:172.16.10.3 Memcache IP: 172.16.10.4
此LAMMP架构是分别搭建在不同的服务器上面,在生产环境中,更是应该如此,一台服务器提供多种应用,服务器会很消耗资源,提供服务的性能也会降低。 此架构中各服务器的工作 Apache在此架构中,响应回复用户html的请求 FastCGI是把php程序执行的结果响应给Apache Memcached是根据用户请求的动态网页文件中是否需要Memcached服务器缓存数据,Memcache是把数据存储在内存中的,速度可想而知了。 Mysql是响应用户是否需写入查询数据 用户的请求资源到获取资源的过程 1、当用户只需要请求web服务器的html页面时,Apache直接响应请求,所经过的过程为1--->10 2、当用户需请求一个web服务器的动态的页面时,Apache把用户请求的php执行程序发送给FastCGI服务器执行,FastCGI把执行的结果返回给Apache服务器,服务器把程序生成的的静态页面响应给客户端。所经过的过程1--->2--->3--->8--->9--->10 3、当用户需要请求的web服务器资源中需要数据时,Apache把用户请求的php执行 程序给FastCGI执行,执行过程中需要对数据进行操作时且Memcached中没有缓存时,FastCGI去请求Mysql服务器的资源,mysql服务器把数据响应给FastCGI,如果此数据需要缓存则FastCGI把数据缓存到Memcached服务器上,然后把数据响应给Apache,Apache生成静态的页面响应给客户端。所经过的过程1--->2--->3--->6--->7[--->4]--->8--->9--->10(如果需要缓存则会经过4过程) 4、当用户需要请求的web服务器资源中需要数据时,Apache把用户请求的php执行程序给 FastCGI执行,执行过程中需要对数据进行操作时Memcached中有缓存时,Memcached直接把 数据响应给FastCGI,然后把数据响应给Apache,Apache生成静态的页面响应给客户端。所经过的过程1--->2--->3--->4--->5--->8--->9--->10
为了解决软件包下载的问题,特提供软件包的下载地址:
系统的yum源为搜狐源,
三、Apache的安装与配置
四、FastCGI的安装与配置
注释: 第2-6行:更具个人服务器系统性能进行调试
五、整合Apache与PHP服务
六、安装Mysql服务器 Mysq有三种安装方式
此处我们采用通用二进制包安装
|